Cornell Mac 1.0 Users Guide
The purpose of this guide is to help users quickly set up their Cornell Video Conferencing Software so they can quickly and efficiently begin conferencing with out hours of trying to connect and ask people on the reflectors for help.
that's so annoying!
 you need to get to the preferences.
You should see a "LOCAL" video window and a "Chat" window and a
"PARTICIPANTS" window.
you need to get to the preferences.
You should see a "LOCAL" video window and a "Chat" window and a
"PARTICIPANTS" window. It should look like this:


Unless your name IS Ezra, or you like taking abuse from people calling you too stupid to change your nickname preferences, I'd suggest changing to your CU nickname.
Go to "EDIT" on your top menu bar, and select the bottom item "Preferences". The following box will open:
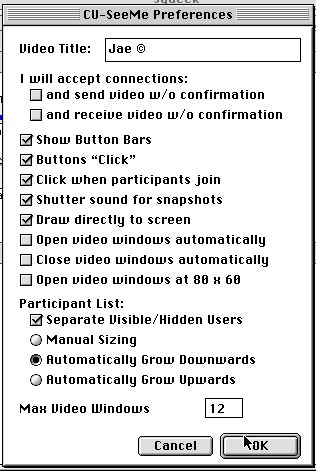
You must put *your* Nickname in the top box in order for you to change your name from Erza. You cannot do this while on a Reflector Site!
While you are on *this* preference page, see what the rest of this preference controls. I'll explain it more later.
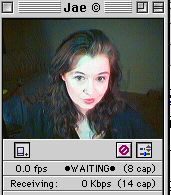
You aren't ready to connect to a Reflector yet. There are more preferences to set so don't close this guide and think you're ready. *smile* If your name is Jae ©, it should look like this now:
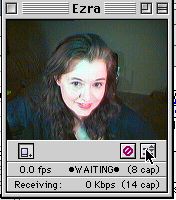
What are these buttons under my local video window used to do?


The first button on the left, opens a line under your video window which shows at what rate your are sending (fps) and receiving (kbps).
The second button is used and open when sending in cornell greyscale. It allows you to 'flip' the picture around.
The third button the RED one allows you to pause (stop) your video. It freezes the pictures. (I call it the 'I have to pick my nose feature).
The button on the far right is VERY important!. It allows you to set up ALL of the other Preferences!
When you open the preferences using the far right button, you should see your local video frame look like this:
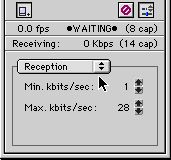
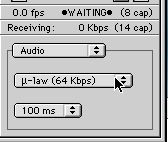
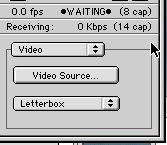
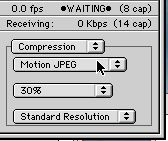
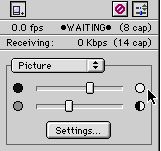
 Notice the white box that says "Transmission"? This is where you can access your:
Transmission rates:
Reception rates:
Audio settings:
Video Options:
Compression settings:
Picture light/contrast adjustment:
Use the little arrows to adjust and navigate through here.
Here are the pictures of what each setting has, but note there are 'subsettings' in each one.