 |
|
|
|
|
|
|
|
|
|
|
|
|
|
|
|
|
|
|
|
|
|
|
|
|
|
|
|
|
|
|
|
|
|
|
|
|
|
|
|
|
|
|
|
|
|
|
|
|
|
|
|
|
|
|
|
|
|
 |
|
|
|
Page 3 |
|
|
1-16-99 |
|
|
|
|
|
|
 |
|
Front wheels: |
|
|
|
|
|
I wanted the front wheels to fit narrower than stock so I cut the hubs almost even with the rims. Had to shorten the axle and deepen the holes in the wheels. The new wheel set is thanks to a Racing Champions 68 Firebird. |
|
|
|
|
|
Rear wheels: |
|
|
 |
|
|
|
|
|
|
This was a little tricky. To keep from raising the rear end I wanted to use the original channel for the axle. This presented two problems 1.) The original axle was not long enough to use the new wheels. 2.) The axle that came with the wheels was too thick to drop into the channel. I made a new axle using a paperclip, carefully heated up the plastic hub with the axle inserted, melting it in place. Once both wheels were attached I put the axle in place and fused plastic over it to keep it there. |
|
|
 |
|
|
|
Front Wheels: |
|
|
|
|
|
The front set I let ride on top of the existing channel to lower the front end just a hair, notice the different axle thicknesses. |
|
|
|
|
|
 |
|
:)
New rubber in place. |
|
|
|
|
|
 |
|
Teaser:
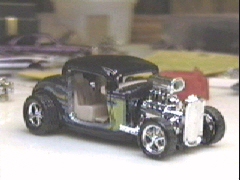
I hope yall noticed the new air scoop, robbed from the 68 Firebird. |
|
|
|
|
|
 |
|
Big brother:
Just a little side by side for comparison. |
|
|
|
|
|
1-18-99 |
|
|
|
 |
|
|
|
Rear interior:
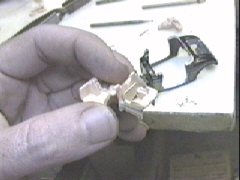
Finished building the back interior. I'm not real happy with it but it should look ok. I learned alot and the next will be better. I had tried melting plastic onto the seat to build it up into a cusion, it discolored a little. |
|
|
|
|
|
 |
|
|
|
Rumble lid:
To keep from having a bulky hinge showing I used two small pins, 3 mm long each. Drilled holes in the lid 2 mm deep and chassis 1 mm deep. |
|
|
|
|
|
 |
|
|
|
 |
|
Rumble lid:
Opens and closes great and best part it you cant see any hinge. |
|
|
|
|
|
 |
|
|
|
 |
|
Thinking:
I may have made the rumble seat too large. The next will be about 3/4 this size. |
|
|
|
|
|
 |
|
|
|
Practice:
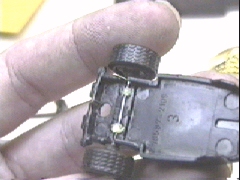
Used The back end of the Mercedes to test different methods for building hinges for the doors. Lead solder doesnt like to flow, melted plastic doesnt like to stick. I finally decided to use a technique for setting stones, bead setting. What happens is the pin rests just under the surface in a channel I have cut. Using a graver I "pulled beads" over the pin, holding it in place. |
|
|
|
|
|
 |
|
|
|
Doors:
This should work out good. Most of the actual hinges will end up hidden by the door panel upholstery and seats. |
|
|
|
|
|
Page 3 |
|
|
|
|
|
 |
|