![]()
Making Strips
| Making
Strips Determine
your braid width. This is purely a matter of personal
preference. The desired braid width and the thickness of your
fabric determines how wide to cut or tear the strips. If you
are mixing different kinds of fabrics, you may need to make strips
of different widths in the same rug, to maintain braid
consistency. With thin fabric, perhaps start with 2" strips -
that is wide enough to practice the folding/tucking and lacing
techniques and makes a pleasing size of braid. Extremely thick
fabric, like blankets, will need to be wider and will make a soft,
cushy braid. Cut or tear the fabric with the grain to make
your life easier.
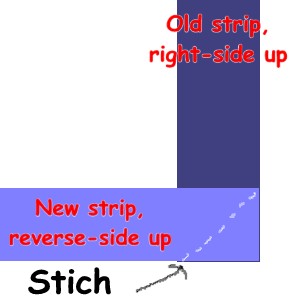
Attaching Strips This method gives you invisible seams
|
Folding strips
Purists will advise pre-folding (and ironing, hah!) your entire
stock of strips, but that sounds incredibly boring to me and I have no
problem folding as I go -- especially since I purchased
Braid-Aids. This folding method will completely tuck and hide any
frayed edges.
|
Home Getting ready Strips Starting the rug Braiding Lacing Finishing Tools Photos