For this tutorial you will need
PSP VERSION 7.02 (30 day trial version)
SUPER BLADE PRO (Optional)
You will also need a ding of your choice. I used a ding from
Dover Chinese Motif, which I downloaded at HOUSE OF LIME.
Ready? Great, let's get started. If you want to use the same
image I am using just right click and choose save
picture as and save to YOUR hard drive.

You will also need the starmask that I used. Just right
click and save picture as and save to YOUR hard drive.
1. Open your image in PSP and make two copies of it (Shift+D).
Close your original and minimize one of your copies for later use.
You can also minimize your starsmask, we will be
using it soon.
2. Layers->New Raster Layer click okay. Select your dropper
tool and choose a color from your graphic. I am using #C2A778.
Click on your flood fill tool (tolerance 200 opacity 100) and
flood your layer with the color of your choice.
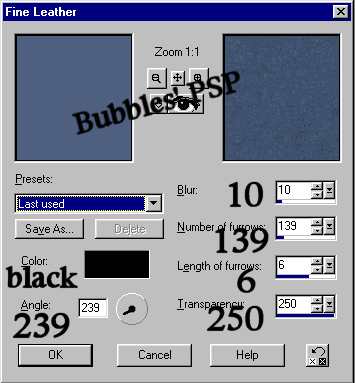
3. Effects->Texture Effects->Fine Leather with settings
as shown below:
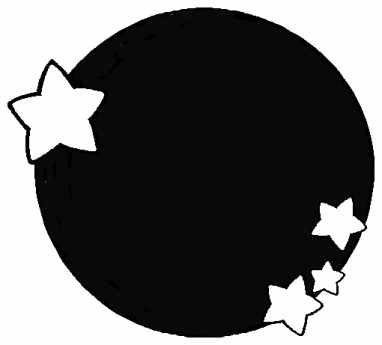
4. Your starsmask should already be open and minimized.
Go to Masks->New->From Image and select starsmask.

This is what your image should look like at this point.
Yours will be bigger as I have resized mine for tutorial
purposes.

5. Go to Masks->Edit. You should be on layer 1.
With your magic wand (tolerance 10 feather 0), click on
the outside area surrounding your mask.

6. Next, keeping your mask selected, go to Masks->Delete
and click yes to merge mask to current layer.
Then, Selections->Invert.
Now we need to add a
drop shadow. Effects->3D Effects->Drop Shadow with
these settings: Opacity-100 Blur-12.3
Vertical-(3) Horizontal-(3). Then, drop shadow once
again only vertical and horizontal-(-3). Deselect.
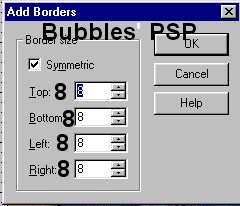
7. Layers->Merge All (flatten). Background color white
(#FFFFFF). Image->Add Borders symmetric checked 8 pixels.
8. With magic wand (tolerance 0 feather 0) select your
white border. Effects->Plugins->Flaming Pear->Super Blade
Pro. Fill with your choice of preset. I used the liquidgold
preset. This step is optional. You can fill with a preset, or a
color from the graphic, or Ulead Art Texture.
If you want to use the liquidgold preset that I used,
drop me an email and I'll zip it up for you.
9. Selections->Invert. Effects->3D Effects->Drop Shadow.
Opacity-50 Blur-3.7 Vertical-(3) Horizontal-(3).
Then repeat except vertical and horizontal (-3). Deselect and save.
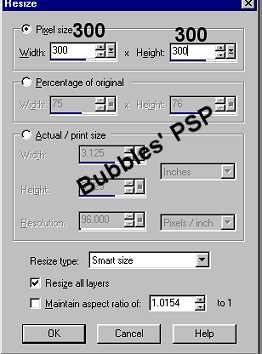
10. Minimize that image for right now. Now is the
time to use our second copy of the graphic. Go to
Image->Resize and resize your second copy to 300w x 300h.
Effects->Sharpen->Sharpen.
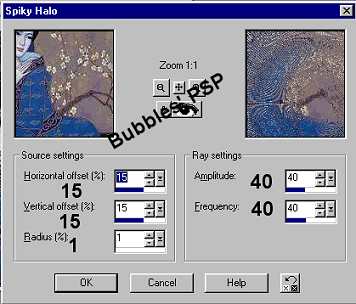
11. Effects->Geometric Effects->Spiky Halo with the settings
as shown below
12. Effects->Reflection Effects->Pattern with settings
as shown below.

13. Okay, minimize that graphic also. You should have
two minimized graphics; one the framed starsmask image
and the other your graphic you made into a pattern.
Go to File->New and create a new image (transparent
bkg) approximately 50 pixels wider and higher
than your starsmask graphic. For example, my starsmask
image is 412w x 406h so I will be making my
new image 462w x 456h.
14. Go to your styles palette and change your background
to pattern.
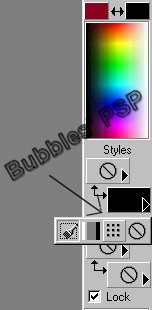
15. Now go to your pattern dialogue box, and from the
drop down list select your pattern you just made
from your graphic.

16. Flood fill your new image with your pattern. Now,
maximize your framed starsmask graphic, edit/copy,
then click on your pattern image, edit/paste as new layer.
Your framed image should be centered on the background image.
(see below)

17. Make sure layer 2 is active, then, with your magic
wand, click in the area outside the framed starsmask image.
Selections->Invert. Effects->3D Effects->Drop Shadow with these
settings: Opacity-100
Blur-12.3 vertical-(3) horizontal-(3).
Repeat drop shadow but change the vertical
and horizontal to (-3). Deselect.
18. Layers->Merge->Merge All(flatten). Background color to
white (#FFFFFF). Image->Add Borders 6 pixels
symmetric checked. With magic wand, select your white border
and add the same preset or color that you used
on your framed starsmask image. Add a drop
shadow using the same settings as step 17.
If you do not want to add dings to your image, just save
as a .jpg and you are finished. If you want to add dings
to your frame, continue on to the next step. Results
of tutorial without dings are shown below.

19. Layers->New Raster Layer. Click okay. Background
and foreground to white (#FFFFFF). Click on your text
and make sure floating and anitalias is checked.
Select the ding you want to use. I used
Dover Chinese
Motif lowercase f size 60. If you are using the same
ding, size 48 is a good size also. I positioned the
ding in the upper left corner of the outer frame. I had
to go to Image->Rotate 90 degrees to the right to
get it in the corner.

20. Fill with your choice of preset (I used the
liquidgold preset) and then add a drop shadow with
these settings: Opacity-100 Blur-0 Vertical-(1)
Horizontal-(1). Repeat drop shadow changing the
vertical and horizontal to (-1). Deselect.
21. On your layer palette, make sure your ding layer
is active. Right click on your ding layer and choose
Duplicate. Then go to Image->Mirror. You will now
have a ding on your upper right corner of the frame.
Go back to your layer palette, make sure Copy of Layer 1
is active, right click on that layer and choose
Duplicate. Then go to Image->Flip. You will now have a
ding at the bottom right corner. Next go back,
one more time, to your layer palette, make sure
Copy of Copy of Layer 1 is active, right
click on it, choose Duplicate, then go to Image->Mirror
and you will have a ding in your bottom left
corner. WHEW!!
22. Last step, I promise :) Layers->Merge->Merge All
and save as a .jpg. Results below.

Sample below of tutorial was made adding 100 pixels
to width and height of pattern background.


Image used in this tutorial was from a site that claimed it was
free to use on the web. I want to thank Wizzard for
emailing me and letting me know that Karl Bang is the artist
that created this beautiful image. Starsmask was obtained
through a graphics group. This tutorial not to be reproduced
on any other site without permission from me first.

