This tutorial created January 22, 2001 by Bubbles' PSP and may not be copied or uploaded to another site without permission from me. If you would like to use this tutorial for your PSP groups, please use a text link. If you have any problems with this tutorial, please feel free to email me. And remember, "SAVE OFTEN"!
For this tutorial you will need:
PAINT SHOP PRO VS 7.02 (Trial Version)
DC SPECIAL FILTERS
VM DISTORTION FILTERS
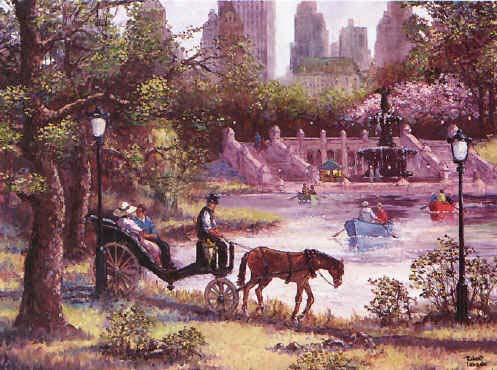
If you want to use the same graphic that I am using, click here. If anyone knows who the artist is of this graphic, please email me and let me know so I can give him/her proper credit or remove if that is his/her wish.
1. Open up your image in PSP, make a copy of it (Shift+D), and close the original. That way you have your image in case you want to use it again.
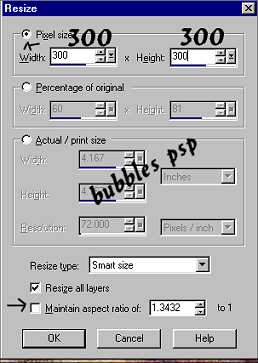
2. Image/Resize 300w x 300h. Effects/Sharpen/Sharpen.
3. Effects/Plugin Filters/DC Special/Melt with settings as shown below:
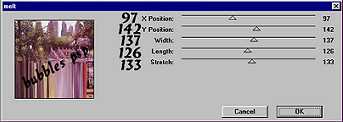
4. Image/Flip. Effects/Plugin Filters/DC Special/Melt with settings as shown below:

5. Effects/Plugin Filters/VM Distortion/FlipChop with settings as shown below:

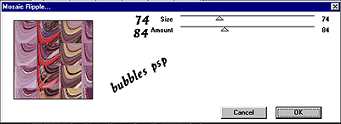
6. Effects/PluginFilters/VM Distortion/Mosaic Ripple with settings as shown below:
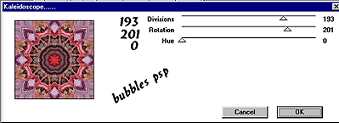
7. Effects/PluginFilters/VM Distortion/Kaleidoscope with settings as shown below:
8. Double click on your selection too and insert the settings as shown below:

9. Image/Crop to Selection. Image/Resize in increments of 85% to desire size. I resized mine twice making my tile 209w x 209h. Be sure to go to Effects/Sharpen/Sharpen each time after you resize. Also, when you resize, make sure that "maintain aspect ratio is checked". Save as a .jpg and your tile is ready to use. The background for this webpage was made using this tutorial. I used the same setting on all filters except the Kaleidoscope, where I change the divisions to 194 and the rotations to 216.


This tutorial and all images pertaining to this tutorial, with exception to the
graphic that was used, are ©Bubbles' PSP 2001 and not to be removed from
this site without permission.

