This tutorial created April 7, 2002 and is the sole property of Bubbles' PSP. Please do not reproduce on any other site UNLESS given permission by me. PSP groups, please feel free to share my tutorials with your groups; I just ask that you sent the url to the tutorial and not the tutorial itself through email. And I would love to hear from you if you are using my tutorials :) Thank you Sherry and Rusty for testing this tutorial and helping me get the kinks out of it. I really appreciate the both of you.
For this tutorial you will need:
PAINT SHOP PRO(Trial Version)
PAINT ENGINE
CRESCENT MOON
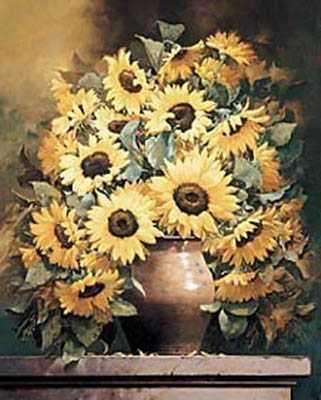
You will also need an image of your choice; if you prefer to use the image that I am using, click here. I obtained this graphic from a site that claimed it was free to use on the web. But I would still like to know the name of the artist of this image, so if anyone knows, please email me and let me know so I can give proper credit or remove, whichever the artist prefers.
Click here for the mask. The mask is in .msk format; just unzip and download into your masks folder in PSP. Again, I have no way of knowing who to give credit to for the mask. If anyone recognizes it as their own, please email me and I will be more than glad to give proper credit.
If you wish to use the same goldfill pattern that I am using, click here.
Corner ding of your choice (Optional) and the butterfly ding (Optional). This tutorial can be created with or without the butterfly ding and corner ding. The butterfly ding is from Art Nouveau 1 and the corner ding I am using is Dbl Corners. If you are looking for some great dings, these included, pay The House of Lime a visit.
Alright, let's get started with our tutorial!! And remember, SAVE OFTEN!
1. Open your image and mask in PSP. Make a copy of your graphic (Shift+D) and close the original. Minimize your mask and graphic for now. Open a new image (File/New) with the dimensions of 350w x 425h transparent background.

2. Set your background color to white (#FFFFFF) and floodfill your new image with your white background color. Masks/New/From Image. Select the decoration mask from the drop down menu under the Source Window.

3. Selections/From Mask. Keep selected and go to Masks/Delete. Merge into current layer? YES. Apply your favorite Blade Pro preset or goldfill pattern to your selected mask. I'm using the goldfill pattern that is supplied for this tutorial. Selections/Select None.
4. Layers/New Raster Layer. Layers/Arrange/Send to Bottom. Make your frame layer the active layer. With your magic wand (tolerance 0 feather 0), click in the center of your frame. Selections/Modify/Expand by 2. While still selected, make the layer under the frame (the one you sent to the bottom) active.

5. Bring up your graphic, go to Edit/Copy, minimize your graphic, go to your frame image and then Edit/Paste Into Selection. Your graphic should be on the layer below your frame layer. While still selected, go to Layer/New Raster Layer. Then go to Effects/3D Effects/Cutout and use these settings: Opacity 71; Blur 15; Vertical 2; Horizontal 2; Color Black. Repeat the cutout changing the vertical and horizontal to -2 this time. Selections/Select None.

6. Layers/New Raster Layer. This layer should be between your frame and cutout layer. Make your frame layer active. Grab your eyedropper tool and select a color from your graphic that you want to use in your frame. I'm using color #243D3E. With your magic wand (tolerance 0 feather ), click in the open area of the outer frame. (See below for an example).

7. Selections/Modify/Expand by 2. While still selected, make the layer under your frame layer active. Click on your floodfill tool and floodfill the selected areas of your frame with the color you selected from your graphic. Effects/Texture Effects/Fine Leather using these settings: Color Black; Angle 210; Blur 10; # of Furrows 18; Length of Furrows 10; Transparency 247. Keep selected.

8. Effects/Texture Effects/Sandstone using these settings: Blur 3: Detail 12; Luminance 10; Angle 45; Color White. Do not deselect.

9. Make your frame layer active; you should still have your marching ants. Go to Selections/Invert. Effects/3D Effects/Drop Shadow using these settings: Opacity 100; Blur 12.3; Vertical 2; Horizontal 2. Repeat drop shadow but this time change the vertical and horizontal setting to -2. Selections/Select None. Layers/Merge/Merge All (Flatten).

10. With your background color set to white (#FFFFFF), go to Image/Add Borders 25 pixels symmetric checked.

11. With your magic wand (tolerance 0 feather 0), click on your white border to select. Effects/PluginFilters/Crescent Moon/Terracotta using these settings: # Horizontal Tiles 4; # Vertical Tiles 4; Horizontal Source 11; Vertical Source 6.

12. While still selected, go to Effects/PluginFilters/Fantastic Machines/Paint Engine and use the soft outlines preset. Setting shown below for those who do not have the soft outlines preset. DO NOT DESELECT.

13. Effects/Artistic Effects/Brush Strokes using these settings: Length 4; Density 21; Bristles 11; Width 19; Opacity 11; Softness 0; Angle 337; Color-Black. Apply these settings TWO times. Do not deselect.

14. Effects/3D Effects/Cutout using the same settings as before: Opacity 71; Blur 15; Vertical 2; Horizontal 2. Repeat cutout changing the vertical and horizontal settings to -2. Selections/Select None.
15. Background color still set to white (#FFFFFF), to to Image/Add Borders 5 pixels symmetric checked. With your magic wand (tolerance 0 feather 0), select your white border and apply your Blade Pro preset or goldfill pattern. Selections/Select None.
Your frame is now finished. Continue on to the next step if you wish to add the butterfly and the corner dings. If you prefer not to add them to your frame, just resize if desired (be sure to sharpen after resizing) and save as a .jpeg.
16. You may have a different way to add your butterfly instead of the way I'm doing it. I'm just giving instructions on the way I did the butterfly. These instructions are not written in stone okay :) Layers/New Layer. I used Art Nouveau 1 Caps L Size 60 for my butterfly. Background set to white (#FFFFFF) See sample below.

17. Apply your Blade Pro preset or goldfill pattern to your butterfly. Effects/3D Effects/Drop Shadow with these settings: Opacity 70; Blur 0; Vertical 1; Horizontal 1. Using your mover tool, place your butterfly on the upper left inside corner (or wherever you want your butterfly placed). Image/Rotate 15 degrees to the left. Be sure to go to Effects/Sharpen/Sharpen after you rotate your butterfly. Go to your layer palette, make sure your butterfly layer is the active layer, right click on it and select Duplicate. Go to Image/Resize (make sure "resize all layers" is unchecked) and resize your second butterfly by 85%. Effects/Sharpen/Sharpen. Rotate to the right by 15 degrees. Sharpen again. Layers/Merge All (Flatten).
18. If you are using a different ding than I am, then your steps will be different than mine. I used Dbl Corners Caps Letter F size 72. Background set to white (#FFFFFF).

19. Apply your Blade Pro preset or goldfill pattern to your corner ding, apply your drop shadow (same as on butterfly), and with your mover tool, place your corner ding on the right corner of your frame. (If you are using a different ding, you may have to go to Image/Mirror and then place on your right corner). Duplicate your corner ding layer, go to Image/Mirror, and then Image/Flip. This will place the ding on the lower left corner of the frame. And that's it. Go to Layers/Merge/Merge All (Flatten), resize your frame if desired, and save as a .jpeg. Below is another sample of this tutorial using a different graphic, corner ding, and goldfill.


This tutorial ©Bubbles' PSP 2002. Please do not remove any contents from this tutorial and claim as your own. Please feel free to print out this tutorial for your own personal use. I ask that you do not pass these tutorials through email groups; use the url to the tutorial instead. Thank you.

