AEROTEAM 1:72 MIL MI-2
Reviewer: Myself (braithy@bigpond.com)
The Mil Mi-2 is based on the earlier but now long obsolete Mi-1 Hoplite, with a larger cabin and twin turbine engines. Physical similarities can be seen between the two machines (just take off the twin turbines, shorten the cabin and take out a few fuselage windows) which launched Mil as a large supplier of helicopters for the Soviet Union and her allies. By 1985 about 4,000 Mi-2's were produced (many of them under licence by Poland company PZL) with the majority of them going to civil customers. It was also the standard helicopter utility and liaison machine of the Warsaw Pact during that period, with a few exceptions being the trainers, before being replaced by newer designs. A few middle eastern countries also purchased the Mi-2 for their own work including Yemen, Sudan, Egypt and Iraq - the latter using it in guerilla warfare against the Kurds to the North East.
The boxart features three sideview artworks of the three versions in the kit (just like you would expect to find in a "Warplane" data file entry). Inside there is just one sprue of light grey injection mold plastic that contains a minor amount of flash. There are about 45 parts and 11 clear - panel lines and rivets are finely engraved. The external detail is actually quite good for this particular kit although a lot of small strut-like pieces forecast a fairly challenging build.
There are two sheets for the instructions, one containing the steps, sprue diagram and short history while the other contains the colour call outs for the versions the kit produces. The parts are only numbered in the sprue diagram on the instructions so it's just a matter of pinpointing the part on the diagram and then corresponding it's position on the sprue. This is fine, except during the construction process I stumbled on a mistake - the diagram has an area the wrong way around. The best way to describe this is to imagine yourself standing feet together but arms stretched out. Imagine the kits parts attached to your body and your arms as any normal kit and your legs and arms form the main sprue trunks. The diagram says that the parts are attached to your left arm and right arm respectively - but in actual fact they are the otherway round - ie: your right arm parts are actually on your left arm! Now I hope I didn't confuse things here but if you get the kit, have a proper look and you will see what I mean. Strangely the rest of the diagram showing where parts are located is fine.
The big letdown in this kit is it's interior, and although the clear plastic is not the clearest you will ever find, the mere nature of having all those windows (see image at bottom of page) means that you are going to be able to see inside. All you get is a base, an instrument panel and two pilot seats. The seats are not even the right scale and sit way too low - like sitting in a chair without legs! There is no cabin detail, wall detail, interior benches, control columns, yaw pedals - nothing! I had a bit of a look around for a suitable replacement detail set but was unable to turn anything up. If you have better luck than I did then replace the interior. It's hardly worth the effort!
I started construction by setting up the interior above - ready to be attached inside the fuselage - (took only a few seconds!) and glueing in all windows, except the windscreen. I found that all the clear parts and the window cut outs were prone to very small amounts of flash so I carefully trimmed everything and dry fit tested before placing them in. With the right care and attention they all went in quite fine - at least the sprue diagram numbers the parts correctly here. The windows are not very clear - a bit cloudy - but I have seen (a lot) worse and they will do. It should also be pointed out that a bit of care needs to be taken when detaching all parts from the sprue as they show the same sort of quality of limited run kits and will easily gouge or snap if caution is ignored.
Attaching the interior base (after all that's about all it seemed) was not as easy as one would like. It wasn't a case of a bit big for the fuselage halves to handle rather it was actually a tad smaller. After tries with normal modelling glue and attaching the instrument panel at the front (one seat sits slightly further back than the other) I could see that it wasn't really sitting well. In the end I actually had to use superglue and then painted the whole interior grey with brown seats. The other big problem with this kit is that all the exhaust areas are simply holes in the side of the fuselage and front of the cowling. Naturally this means that once you attach the fuselage you can see right through! Well I wasn't going to have any of that thank you very much so I used some putty and carefully made globs of it inside the upper fuselage and separate cowling so that all the holes were closed off. While it was still soft, I gently poked a toothpick through from the outside as to give it the appearance of a short 'pipe'. Then once dried I painted the internal modeller-made trunks black and voila, they look like engine exhausts now. Certainly a suggestion I would recommend and you could also double it up to make a ceiling inside the cabin if you are that way inclined - I didn't because you can't really see it anyway. I then used putty again to plug up the boom since there is no wall here behind the cabin, and also used filler around the base.
To be honest that was the worst part of the kit over - not necessarily the hardest but it wasn't very good. Attaching the fuselage halves proved to be a bit of a challenge and made evenmore so by the fact that the windscreen needed to be added in at the same time (a bit of sanding and thorough pre-fit testing required). Nose weight is advisable, you won't need much but it will be a tailsitter if you do not add in any. The instructions suggest also to attach the main blade 'stopper' at this point, so if you want moveable main rotor blades you should assemble and organise attachment to the stopper to be trapped when the fuselage halves are glued together. If you are confident, I'd suggest not doing this because the blades will only get in the way during later construction. There's a large gap where you place the engine cowling and if you leave this off and do the rest of the kit you can use tweezers to hold the stopper in place while you insert the rotor shaft through the top of the engine later. It does make the whole construction and painting work a little easier.
Join lines and gaps were visible after joining fuselages so these needed to be filled and sanded back accordingly. Once this was done I attached all the external detail including the rear stabilizers, fuselage pods, aerial, pilot step, pitot tube and underbelly fairings. In most cases this was rather easy to do since the kit provides small alignment rails and holes to attach the various parts to. The instructions indicate that the aerial goes on the upper fuselage just behind the rear window, this is wrong - as can be shown on the picture below (and also in the kit's other diagrams) the aerial is actually located a bit further back along the boom - port side. The aerial is a little too small and thick to be accurate. There is basically no indication or assembly step that covers the rear stabilisers. But in the colourscheme diagrams you can see that these are placed just in front of where the boom turns upward to the tail rotor - there are small indents in the kit to assist. The tail rotor was quite easy to construct although you need to really scrutinise the diagram carefully to understand it - and this is also where you need to remember the error in the numbered parts of the instruction sheet as pointed out above because the rotor plug and shaft look exactly the same when viewing the sprue top-down.. The other annoying factor was that all these small bits were semi-circular in mold - ie: not completely rounded - but flat on one side.
I then decided to affix the undercarriage and unfortunately this contains a few mold imperfection marks and needs to be cleaned from flash. The struts are two piece - one "V" shape and the other "|" which need to be attached to form a triangle (again the image below can show this). The V forms the base and the | to stabilise and the best way to tackle this step is to attach the struts to the fuselage without the wheels. I used superglue on the base and normal modelling glue for the connecting and stabilising strut. You also need to very carefully line the two sides up to ensure they both sit right so that there is no lean when you sit the model flat. The small locator holes if used precisely will ensure the model will sit flat. The nosegear is much simpler - ready made (but you need to attach wheels) and simply goes straight into locating hole. Both sets of undercarriage are replicated well but are still a little inaccurate in shape. At this point I also attached the rear bumper and the instructions were really vague in how exactly this should be affixed, so reference material was called upon.
I didn't put any nose weight in my chopper - unfortunately I was too preoccupied with all the interior problems above that my number one rule for any aircraft with tricycle landing gear was not observed. You only need a very small amount of nose weight, the chopper will almost sit right without any and I have been successful in being able to achieve this if I position the main rotor blades at the right angle.
Before I put on the cowling and main rotor blades I painted the whole model in desert sand colour with desert brown and dark green splotches to depict an Iraqi example. The blades were then separately assembled and painted, they are very flexible blades and you can bend them like you could a young tree. I used tweezers to position the shaft connector (pre-filled with glue) under the hole in the top of the fuselage and feed the shaft through into the connector. It was then just a matter of using a finger to ensure a proper connection and the propellor would move around nicely. The cowling was placed on and this left a terrible gap at the front as well as small gaps around the sides and is also slightly larger than the space it went into, resulting in a slight overhang on one side that needed to be filed down. The gaps were puttied and sanded and this was difficult because of their location and contours around the cowling.
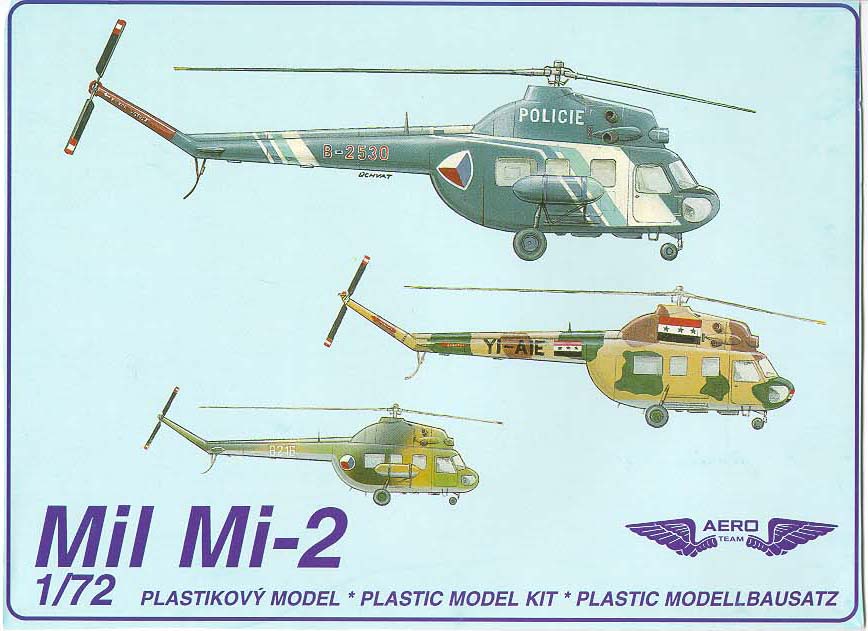
The kit produces three versions, a dark green/light green/earth shading for Czechoslavakian Air Force, an overall dark blue example with light blue and white stripes from the Czechoslavakian Police and an Iraqi overall desert sand coloured example with patches of Dark Green and Brown. Decals are produced by Propagteam and as usual were very nice in register, perhaps a slight too thick but otherwise very happy to sit on the surface of the model. I chose the Iraqi version that was used in operations against the Kurds and features the flag as it's insiginia.
I am very pleased with the finished product and it builds to scale quite well. The unique lines of the Mi-2 have been captured well and there's not a lot of problems with accuracy aside from those pointed out in the review. It is not an easy model but also not a completely difficult one by any stretch of the imagination - I was more put off by the anticipation of some of the smaller assembly tasks than I was frustrated in acutally building it. It did need to be one of those projects that you took time with and waited for parts to dry before moving onto the next but I actually really enjoyed building this kit. I wouldn't recommend it to any one below intermediate skill and would even then only recommend it to someone on that level if they were confident with small fiddly undercarriage bits, the use of putty and able to coax windows in their places correctly. For anyone else however, I would certainly recommend this kit as a bit of a challenge but enjoyable project.
Back to home
Kit Review Index: 1/72
1/48

The purpose of this photo is only to show what an Mi-2 looks like and is
not one of the examples in the kit
(It's actually the box art from the new Amodel kit)