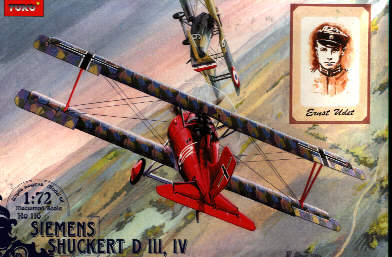
TOKO 1:72 SIEMENS SCHUCKERT D.III/D.IV
Reviewer: Adrian Papps (rec.models.scale) - addendum on accuracy supplied by Bill Powers
The Siemens Schukert was one of the most superior fighters from the First World War. Unfortunately, it was plagued by engine cooling and lubrication problems thereby keeping it's number and ultimately effectiveness limited. It was a radical design that incorporated a rather unorthodox engine gearing, insofar as it rotated in opposite direction to the propellor, thereby allowing the propellor to operate at a more efficient speed. The Schuckert had excellent performance with superior climb and manouevrability to all other aircraft at all altitudes. It was not to appear in sufficient enough a number to have any affect on the Air War in WW1.
Toko package this in a medium sized box, considering it is only a WW1 fighter reproduction, with about 37 injection moulded parts that include options to build a D.III or D.IV version as desired. The plastic is crisp and contains a minor amount of flash around the wing roots but other than that is very clean. Detail is quite reasonable and finely engraved panel lines are etched into the plastic. The instruction sheet is fairly easy to follow with logical steps to follow and a diagram of the sprue parts.
Construction of the kit is fairly fiddly and is a bit more complicated than was expected. I'd certainly recommend that you make up separate sub-assemblies of the engine, wings and fuselage areas and finish them off first, before attaching all of them together. The instructions certainly don't indicate this but doing it altogether after main assembly will only cause problems and probably a nervous breakdown! A bits also need to be replaced in the kit including the pilot's seat which is too small and those awful lozenge decals! More on both these following.
The best way to tackle this kit is to make sure you have a reference handy during the construction phase. It seems that a few small flaws are apparent between the actual assembly and the appropriate placement according to the instructions. For instance, the interplane struts positions are not clearly noted on the assembly diagramm and a first glance may well lead to an incorrect placement. I also noted that the spinner for the D.III may be of either plain or louvred variety as picture references confirm both types were used, keep this in mind for the replication of Udet's machine (which is a D.III with a louvred spinner according to my reference sources). The decals will allow the desired option to be chosen.
The cockpit is fairly sparse with a pilot seat that is quite obviously too small and needs to be ditched for a better example. I'm not too sure about the floor in the cockpit and whether there was one, so best to check your reference source, unfortunately none of mine were able to shed any light on this subject. An instrument panel isn't supplied only an area which could represent same behind the guns, so a bit of scratchbuilding here is necessary as I don't believe there are any aftermarket products that would assist.
Moving onto the wings make sure you sand back the attachment pins carefully to get a nice snuggly fit to the fuselage. Also I would suggest finish the lower wing colouring (a lozenge decal is provided) before attaching the upper wing, or otherwise you will be in for a frustratingly hard exercise. The lozenge decal is wrong, the colours and shades thereof are incorrect and they are also shaped the wrong way, they should run spanwise covering the wings. That said, with nothing better on offer, and a definite reluctance to hand-paint I went with the decals supplied. Once you have applied all the decals to upper and lower wing surfaces then you can attach the upper wing and mount the subassembly to the fuselage. The interplane struts don't assemble vertically on the D.III and I am not sure if this is absolutely correct. Also I would suggest a very slight 2-3mm trimming of the struts to make the wing gap more accurate to scale.
Finally I added on the separately assembled nose and engine cowling, painting and finishing the model before attaching the underside struts. This made things a little easier to work with but also you have to be careful not to ruin the paintwork or snap the strutting.
I finished the model as Udet's machine but used a Matt red (in this case Humbrol Scarlett) as the gloss red was too bright to be accurate. This made for a very nice model in spite of some of the complications and I would recommend it to those who have an interest in this era. Toko have certainly done well with this kit and the only criticism would be levelled at their research on the lozenge decals. Not for a beginner but I would certainly be looking to get another kit to make the D.IV version later on.
Addendum (Bill Powers) : regarding accuracy: From photos found in Windsock and the Scale Models article, there was no dashboard. The instruments were mounted on the plywood band arouind the rim of the cockpit (not represented in the kit), one on the right side of the gun butt and another (maybe) on the left. Inside the cockpit, next to the seat is the compass, which is atached to the side tubing. Attached to the vertical tubing infront of the compass are one or two more intruments. The bottom of the ammo container can be seen protruding below gun butts. There is a "crash pad" on the plywood ring between the gun butts. There is a plywood floor, from under the seat to past the rudder pedals, with a square hole for the control stick. There is some question on the accuracy of the top wing of the DIII (I think it is accurate) and the propeller is much wider in chord and thicker. But this is still a beautiful model!!
Back to home
Kit Review Index: 1/72
1/48