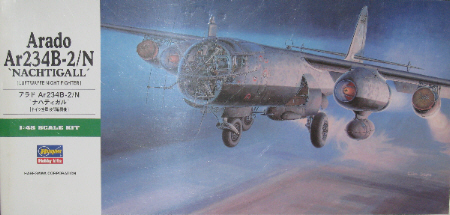
Hasegawa 1/48 JT85

This is my
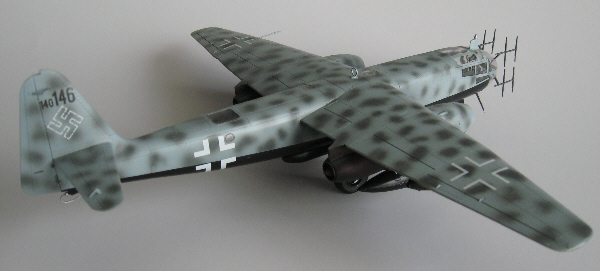
Ar234B-2N Nightfighter, which, according to the kit instructions is the
aircraft of Leutnant Kurt Bonow, based at Oranienburg in March 1945. I
confess I didn't know anything about Lt. Bonow so I turned to google
and even then was able to find very little. Lt. Bonow finished the war
with 10 kills and was the commander of Nachtjagdgeschwader 100 for a time.

The kit is up to the typical (very good) Hasegawa standards. Not being a rivet-counter, I will just say that it sure looks like an accurate A234. There are 172 parts (160 molded in light grey and 12 in clear) parts on 11 sprues.with 2 marking options. I had started the kit when it first came out a few years ago and had progressed as far as completing the cockpit but for some reason got tied up in another project. I dug it up again back in the summer and decided to try and finish it in time for Granite Con XV in New Hampshire. I managed to finish it on time and came away with a first in multi-jet aircraft. Needless to say I was very pleased, I had not only managed to finish what I think is one of the coolest looking late-war aircraft, but some of my fellow modelers liked the job I had done on it as well.
The kit cockpit is very complete and thankfully looks very busy through the large greenhouse it's housed in. The only thing I added were Eduard photo-etched seat belts. All the instrument faces have molded on detail that came out nicely with some dry-brushing. There are also a total of 6 decals for the various instrument faces in the front cockpit, that gives you some idea of the cockpit detail. The main instrument panel itself attaches to the very front of the clear nose. I had to be very careful gluing it on as there is so much surrounding clear areas. The clear parts had all been dipped in Future but I was still very careful not to get any excess anywhere. By the way, the clear parts were very clear but I've gotten into the habit of dipping all my canopies in Future for clarity as well as protection. The cockpit tub itself also comprises the nose gear bay and fits between the 2 forward fuselage halves which are molded in clear plastic. I left off attaching the front clear part with the radar antenna till the very end. You also get a rear cockpit for the radar operator that has some nice molded on detail as well, there's also 4 decals for those that wish to go that route. This area is a little hard to see as not a lot of light gets in through the overhead clear panel or the side portholes. One note, remember to drill out the holes for the portholes on the sides of the fuselage, Hasegawa give you indentations as guides to help with this.

The main gear bays, which have good detail considering you can't see much of them, were glued into their respective fuselage halves and after installing the radar operator's cockpit in the rear of the plane, the two halves were glued together with Tenex. At this point the recessed bay for the under fuselage cannon was also added, no fit problem here either. The fuselage halves go together beautifully and all that was required to finish the seams was some light sanding and steel wool. There is a clear insert on the bottom of the fuselage that you can paint without masking as it's only clear on the recon version. These 2 inserts (the upper one was added after the wing was attached to the fuselage) required a bit of care installing and more than a little sanding to blend them in. I was able to save almost all the surrounding detail and had very little rescribing to do. I deviated from the kit instructions by next gluing the forward fuselage with cockpit and it's associated bulkhead to the rear section. Remember to add sufficient weight behind the cockpit to prevent tail sitting.The fit here was pretty good and didn't need a lot of clean up.

The wings and engine were next assembled and again the fit was very good with only minor clean up required. The front part of the engine nacelles are one piece so we are spared any difficult seam clean up.At this point I also installed the fuel tank pylons to the bottom of the engine nacelles. The engines fit perfectly to the wings and once the Tenax residue had been polished off with steel wool the completed wing/engine assembly was attached to the fuselage. There is as large clear part that fits over the spine behind the wing trailing edge that incorporates the upper window for the radar operator. I masked the window and then sprayed RLM66 for the interior colour. The tail planes were next added and fit flush to the tail.
Now the remaining assemblies were completed. The Walther Ri-202 'Rauchergeraet' RATO pods are covered in very convincing detail. However, care must be taken when assembling the RATO pylons. I didn't test fit mine as much as I should have and ended up having to butt glue them to the underside of the wing as I could not get the corresponding attachment holes to line up. The parachute packs that attach to the front of the RATO pods are very realistic and required some careful painting to highlight the straps. The under engine fuel tanks and the 20mm cannon pod for under the fuselage were no problem.

After washing the completed kit,
I painted it according to the kit instructions with ModelMaster enamels
and after a coat of gloss the decals were applied using the micro scale
system. There aren't many decals so this step went by fairly quickly.
After a couple of light coats of clear flat I removed the many canopy
and window masks and added all the remaining bits and pieces. It was at
this stage that I realized I had screwed up the RATO pylons
and ended up butt joining them to the wings. After all these bits and
pieces were added, it was time for the final and most important task.
The radar antenna are such an obvious and important part of this
project that I knew it would make-or-break the whole thing. I left the
instrument panel till last and applied glue to the antenna attachment
points inside the nose and added the antenna one at a time, allowing a
couple of hours for one to dry before adding the next. Finally, they
were all on and as a bonus there weren't any glue smears inside the
large clear nose. The clear nose section was attached with white glue
and by and large the fit was (thankfully) pretty good. All in all, a
very enjoyable project and looking at this unique plane on my shelf
made it worth while.
The kit is up to the typical (very good) Hasegawa standards. Not being a rivet-counter, I will just say that it sure looks like an accurate A234. There are 172 parts (160 molded in light grey and 12 in clear) parts on 11 sprues.with 2 marking options. I had started the kit when it first came out a few years ago and had progressed as far as completing the cockpit but for some reason got tied up in another project. I dug it up again back in the summer and decided to try and finish it in time for Granite Con XV in New Hampshire. I managed to finish it on time and came away with a first in multi-jet aircraft. Needless to say I was very pleased, I had not only managed to finish what I think is one of the coolest looking late-war aircraft, but some of my fellow modelers liked the job I had done on it as well.
The kit cockpit is very complete and thankfully looks very busy through the large greenhouse it's housed in. The only thing I added were Eduard photo-etched seat belts. All the instrument faces have molded on detail that came out nicely with some dry-brushing. There are also a total of 6 decals for the various instrument faces in the front cockpit, that gives you some idea of the cockpit detail. The main instrument panel itself attaches to the very front of the clear nose. I had to be very careful gluing it on as there is so much surrounding clear areas. The clear parts had all been dipped in Future but I was still very careful not to get any excess anywhere. By the way, the clear parts were very clear but I've gotten into the habit of dipping all my canopies in Future for clarity as well as protection. The cockpit tub itself also comprises the nose gear bay and fits between the 2 forward fuselage halves which are molded in clear plastic. I left off attaching the front clear part with the radar antenna till the very end. You also get a rear cockpit for the radar operator that has some nice molded on detail as well, there's also 4 decals for those that wish to go that route. This area is a little hard to see as not a lot of light gets in through the overhead clear panel or the side portholes. One note, remember to drill out the holes for the portholes on the sides of the fuselage, Hasegawa give you indentations as guides to help with this.
The main gear bays, which have good detail considering you can't see much of them, were glued into their respective fuselage halves and after installing the radar operator's cockpit in the rear of the plane, the two halves were glued together with Tenex. At this point the recessed bay for the under fuselage cannon was also added, no fit problem here either. The fuselage halves go together beautifully and all that was required to finish the seams was some light sanding and steel wool. There is a clear insert on the bottom of the fuselage that you can paint without masking as it's only clear on the recon version. These 2 inserts (the upper one was added after the wing was attached to the fuselage) required a bit of care installing and more than a little sanding to blend them in. I was able to save almost all the surrounding detail and had very little rescribing to do. I deviated from the kit instructions by next gluing the forward fuselage with cockpit and it's associated bulkhead to the rear section. Remember to add sufficient weight behind the cockpit to prevent tail sitting.The fit here was pretty good and didn't need a lot of clean up.
The wings and engine were next assembled and again the fit was very good with only minor clean up required. The front part of the engine nacelles are one piece so we are spared any difficult seam clean up.At this point I also installed the fuel tank pylons to the bottom of the engine nacelles. The engines fit perfectly to the wings and once the Tenax residue had been polished off with steel wool the completed wing/engine assembly was attached to the fuselage. There is as large clear part that fits over the spine behind the wing trailing edge that incorporates the upper window for the radar operator. I masked the window and then sprayed RLM66 for the interior colour. The tail planes were next added and fit flush to the tail.
Now the remaining assemblies were completed. The Walther Ri-202 'Rauchergeraet' RATO pods are covered in very convincing detail. However, care must be taken when assembling the RATO pylons. I didn't test fit mine as much as I should have and ended up having to butt glue them to the underside of the wing as I could not get the corresponding attachment holes to line up. The parachute packs that attach to the front of the RATO pods are very realistic and required some careful painting to highlight the straps. The under engine fuel tanks and the 20mm cannon pod for under the fuselage were no problem.