| HÖRGE's Coral Reef Page |
| Reef Ecology |
| Ligpo Reef |
| Tank System |
| Collecting |
| Anchoring |
| Coral Care |
| Gallery |
| e-mail me |
| Home |
| Anchoring Coral Fragments |
| There are three things you need for
this critical task of coral propagation: 1. Anchor bases 2. Coral fragments 3. Stabilising media/Adhesive The coral fragments,
or frags, should be chosen for shape and size.
They can theoretically be as small as is needed
to contain at least one polyp, ..but you don't
want to wait two years for the propagated new
colony to attain substantial size! The anchor
base can be a piece of live rock, beach
stone, or pre-cast concrete plugs. The base must
be stable and heavy enough, to keep the mounted
frag from tipping over, and non-toxic to the
frag. Coral will try to grow onto almost any
relatively clean surface it comes into contact
with. |
|
||
| Preparing the Anchor Base(s) |
 |
Bases
of live or inert rock will need little discussion
beyond the already-treated topics of weight,
stability, and non-toxicity.
Live rock
DOES need to be as free of algae or other living
material as possible AT THE POINT OF CONTACT with
the coral frag. Anyway, for precast cement plugs, a plastic eggtray is used as a mold. Short sections cut from a hot-glue stick are affixed upright to the bottoms of the egg-sockets with a dab of melted wax. These provide the cast with peg holes to stick frags into. Once the cement is mixed and poured in, you wait for them it to cure. The glue sticks are easy to pull out of the hard cement cast: just remember to leave enough length of glue stick to grab onto when you cut them in the first place. The dry plugs are popped free, the glue stick sections yanked out, and the plugs soaked in a neutralizing bath of fresh water (slight acidity will help) for a day or two. |
|
| Attaching The Frags |
| There's
two ways to anchor a frag, orientation-wise:
vertically and horizontally. I use vertical anchoring when the frag is on the smallish end of the size scale. The physical lock provided by the peg hole of the base is made full use of. On the other hand, horizontal anchoring provides a larger area of attachment to the base, and is ideal for coral frags possessing larger size and numerous budding branches. You need to take your relatively dry bases, and set them down on some stable, clean work surface. Your frags should be sitting in saltwater, and your cyanoacrylate (CA) glue should be ready to go. A gel-type CA glue dries more slowly, giving you a few extra moments to work the contact about; and it furthermore doesn't run or spread out on its own like non-gel CA glue. |
|
|
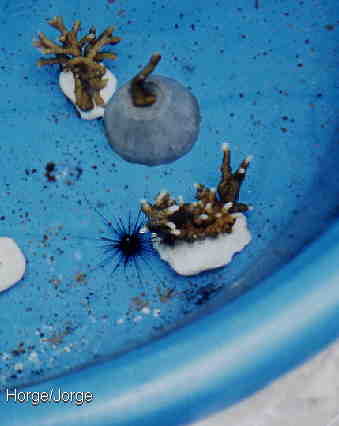
 Anchoring frags is easy and fun. |
First,
study each frag and how it would best be
anchored. If need be, you can break up a frag
further. Pick a frag up out of the water, apply
glue to the base and/or to the frag at the point
of contact, and without delay, gently press base
and frag together. Let the assembled colony sit out of the water a few moments (I give it ten seconds) to let the glue 'skin' a bit. Return the assembled colony to the second tray of saltwater. The glue may whiten on contact with the water, --this is normal and inconsequential. For a vertical anchor,
I emphasize application of glue to the frag's tip
AND the base socket. You're fairly sure of the
contact point, and so can commit the glue with
confidence. For horizontal anchoring,
I apply glue to the base only, and maneuver the
frag to sit on the glue. |
