JMC Gallery Presents

School Murals: making a fabric mural or banner.


The Course:

Make a group mural using transfer paints and crayons. Class time should be between 1-2 hours with no more than 30 students per teacher. Can be used for grades K-9.

Description:

Students make a painting on regular copier paper using special paints and crayons. The paintings are then ironed onto a large sheet of synthetic (polyester) fabric. The resulting work can be hung in the school, used as a banner, or used as a backdrop for a play or event.

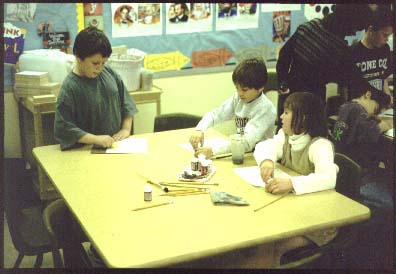
Students drawing on paper.

Course outline:

  1. Discuss what a mural is. (A mural is a painting done on a wall or ceiling). Show photos of murals if available. Describe traditional fresco method of making murals. The fresco technique involves coating an area of a wall with wet plaster and painting or drawing onto the plaster with pigments before it dries. Mention mural works by artists such as Michael Angelo, Leonardo di Vinci, and Diego Rivera. Explain to the students that by working on paper and fabric, the mural wall is being brought to their desks.
  2. If the mural is to have a theme, discuss ideas and images the students can use. If, for example the theme is immigration to the USA, students can draw where they or their parents came from, how they came to America, or where they live now.
  3. Explain the mural transfer process. Students make an initial 5-10 minute sketch on paper in pencil. They then color-in their work with the iron-on paints and crayons. The finished work is brought to the instructor to be transferred onto the fabric.
    1. Remind students that the pencil sketch will not transfer. They can do a very fast sketch without needing to worry about erasing mistakes. The pencil drawing should not have fine detail since the crayons do not have a fine point. They also shouldn't spend time shading in areas in pencil.
    2. The paints should not be spread on the paper too thick otherwise the paper will be difficult to handle, and the work will not be able to be ironed-on until after it dries. Stress that the paints should not be mixed, and that the brushes must be cleaned before using a new color.
    3. The students can place a piece of sandpaper or wood placed under the paper and then use the side of a crayon to create interesting textures. (Provide a demonstration of this technique).
    4. Show samples of how the original and finished work looks. Discuss color changes during the transfer. The colors from the paper become lighter and brighter (pastel-like) when ironed onto the fabric.

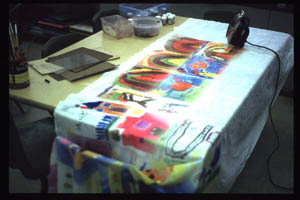
    Ironing-on students’ work.


    1. Also explain that the image ends up reversed. Explain that any text and numbers will look backwards on the mural unless they are done backwards on the paper. The students can write backwards by writing in pencil on the back side of the paper and then tracing the pencil markings as seen from the back on the front side of the paper. If text is allowed on the paintings remind the students that the text should be large since the images will be seen from a distance.
    2. Students can keep their paper artwork after it has been ironed onto the mural.
    1. How to iron-on the students’ paintings: The fabric should be laid on top of a large table. It may be necessary to cover the table with old newspaper in order to protect the table from any fabric paint bleeding through. Tape the newspaper down to keep it from sliding around while ironing. Place the completed and dry paper artwork face down onto the fabric. Make certain to hold onto one edge of the paper while ironing, in order to keep the paper from shifting around and distorting the image. Iron directly on the backside of the paper. A heavy iron set at the highest heat works best. Newer aluminum irons should be avoided. Heavy grades (or weights) of paper also make the transfer process difficult. Photocopier paper seems to work best.
    2. Students should start to clean up 10 minutes before the end of class.

    Materials:

    1. Crayola iron-on crayons.
    2. Deka iron-on transfer paints.
    3. Copier paper (either 8 1/2 x 11 or 11 x 17 sheets).
    4. Pencils.
    5. Brushes.
    6. Water containers and rags to clean brushes.
    7. Containers or trays to hold crayons and paints at each table.
    8. Large roll of fabric. 100% polyester works best. A 45 inch by 8 yard piece will hold approximately one hundred 8 1/2 x 11 sheets.
    9. Iron and extension cord.
    10. Sandpaper and plywood for crayon textures.
    11. Hammer and grommets to hang the finished mural.

    Students painting with transfer paints.

    The finished work.