| SEABIRD´86 |
|
 |
BUILDING STEP 4
Keel & Bottom
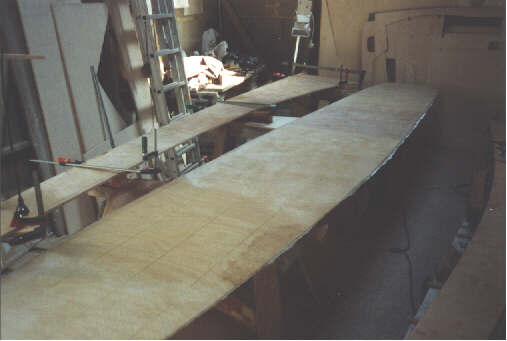
I began cutting out the plywood walls of the
keel assembly and the 3 bottom pieces. Loft work was minimized by using
templates made of printer foil -thanks to Leo Foltz- last winter (see Building
Step 6, Bulkheads).
All in all I've needed one sheet (3m x 1,5m)
for the keel walls, and 1 1/2 sheet for the bottom. The plywood I will
use mainly is 1/2`` birch plywood.
Thereafter I scarfed the pieces together. Always
10:1 scarfings and coated with 12 oz. bi-directional glass. |
 |
In the middle of the bottom coat you see a stupid
mistake. Still I don´t know, how to handle that. The Epoxy has not
hardened there. Probably I´ve forgotten the hardener.Now I plan to
cut out the glass at the affected location and soak away the not hardened
epoxy with sawdust and grind the plywood another time.
Then I will repair - oh, I love repairing new
things - with a new layer of glass. Must I overlap the glass to the other
glass parts? I don't know. If somebody has any suggestions to this problem,
please mail it - thanks ahead!
-I've it done this way, without overlapping
the glas. I turned the bottem, and glassed the other side. So, my bottom
is glassed both sides. The bad side is now inside the cabin.- |
 |
Gluing the bottom wood of the keel box (made
from 1´´x3´´ larch) to the keel wall, was not as
difficult as I provided. All fits fine as planed., secured with 1 1/2´´
stainless screws every 6´´. |
 |
The corner is rounded and coated with glass. |
 |
The mould for 1.100 lb.. lead keel for Seabird
is made from concrete (see Building Step
3 ). The burner on the left picture is a roofers gas burner, bought
at a home store for 20$ - works fine and fast. I've needed 6 hrs. and ~
8 Kg gas to meld the whole lead. |
 |
The mould is filled up and all my (500 Kg) lead,
mostly bought from a scrap trader, fits in. |
 |
At the same day I broke the mould |
 |
Next day I put the lead keel to a heavy hardwood
plank. Oh..., I must see now how the lead sinks down under his own weight
between the wooden sticks. Keel making this way results in a couple of
lead layers. The bonding between this layers is not continuous. |
 |
Transporting the keel from the melting place
to the workshop was really no problem. 4 hands and some wooden rollers,
wood pieces and a crowbar were all the stuff we needed. |
 |
All the lead in one piece in the workshop is
a very nice feeling. |
 |
All looks fine and easy at this picture, but
it was not. |
 |
My plan was to push the lead with some screw
clamps and a jack on the plywood wall layed on two heavy hardwood planks.
But at some points my lead sank down and scraped at the plywood edge. Big
epoxy pads started to harden and I had to return and push up the whole
lead keel. I've sweated this 1/2 hr like butter in the sun. I took some
more wood sticks and put them a little bit on the plywood, so the arrangement
works fine.
Lessons learned: Take a wooden stick every 6´´
and put it 1´´ on the plywood. |
 |
Yeah! The keel is on. Yeah! It fits accurately.
Only one day more boat building time and
the keel assembly will be ready -I hope.
Now, what is to do with the uncured-epoxy-bottom-bullshit?.
|
 |
|
 |
|