|
My Butterfly Shooter
Since these webpages went online on 22 December 1997,
I have received some inquiries
about the photographic equipment and techniques that I use to shoot butterflies. This
article, I hope, provides some useful answers.
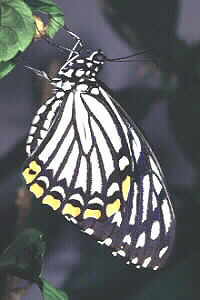 I began to “specialise” in close-up photography
in 1982. Like most beginners, I made many mistakes and wasted a lot of film.
As I had then started using 35mm colour slide film,
the mistakes were quite costly. I soon realised that available light
is often not enough and that depth of field is a rare but essential ingredient for producing
good close-up nature shots.
Initially, I bought and experimented with
many accessories, including flash units,
slave units, sync extension cords, pieces of diffusing material, reflectors, close-up
(filter) lenses, and extension tubes, but most of them were cumbersome to use
for field photography, and the results were usually not satisfactory. Most of this
paraphernalia soon fell into disuse, but a few remained in my camera bag as they could
still be needed.
Not long afterwards, I bought a 2X macro-focussing teleconverter (MFTC)
after reading a favourable review of it in a photo magazine. This turned out to be
my best investment in photographic equipment.
Since then, it has been the "optical heart" of my manual SLR camera system for
shooting butterflies and other insects and small creatures.
I found the MFTC so useful that when I upgraded to a more robust
SLR, I bought another one for my the new camera. The MFTC, made by
a major independent lens manufacturer, is a high-quality, seven-element teleconverter built
into a helicoid extension tube. It was, I believe, designed to work especially well with
50 or 55mm standard lenses, turning them into
100 or 110mm tele-macro lenses. For many years, this combination was my "macro lens" of choice
for close-up photography.
I now have a "true" 55mm macro lens, but I prefer to mount it on the MFTC in
order to use the combination as a 110mm tele-macro lens. This gives me a more comfortable
"working distance", in other words more breathing space between the subject and camera.
This setup works well enough if I took care not to go too near to the subject to
scare it away.
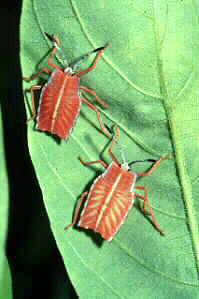 The MFTC came into the market
in Malaysia in the 1980s,
and was available in lens mounts to fit the major brand cameras. It is an excellent converter
that could be used with lenses of other focal lengths although it works best with the standard lens.
For example, I have a 75-300mm
zoom that becomes a 150-600mm close-focussing telephoto zoom when mounted on the
MFTC, and it gives quite good results when used carefully. So, in effect, I have in my
camera bag lenses ranging from 55mm standard macro to 110mm tele-macro, and 75-300mm tele-zoom
to 150-600mm tele-zoom.
This system is versatile enough to capture any insect from bees and
beetles to bugs and butterflies. The longest telephoto configuration -- used with extra care
when the camera can be mounted on a stable tripod -- could even "pull in"
a bird or two. With this setup, I have succeeded in photographing a few common bird species
while they fed on papayas on a tree.
Having tried it, I don't think I will seriously take up bird photography.
I'll continue to focus on butterflies, insects and other small creatures. Bird photography
and butterfly photography share some common problems,
such as difficult lighting situations and inadequate depth of field, inherent problems when
using either long telephoto or macro lenses. But these challenges can be overcome more easily,
and cheaply, by those who shoot butterflies and other more down to earth subjects.
After having experimented with
reflectors and available light photography, I have found it completely futile to rely on
them for active subjects like butterflies and insects, even
in bright sunshine. I have long opted for electronic flash units to "freeze" these subjects.
I have a handful of these small, manual flash units with a guide number of around 20. They don't cost much.
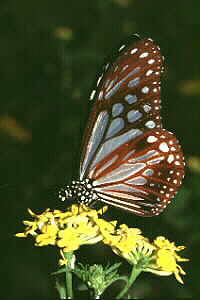
"Portable sunlight" from these units overcomes -- in a flash -- the twin problems of
inadequate lighting and depth of field. Through trial and error, and with frequent use of this
setup, I can now
"guesstimate" with some accuracy the aperture settings needed in different conditions. With one
GN20 flash unit mounted either directly on the camera hotshoe or on a bracket (with a sync cord
plugged into the sync socket), I need to set an aperture of f8 (for an effective aperture of
f16 because I use a 2X converter) to correctly expose ISO 100 colour slide film.
With a second flash unit of similar power attached, I need to reduce the aperture by one
stop as the light output is now doubled. (I need to set the aperture halfway between f8 and f11 on the
prime lens as I'm using a 2X converter). Occasionally, I use a third flash unit, but this is usually
to provide some backlighting when the situation allows me to set it up. With a flash sync speed
of 1/60 second, I find these the best settings to
use under a bright sun as the background would be reasonably well exposed.
However, using these settings under a forest canopy results in a completely
dark background in the photos. Some people like
that, others don't. Those who like this type of pictures say the main subject stands out prominently
without any background clutter. Those who don't say these photos give the false impression that they
had been taken at night. The "two schools of thought" can argue till the cows come home on the pros and cons,
and the merits and demerits, of either type of photos. For me
the choice is obvious. The ambient light in a rainforest is simply not sufficient for photographing
lively subjects like butterflies and other insects. In short, no flash no picture.
Getting the exposure right is still a hit-or-miss affair for me.
I bracket my shots whenever possible (if the insect does not fly away the first time I press the shutter button),
hoping to get at least one right. I still make some mistakes and waste some film, but I get
more "useable" photos now with this setup and the method described.
Further reading:
Get The Most From
Your Butterfly Hunt – by Jakub Jasinksi for photo.net
How
To Photograph Butterflies – by Chin Fah Shin
|


