


Here I was just playing around with some shapes. Playing around for a while helped me get an idea of what I wanted to do.
I finally came up with this three prong shape as the beginning of the apron. If you have used Amapi before this will be easy and straight forward. Also feel free to skip ahead if you know where I am going. If you haven't used Amapi then it will only take you some time to remeber where the tools are. Just use the mouse pointer. Let rest over any of the tools to get a feel for where they are. I will make it simple in the beginning by saying if it is at the top, bottom, or to the left.
First we make a circle with 13 sides. Select the draw tool(left) and select circle. Create a circle of any diameter. The default sides are 8. Press the plus button to increase the sides of the circle. Press it five times. Now click validate(top) or press enter twice.
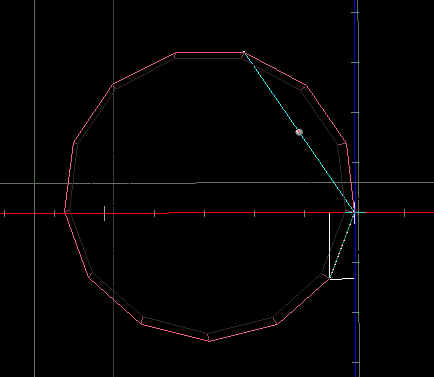
Now use the draw tool again. This time choose polyline and start at the very top of the circle. Find the end points of the side by holding shift to snap to points. Click on the left and then the right endpoint. In the picture I started with the right endpoint. No matter which one you start with you will skip the next two points after the right endpoint and choose the endpoints of the next side. Then skip the next three points and repeat. Once you have made it back to your starting point click validate or hit enter twice.
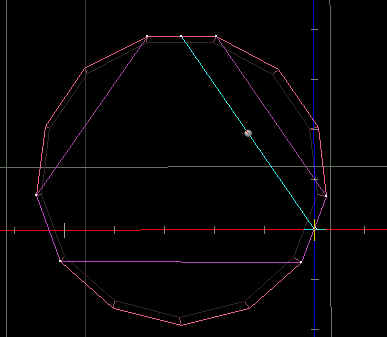
Next we will use the same technique to draw the inside triangle. Choose polyline and hold shift. This time we want to choos the center points. It will automatically snap once you are over the center. Now create a triangle as shown in the pictures. When you reach your starting point click validate twice.


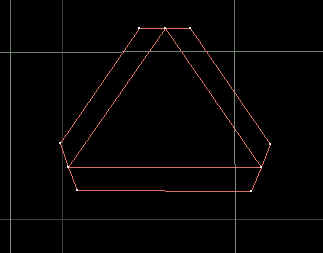
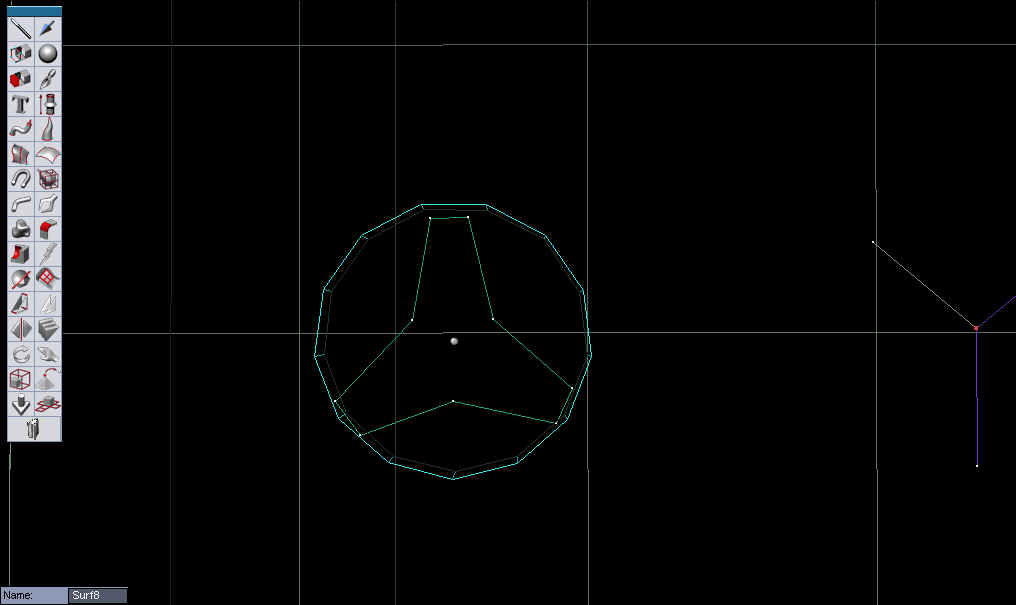
When you finish it should look like this. With the circle removed.

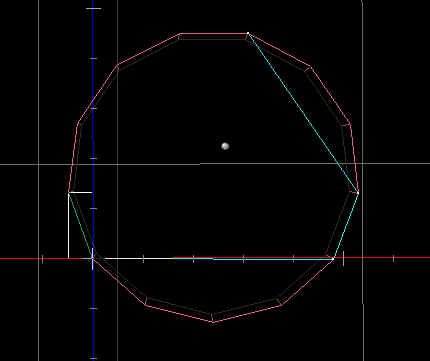
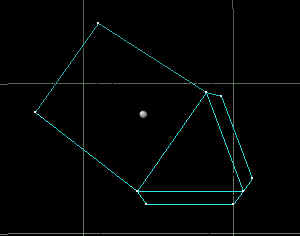
First group the triangle and the core of the prong. The grouping tool is at the bottom(the chain icon). Once both objects are grey press enter and choose the change current object tool. This will exit you from the group tool. Now select the endpoints of the outside line segments using the the targeting cursor(Hold down the shift key). It is at the top(or you could right click 3 times). Once you have the points selected choose the stretch tool. Press the spacebar twice and hold the shift key to snap to the middle point. Click and drag the line segment downward. Now make sure to keep track of how far you drag it by using the distance box on your left below the tool palette.

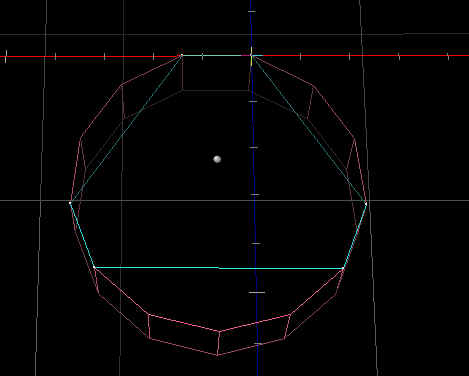
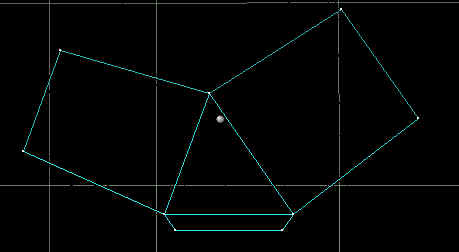
If you forget to note how far you dragged the line segment, then you can always use the measuremts tool(bottom) to find out. Once you have a set distance, rotate the object clockwise and repeat for the other two prongs.

Try to make sure that the line segments of the other two prongs are as horizontal as possible. The reason we are rotating the object is because I have not found a way to move in a straight line other than ont the x,y, or z axis. If I find a way in the future I will update this tutorial.
You may notice that one of your prongs is larger than the other. You can leave this alone if you want. I fixed mine by measuring the two sides with the measurments tool and a then used the scale tool(left) to size it. Use the Lasso(1 right click) or the Bullseye(2 right clicks) to select the line segments. Choose the inner triangles longer side first then scale it to the units of the other two sides. Measure the outer line segments and then repeat the scaling for the longer line segment. (There is actually an easier way to make the triangle but this way introduces you to number of tools--"practice")

Now there are two directions you can take. You can continue to manipulate this object or you can create an outline and resave as another file ex. "ship2". I suggest the 2nd option.The two main reasons for doing this are: 1)Amapi can simply wipe the object you are woring on out of existence. Don't get scared. Sometimes when your carrying out an operation that may seem legal a boolean(cut) where you subtract an object from another amapi might disagree. And when try to undo your object is completely gone. This only happens while I am experimenting. But it can happen even when I think it is a legal operation. So I always like to have multiple copies and multiple files. If your space starts to get cluttered simply delete what you don't want and save to another name. 2)You are not dealing with a grouped object you are dealing with a single object.