Gamo CFX
The below operations are recommended to be made after the warranty of the gun
has expired and after the shooter is used to operating the gun, otherwise a
gunsmith can do it in a better and safer way. MODIFYING, REPAIRING, MISUSE AND
MISHANDLING THE GUN CAN CAUSE THE LOSS OF WARRANTY, SEVERE DAMAGE ON THE GUN
AND EXTREME INJURIES !!!
Here you can find the handbook and the construction of the CFX: handbook
, construction 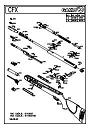
CFX ADVANTAGES
1. on front of the gun can be mounted laser or flash light
2. the gun can be blocked by bonding the cocking lever with the barrel
3. after the pellet was loaded in the barrel you can leave a pellet in the breech, at the next arming the pellet is already in the breech and you must push into the barrel
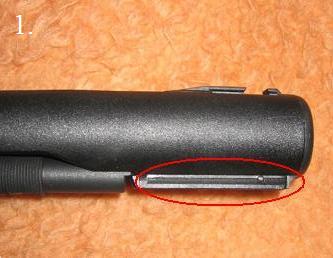

THE CORRECT PELLET LOADING
The loading of the GAMO CFX is very important as the rotating breech allows few
mistakes that can be done during this operation, such as chipping the breech
seal because of the incomplete insertion o the pellet into the barrel. In order
to assure a correct insertion of the pellet, a soft material stick can be used
(eg. plastics, aluminium, copper, etc.) to push the pellet into the barrel. A
pellet inserteed too much will not have the entire power given by the gun,
because the ''trip'' along the barrel begins with an extra effort, as the
pellet's skirt is slightly bigger than the barrel and this contributes to more
pressure behind the pellet before it begins to move.
A RIGHT INSERTION OF THE PELLET IS DONE WHEN THE PELLET'S SKIRT IS AT THE SAME
LEVEL AS THE BARREL
TEXT:Cosmin-Ioan
PELLET LOADING WITHOUT ARMING THE GUN
We can load the pellet in the barrel without arming the CFX, with the pellet
already in the barrel we need only 1-3 seconds to charge and to shoot. When the
gun is not armed the breech is pressed to the barrel by the spring:
1) pull-back a little the cocking lever and rotate the breech
2) load the pellet
3) pull-back a little the cocking lever and rotate back the breech
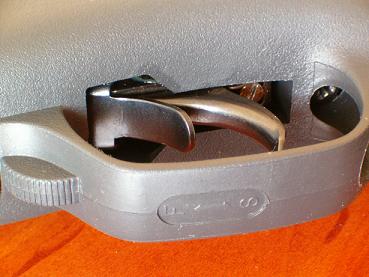
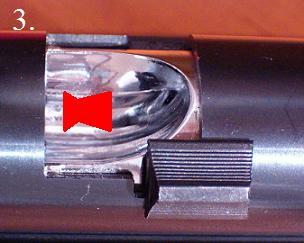
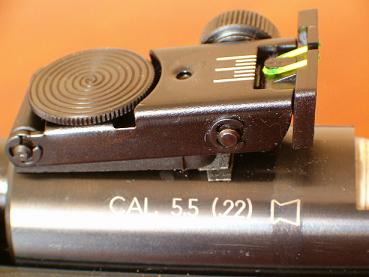
THE REAR-SIGHT EXTRA-ADJUSTEMENT
One of the weak points of the CFX is the TruGlo open-sight, which is highly
sensitive and can be easily damaged by mishandling the gun. The rear sight can
have another problem: the elevation wheel can be loose because of the
inclination and the elevation adjustement will be modified by the shocks caused
by the gun firing, so after a few shots its accuracy will not be the same. The
elevation wheel must stop in its position as it has some fine radial grooves
beneath it. When the sight is too inclined, the elevation wheel is loose. This
can be fixed by adding a few strips of leather or rubber (as seen in the
picture) and by replacing the screw that holds the rear sight on the gun (you
can get to the screw by turning the elevation wheel until it comes off the
sight, be careful not to lose the spring), as the original one is quite short.

TEXT,PHOTO:Cosmin-Ioan
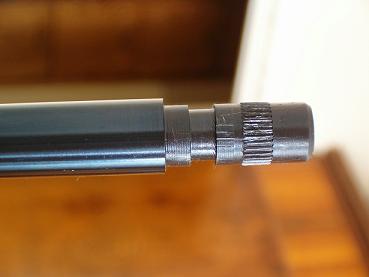
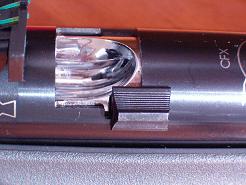
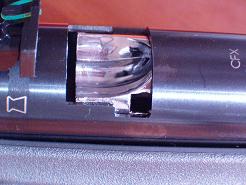
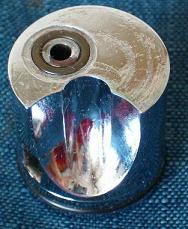
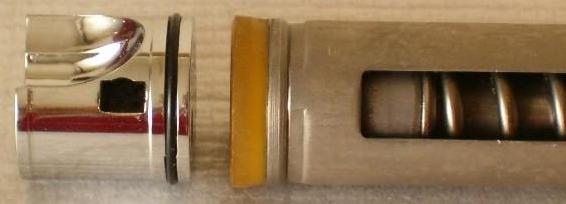
CHECKING THE FRONT BREECH SEAL
It is highly recommendable that this seal is checked from time to time, to
ensure its integrity, as it connects the rotating breech to the barrel.
This operation needs two people: one to hold the cocking lever at half of its
way and the other to operate the rotating breech. Before that you must extract
the breech's little plastic handle, paying attention to the small metal piece
that holds it in place inside the breech, as it can be easily lost. The cocking
lever is held in a position that allows the breech to rotate with little
effort, a small screwdriver is put in the handle's hole and the breech is
pushed towards the gun's rear until a small gap appears in front of it, after
this the same screwdriver can be used to push the breech even further along the
cylinder, until the front seal becomes visible and can be checked. After this
operation, the cocking lever is easily put in its place under the barrel, the
breech is coming along with it and the handle can be put back in its place.


TEXT,PHOTO:Cosmin-Ioan
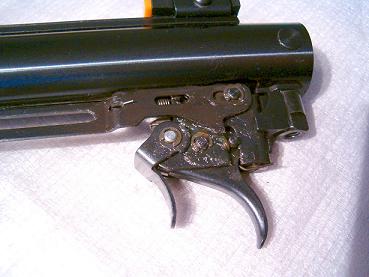
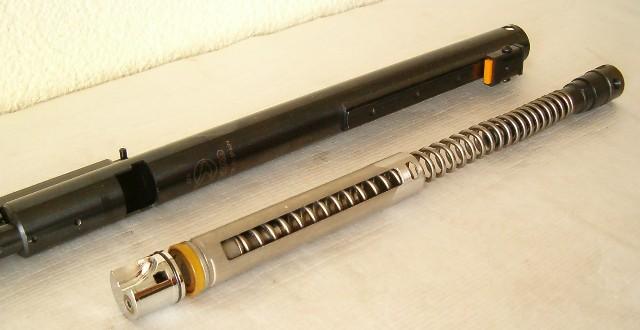
DISASSEMBLING THE GUN
The CFX is quite tricky at the beginning of this operation, as the front stock
screws are hidden under the rubber pads on the sides of the stock. Once they're
found, they can be easily removed. If this operation is done several times,
removing the pads and reassembling them with additonal short screws or to make
holes to get to the front stock screws would be proper solutions rather then
damaging them.

To disassemble the gun you need a special press (it can be easily home-made),
as the spring is already tensed inside the cylinder.
The gun has been disassembled after 3000 shots.
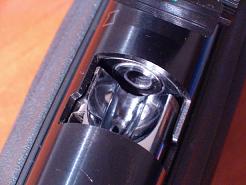
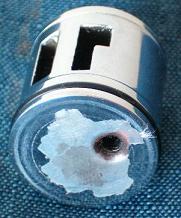
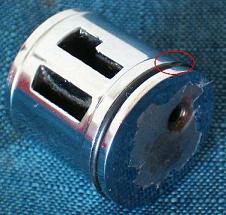
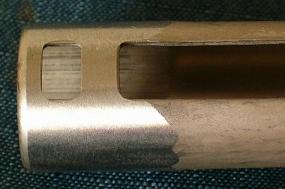
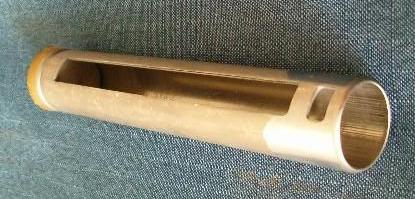
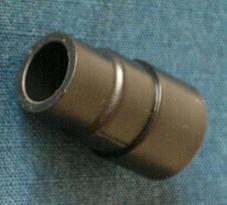
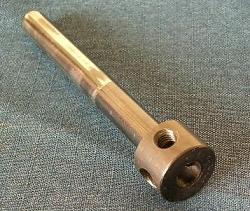
THE ROTATING BREECH has an area in which the crome layer has been peeled
off because of the pressure inside the cylinder and has marks of intense heat
along the hole that connects the cylinder to the barrel. The back-seal is very
fragile and it has been damaged.
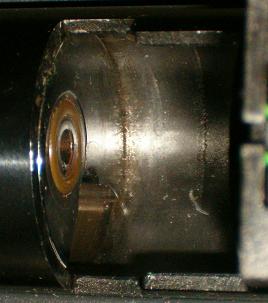
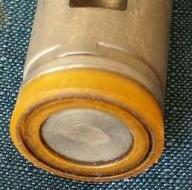
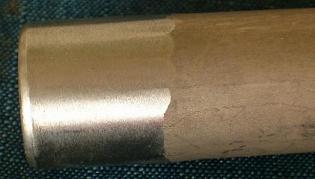
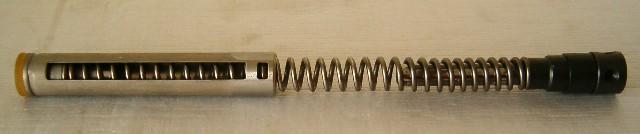
THE PISTON has been modified in the factory as it had been made for a
larger cylinder (???) (the clear zone at its back end).
THE SPRING GUIDE is worn-off because of the friction with the spring
that was bent when I first disassembled the gun. The spacer is made of plastic,
an unfortunate choice.


TEXT,PHOTO:Cosmin-Ioan
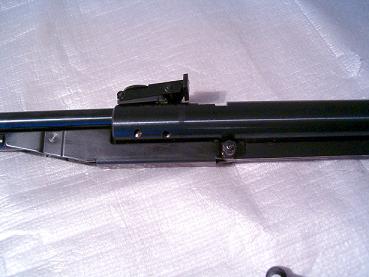
Here are some more pictures, for explanations and better pictures you can
contact Cosmin