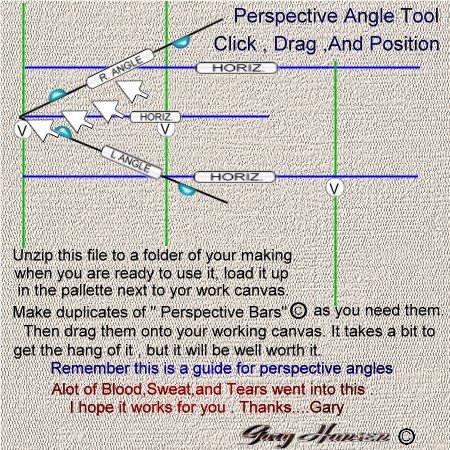
| Visual Aid #1 | ||||
|
||||
| Visual Aid #1 | ||||
|
||||
| Click HereTo Download Zip File | |||
| Visual Aid #2 | |||
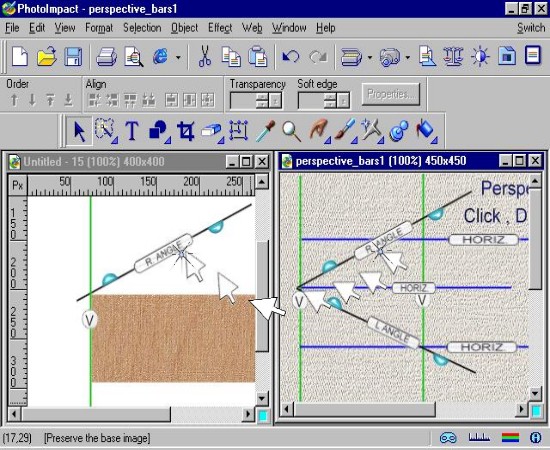 |
|||
| This Tutorial Uses The Edit Path Tool To Shape The Parts Of The Box | ||
 |
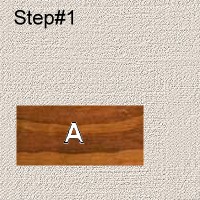 |
We will start with a horizontal rectangle,[as in step 1] and make a box. Click on the green vertical line in the perspective box and duplicate it, and drag it along the left side of the rectangle[as in step 2]. | 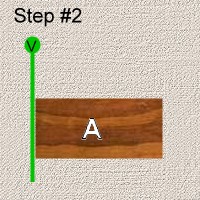 |
||
|
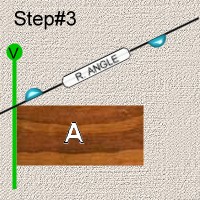
Click on the right angle line bar in the perspective box and duplicate.now drag it over to the top left corner of your rectangle.[as in step3] Click on the right angle line bar in the perspective box and duplicate another right angle line bar.and place it on the right top right side of the rectangle.[as in step4]. | 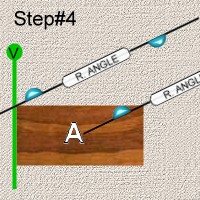
|
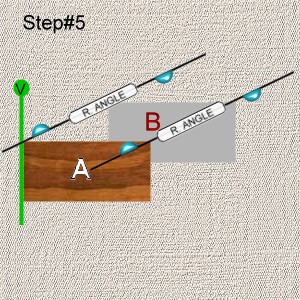 |
Click on rectangle "A" and duplicate, then send duplicate "B" to back. And align between the 2 right Right Angle Line Bars. any depth that you want.[as in step5] | |
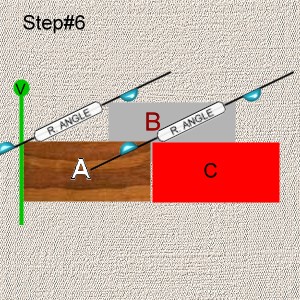 |
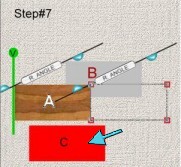
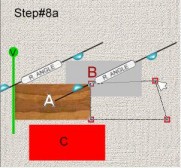
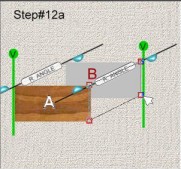
Click on rectangle "A" and duplicate, then butt the left side of the duplicate rectangle "C" with the right side rectangle "A". [as in step6] The Sequence Of Frames Below Is Step 7 thru 12 And It Will Give You An Idea Of How To Work With The Path Edit Tool. |
|
| Click |
Click on the Path Edit Tool. 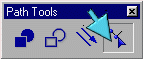 |
 |
 |
 |
||
 |
 |
 |
 |
 |
|
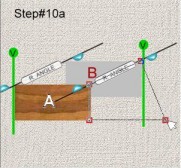
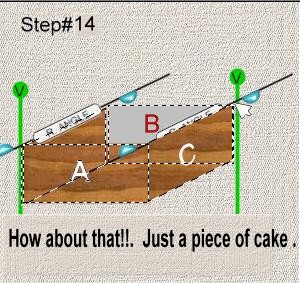
| To add more depth to your box reduce the heigth of "B" a few pixels, until you get it where you are satisfied with the depth perception. | |||
| If You Have Any Problems Or Question , Just Email Me At valhalla@cableone.net | |||
| HOME | |||
| All Material And Caricatures Are Copyrighted To Viking Innovations. 12/3/2000 © | |||