 THE DAGGERFALL APPAREL
CATALOGUE
THE DAGGERFALL APPAREL
CATALOGUE
Submissions Accepted
The Daggerfall Apparel Catalogue and the Daggerfall Postcard Rack are accepting submissions of the relevant material (i.e. articles of clothing for the Daggerfall Apparel Catalogue and images suitable as backdrops for the Daggerfall Postcard Rack). Simply send your submission as an attachment to me via e-mail, along with some description as to what it is. I'll look at it and discuss what to do next with you, and with your permission I'll put it up for download here. Don't worry if your submission is the wrong size or isn't very refined; I don't mind touching things up here and there. Your submissions can deal with any subject matter, so you are only limited by your imagination.
THE DAGGERFALL APPAREL
CATALOGUE
 |
Unless otherwise stated, all products are made of TetraFabric (TM), a space-age material which is a perfect blend of lycra, silk and velvet, for comfort, durability and a luxurious finish, and have plain construction. |
 |
Colouring scheme: Black denotes that the item is available in the colour of the same name.
DarkC denotes that the item is available in Cobalt, Lilac, Crimson, Clay, Purple, Khaki, Grey, Jade, Yellow and Green. LightC denotes that the item is available in Azure, Lavender, Vermilion, Peach, Mauve, Beige, White, Aquamarine, Gold and Lime. Currently, all products are available in the above-mentioned colours. |
1. Brassieres
| A. 3/4-Cup Bra -- has "underwired" cups, wide-set shoulder straps and back closure (also available in lace). |  |
| B. Classic Bra -- has "underwired" cups, plunge front and front closure (also available in lace). |  |
| C. Demi-Cup Bra -- has "underwired" cups, is low-cut with wide-set shoulder straps and front closure (also available in lace). |  |
| D. Full-Coverage Bra -- has "underwired" cups, wider wings for support and back closure (also available in lace). |  |
| E. Soft-Cup Bra -- has triangle cups, plunge front and front closure (also available in lace). |  |
| F. Strapless Bra -- has "underwired" cups and back closure (also available in lace). |  |
2. Panties
| A. Bikini -- has high-cut sides, moderate coverage back and a shallow scoop front (also available in lace). |  |
| B. Briefs -- has a full-coverage back (also available in lace). |  |
| C. G-String -- has high-cut sides and a deep scoop front (also available in lace). |  |
| D. Shorts -- has boy-cut legs (also available in lace). |  |
| E. Tanga -- has thin sides, moderate coverage back and a shallow scoop front (also available in lace). |  |
| F. Thong -- has high-cut sides and a shallow scoop front (also available in lace). |  |
3. Hosiery
| A. Garterbelt & Stockings -- garterbelt has front closure; stockings have reinforced tops and stop a few inches below the hip (also available in fishnet and lace). |  |
| B. Knee-high Stockings -- have reinforced tops with silicone grips and stop just above the knees (also available in fishnet and lace). |  |
| C. Thigh-High Stockings -- have reinforced tops with silicone grips and stop a few inches below the hip (also available in fishnet and lace). |  |
| A. Elbow-Length Gloves -- stop about an inch after the elbow (also available in fishnet and lace). |  |
| B. Fingerless Gloves -- stop a few inches from the elbow and cover the first joint of each finger (also available in fishnet and lace). |  |
| C. Full-length Gloves -- stop a few inches from the shoulder joint; at the armpit (also available in fishnet and lace). |  |
| D. Wrist-Length Gloves -- stop about an inch after the wrist (also available in fishnet and lace). |  |
| A. Basque -- has strapless, "underwired" cups, multiple front closures, seven panels and light boning; stockings have reinforced tops and stop a few inches below the hip (also available in lace). |  |
| B. Bodysuit -- has a funnel neckline, stretch bodice, moderate coverage bikini bottom, snap crotch and no sleeves. | 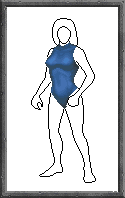 |
| C. Bustier -- has a strapless, stretch bodice, multiple back closures, five panels and light boning (also available in lace). |  |
| D. Merrywidow -- has 3/4, "underwired" cups, wide-set shoulder straps, multiple front closures, seven panels and light boning; stockings have reinforced tops and stop a few inches below the hip (also available in lace). |  |
| E. Teddiette -- has classic, "underwired" cups, moderate coverage bikini bottom and snap crotch; stockings have reinforced tops and stop a few inches below the hip (also available in lace). |  |
| F. Teddy -- has a scoop neckline, stretch bodice, thong bottom and snap crotch (also available in lace). |  |
| G. Thong Bodysuit -- has a turtle neckline, stretch bodice, snap crotch and cutaway shoulders. | 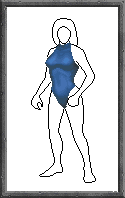 |
Did you ever want to go somewhere for a holiday, but always found yourself unable to make the journey? Or maybe you visited an exotic locale, only to face ridicule when you returned empty-handed? Nonetheless, why not take a postcard or two from this rack as a souvenir of your trip or to savour in the comforts of home? These beautifully hand-drawn postcards serve as excellent backdrops once enlarged and framed.
The above paragraph contains promotional blurb that is "in character" with the Daggerfall Apparel Catalogue. We all know that the images are created by computer, not drawn by hand. What you can do with these postcards is use them as the background for your character's portrait. The .GIF files shown below are linked to .ZIP files that contain the replacement .PCX file. Use Andypic (Dagpic also works here since the backgrounds are stored as .IMG files) to replace the background file (in the ARENA2 directory) for your character's race, and the next time the game is loaded the new background will be reflected in your character's portrait. The background files for each race are as follows:
| Race | Filename |
| Breton | SCBG00I0.IMG |
| Redguard | SCBG01I0.IMG |
| Nord | SCBG02I0.IMG |
| Dark Elf | SCBG03I0.IMG |
| High Elf | SCBG04I0.IMG |
| Wood Elf | SCBG05I0.IMG |
| Khajiit | SCBG06I0.IMG |
| Argonian | SCBG07I0.IMG |
| Vampire | SCBG08I0.IMG |
| Lycanthrope | Characters under the effects of lycanthropy cannot change their backgrounds. |
At the moment there are three cards available on the rack. More may be available in the future. For now, click on the image to pick up the card.
 |
The Alik'r desert is a harsh and barren land, yet sometimes it is this very harshness that hides its astonishing beauty. |
 |
A well furnished room in an unnamed desert inn gives rise to a sense of comfort and security. |
 |
The High Rock Sea Coast area, depicted at noon, from the deck of a small seagoing vessel, is a breathtaking sight to behold. |
In this section, I will put up for download certain images that, while not entirely my own work, did undergo some modification at my hands. Some of them are modified images that originally came from the Daggerfall CD, while others originate from other people/expansion packs. I will try to provide as much information as I can on each image here. Images that are black will have a greyish background so that you can see the general shape of the item, but the actual .PCX images will have black backgrounds. There are no mannequin models for these images, just the images themselves. Simply click on the image to download the .ZIP file it corresponds to. You then have to put it into the game with Andypic. Everything here is subject to change without prior notice whether verbal or written, so if you see something you want, download it first and check it out later. I hope I'm not treading on anyone's toes here, so if you're the creator of one or more of these images and want them off the page, discuss it with me via e-mail and I'll see what I can do.
| Image | Description |
 |
These are the original "Tall Boots" from the Daggerfall CD, but they are now in the Black colouring scheme instead of the original colour, brown. They fit female elves and humans best, but they may fit male elves and humans as well, and possibly even Argonian or Khajiit characters. Who knows? Try them out and if you wish, let me know. |
 |
One day while flipping through the newspaper, I noticed an interesting lace pattern on the skirt hem of a woman in an advertisement, and wondered whether there was an alternative way to make lace construction look more attractive, so I got to work trying to put that lace pattern on a pair of Thigh-High Stockings in DarkC. When I was done I compared what I had made to the pattern in the newspaper. It was the closest I could get, but it didn't quite resemble what I saw on the paper. The result isn't all that bad, but it doesn't make the grade in my books; that's why it's here. Fits female elves and humans. |
 |
This is quite possibly the image that started the inspiration for, among others, the Daggerfall Apparel Catalogue. I first saw this in Andyfall, an enhancement pack for Daggerfall available at TES: The Essential Site. In its original form, it is a "string" style garterbelt with fishnet stockings (with low-waisted, string side panties included), all in black. After modification, the panties have been replaced with g-string style, black panties in fishnet and plain construction, and some missing pixels have been filled in on the stockings. The texture of the garterbelt and stockings resembles that of PVC, or maybe patent leather, while that of the panties is TetraFabric (TM). Fits female elves and humans. |
 |
Ah yes, it seems we have come to everyone's favourite, the Khajiit Suit. I hear that a lot of people like to have their characters -- whether male or female -- wear one under their armour, especially plate armour, as it gives the player the sense that there is a more-or-less "cushioning" layer between skin and metal. This is the Khajiit Suit from Andyfall, which is basically the same as the one from the original Daggerfall CD but with the excess pixels at the neck trimmed off, so that they don't cover the chin, mouth, or even cheeks. I've converted the pixels to LightC and filled in one or two missing ones at the legs. You'll notice that the luminance variation among the pixels isn't very large, and that only about 8 of the 12 LightC colours are used, but that's the way it is. The texture resembles that of plastic, which was much less noticiable when it was in black. Fits female elves and humans. |
 |
The image on the left is a replica of the outfit worn by -- as one internet denizen so quaintly put it -- the "sword babe", that is, the well-endowed, blond-haired, katana-wielding, scantily-clad female found on the front cover of the TES: Arena manual. The -- for lack of a better name -- Arena outfit, is made up of five separate pieces, contained in five separate .PCX files. They are:
1. A halterneck bra top with a high collar and triangular cups. The cups are connected to the collar by two strings each, and to each other by a single string. It can be assumed that this piece is fastened by tying the strings from the outer ends of each cup together at the back. 2. A strappy, probably thong-style bottom. There are three straps on either side in the front, and they may or may not be fused together in the back. 3. A pauldron for the left arm and shoulder, covering the front and back, and exposing the sides (inside and outside). The front and back portions are connected by straps positioned at fixed intervals along the length of the arm, with the back ending at the wrist and the front tapering off at the back of the hand, upon which eight studs are affixed. 4. A pauldron for the right arm and shoulder, with the same characteristics as that for the left pauldron. 5. A pair of stay-up stockings, identical to the Thigh-High Stockings available from the DAC, except for their wider tops (2 pixels wider). The observant will notice that there are a few pieces of the outfit shown on the TES: Arena manual cover not available for download. Namely, these are the headband and scabbard. The headband can't be made because head images in Daggerfall, unlike that of bodies, do not have a definite shape, with regards to both bone structure and hairstyle. Hence, it is not possible to have a universal headband that will fit everyone. You'll have to make your own, tailored to your character's head shape, if you want one. I believe the scabbard to be the thing hanging off and attached to the left pauldron of the sword babe's outfit. I didn't make the scabbard because (1) I don't know how to draw the fastener for it to attach to the pauldron and (2) it is not really a part of the outfit; more like an accessory. The picture on the manual cover didn't show any footwear, so I guess you'll be left to your own devices regarding what type of boots or shoes will go with the outfit. The Arena outfit was one of the first things I wanted to create when the DAC was started in late 1997, but never had the perseverance to see it through its initial stages. Copying from the picture was tough work, involving a lot of rotation and compromises. Now, in the spring of 1999, I am glad to say that it has finally been completed. Credit goes out to Randle Browne rimwolf@camalott.com for help with the strappy bottom piece of the outfit, and Tom Oldani tomoldani@bigfoot.com for help with the tapered wrists of the left and right pauldron pieces. The outfit's texture is in accordance with that of TetraFabric (TM). Fits female elves and humans. |
 |
This one isn't mine. I first saw it in Kirafall, an enhancement pack for Daggerfall available at TES: The Essential Site. Kirafall is made by Marty Runyon, so this image could have been created by him. Anyway, it was originally more-or-less DarkC in colouring scheme, and I've modified it so that it was in the Black colouring scheme instead. I don't know its original name, so I'm calling it the "loop dress", because it has a hole in the front just below the collarbone. Fits female elves and humans. |
| After having been on the alt.games.daggerfall newsgroup for a few weeks, one of the posters, known to me only as "The Masked Aardvark" jmklass@concentric.net, contacted me via e-mail. He writes the articles for the Arrogant Bastard Magazine, an electronic publication that advocates practical and rational attitudes and thoughts toward life, and also dabbles a bit in the realm of -- in his own words -- DaggerFashion. We soon agreed to an exchange of images, and up for download is a modification of one of those images, one that I now refer to as a Bodybriefer. The original was created from the red-hued bodice of one of the female human's evening gown images, characterised by cups that just cover the nipples, extremely high-cut leg openings, and fishnet construction. I did a little touchup work on it, adding and removing pixels to fit it to the slimmed-down body shape and giving it a more defined outline, while retaining the characteristics of the original. In doing so, its texture has been changed to that of TetraFabric (TM). It has "underwired" cups, is in the DarkC colouring scheme and fits female elves and humans. | |
 |
This is the original "Plain Robes" from the Daggerfall CD, but now in the Black colouring scheme. I would have taken a lot longer to do this if it were not at the request of John Segers jsegers@pegasus.cc.ucf.edu, an avid fan of fashion in Daggerfall, so you have him to thank. This is the hood-down image. Fits female elves and humans. |
 |
This is the hood-up image for the "Plain Robes" in the Black colouring scheme. Fits female elves and humans. |
 |
This is the original "Plain Robes" from the Daggerfall CD, but now in the Black colouring scheme. I would have taken a lot longer to do this if it were not at the request of John Segers jsegers@pegasus.cc.ucf.edu, an avid fan of fashion in Daggerfall, so you have him to thank. This is the hood-down image. Fits male elves and humans. |
 |
This is the hood-up image for the "Plain Robes" in the Black colouring scheme. Fits male elves and humans. |
 |
This is the original "Plain Robes" from the Daggerfall CD, but now in the DarkC colouring scheme instead of the previous, more-or-less LightC one. There are two images for plain robes, one with the hood down and the other with it up. This is the hood-down image. Fits female elves and humans. |
 |
This is the hood-up image for the "Plain Robes" in the DarkC colouring scheme. Fits female elves and humans. |
 |
This is the original "Plain Robes" from the Daggerfall CD, but now in the DarkC colouring scheme instead of the previous, more-or-less LightC one. There are two images for plain robes, one with the hood down and the other with it up. This is the hood-down image. Fits male elves and humans. |
 |
This is the hood-up image for the "Plain Robes" in the DarkC colouring scheme. Fits male elves and humans. |
 |
This is not an article of clothing; rather it is a guide to help one create an article of clothing. This is the image of the female mannequin's body, enlarged fifteen times, with thin black lines drawn along the boundaries of every original pixel. The lines form a grid over the whole image, and can be printed for drawing purposes. This way, one can draw smooth lines on paper with a pencil and eraser, and then mark out the pixel boundaries of the clothing when finished. It then becomes a simple matter to transfer the outline into a graphics program. With the shape done, half the work is completed, the other half being the colouring/texture. The file, once unzipped, is huge, over 400K, and took about 4-5 hours to create. |
This section addresses four topics, namely Andypic, colouring schemes, ordering items and a PAQ (previously asked questions) sub-section that will contain questions from users and any answers I can provide.
ANDYPIC
Andypic, by Andy Polis, is needed in order to put any new pictures into Daggerfall, or rearrange old ones. Any item ordered from the Daggerfall Apparel Catalogue or created by yourself is essentially just that, a picture. A program is needed to put it into the game, and that program is Andypic. Another program, Dagpic, by Dave Humphrey, can also manipulate .IMG and .CIF files, but is as yet unable to import/export texture files.
Andypic comes with its own readme file, which you should examine to familiarise yourself with its commands. It is a command line utility, which means that you tell it what to do by typing in the commands straight from the keyboard, and not from a window or menu. I'm sure it is stated in the readme file, but I'll repeat the fact that Andypic has a command by which you can shift images by a specific number of pixels, both horizontally and vertically. Using this command, there will be no need to know the exact coordinates for any image, as all you would have to do would be to import the image, check out how it looks in the game, then quit the game and adjust it, repeating until it is just right. Examples of use follow:
ANDYPIC TEXTURE.220 /B:PICNAME.PCX /S:24 /X:+5
This puts the image PICNAME.PCX into TEXTURE.220 at position 24 using the coordinates occupied by the previous image in that slot, and then shifts it to the right by 5 pixels.
ANDYPIC TEXTURE.220 /B:PICNAME.PCX /S:24 /Y:-10
This puts the image PICNAME.PCX into TEXTURE.220 at position 24 using the coordinates occupied by the previous image in that slot, and then shifts it up by 10 pixels.
ANDYPIC TEXTURE.220 /B:PICNAME.PCX /S:24 /X:+5 /Y:-10
This combines the above two commands into one.
Another thing that you would need to know is the TEXTURE file to manipulate. Andypic provides interesting information on the contents of almost all the texture files in TEXTURE.TXT, a file that is included with the program. Clothing and armour is race and sex specific, which means that if you put armour or clothing images into the wrong texture files for your character, you won't be able to see them in the game when you play. Please note that it is also possible to add images to the end of TEXTURE and .CIF files, thus increasing the total number of images contained within. For TEXTURE files, this means that it is possible to have more than 111 images per file, up to a usable maximum of 128 (17 more images). You can also "create" new TEXTURE files by by taking any texture file and renaming it so that its extension is one that does not exist among those in the CD (an example is TEXTURE.220). You can then use Andypic to import whatever images you want into this file. However, in order to see these images in the game (both those beyond the original maximum in the "old" and those in "new" TEXTURE files), you will have to hex-edit both FALL.EXE and the SAVETREE.DAT of the savegame you want the images to appear in. It is a tedious process, but it does allow you more flexibility in handing images later on. Those interested in being able to address such images can contact me at the same e-mail address used for orders.
Known Bugs in version 1.30 of Andypic
If you use Andypic's interactive mode, you will only be able to view and export images. You must use Andypic's command line mode if you want to import images.
COLOURING SCHEMES
The concept of colouring schemes is, presumably, a relatively new one to customers who are used to ordering from other sites, and certainly deserves some clarification. On other sites, when you order an item, you would specify the colour you want it in, but here you should specify the colouring scheme, instead of the colour. The reason this is so is because Daggerfall address colours in a particular way, in that pixels that are originally of a certain blue or grey (for those who have dealt with 256 colour palettes, they are specifically the colours 96-111 inclusive and 112-127 inclusive of the palette extracted from any Daggerfall image) are mutable, that is, they can appear as a whole range of colours in the game. Thus, a sweater that was totally made up of mutable blue pixels would be available in the game in blue, or in any of nine other colours including red, green, yellow and brown. Conversely, a similar sweater that was made up of anything other than mutable blue or grey pixels, say black ones, would not appear as any other colour than black. Clearly, because of the way that Daggerfall handles colours, it is extremely impractical to make every item available in every single colour, and therefore far easier to let the game bring about the colours by taking advantage of the mutable colours of blue and grey.
At the top of this page should be an image showing a range of colours, along with the corresponding names to their right. These are the colours available in the various colouring schemes you can order items in. As stated at the top, the colour black is in a colouring scheme of its own, as it is the only immutable base colour that items are available in. That is the only colour that the Black colouring scheme contains. The other two, DarkC and LightC, have as their base colours cobalt and azure respectively. The following nine colours below each base colour are the range of colours that the base colour can be changed to once inside the game. The difference between DarkC and LightC lies in their luminosity, or brightness, and consequently, the brightness of their mutable colours.
What does all this mean? All it means is that, when you want to order an item in certain colours, you should first find out what colouring scheme those colours belong to, and then state the colouring scheme, instead of the colour, when ordering. If the colours you want are from different colouring schemes, then make two orders of the same item, one from each colouring scheme. Do note that the item(s) ordered will be sent to you in the base colour of the colouring scheme they were ordered in, and that you should be able to find the colours you want by browsing through the clothing shops, general stores and pawn shops after having put it / them into the game. The technically-savvy can also perform colour changes on their own, by hex-editing the SAVETREE.DAT file of the appropriate savegame.
ORDERING
All orders are presently conducted through e-mail, where there are no restrictions on the form they can take, so some guidelines should be followed:
1. You can write your order in any style and tone you want, but please be tidy. If you do not have anything in mind to follow, then I suggest the following style of presentation, with the contents as an example:
| No. | Description | Construction | Colouring Scheme |
| 1 | Classic Brassiere | lace | DarkC |
| 2 | Bikini | lace | DarkC |
| 3 | Garterbelt & Stockings | fishnet | DarkC |
| 4 | Elbow-Length Gloves | plain | DarkC |
and so on...
2. Try not to make invalid choices. For example, the bodysuit is only available in plain construction, so ordering it in fishnet or lace construction would get you a return e-mail asking you to re-define your order.
3. Remember that you need to state the colouring scheme, not the colour, that you want your item(s) in. Determine the colouring scheme by finding out which scheme the colours you want belong to. This will save me the trouble of figuring them out for you, which will speed up response time.
4. Be as explicit as possible. Do not leave out details regarding any single item in your order, especially those concerning construction or colouring scheme.
5. Remember to include your character's particulars somewhere in your order, specifically your character's name, sex, race and profession. The race is especially important. If your character's race does not follow standard conventions, for example, you consider your character's race to be "Wood Elf" but use the body of a "Redguard", then let me know so that I can arrange things for you.
6. I'm not sure how to say this so please don't take offense. Here goes: try not to be too greedy. Do not send me an order asking for everything I've got; that's a lot of images (140+ at present)! You may not like everything that's available, so try to be rational and order what you think your character would like. It is perfectly alright to make another order at a later point in time, either for the same character or a different one.
7. The items available through the Daggerfall Apparel Catalogue are not rigid and unchanging. At times, new items may be added, or existing ones modified or in as-yet-unheard-of-cases, removed. Should any previous orders you have made contain items that were modified or removed, then that particular order will be sent to you again, with the items in question either updated or removed. You are, of course, free to do whatever you wish with the old images.
8. Technically, you can't order if your character is an Argonian or Khajiit, as I've discovered that the Argonian and Khajiit bodies that are originally present on the Daggerfall CD are radically different from the other Elf and Human bodies, differing in terms of outline, orientation and shading/texture. The items available through the Daggerfall Apparel Catalogue will not fit Argonian or Khajiit bodies, and as a result there will be excessive or insufficient pixels in the wrong places, so things won't look right. Near the top of the page I did mention that some work was done in the modification of the Khajiit body, but this is exceedingly tedious and has been put on the back burner indefinitely. You're free to order if your character is an Argonian or Khajiit, but you have been advised that things won't look so good. Of course, I would be overjoyed if you would volunteer to take up the task of completing the body, and will happily supply you with the raw images and specifications that you will require. Once a suitable body has been developed, one will be sent to all existing and future Khajiit customers. This offer applies to Argonian bodies as well.
PAQ SUB-SECTION
This area is called the PAQ sub-section because it contains any questions deemed worthy of inclusion that have been previously asked by customers (whether prospective or not), even if they have only ever been asked once. Following below are the questions and their respective answers, in the order I received them.
| Question: | Do you supply coordinates for use with Andypic for the different clothings available? |
| Submitted by: | Selwyn Hope |
A long time ago I didn't consider absolute image coordinates to be an important issue, since I could rely on using Andypic's ability to shift the position of images by a certain number of pixels to get things into place, and asked everybody else to do the same. I realise now that I was wrong: a complete set of -- in this case -- clothing coordinates, proves to be instrumental in "creating" a new texture file from the ground up. Having the coordinates handy saves time on having to load up the game to check the positioning of images, and there won't be any adjusting and re-adjusting problems due to overestimation or underestimation of the offset of an image. Following is a set of absolute image coordinates that have been tested with all the items available from the Daggerfall Apparel Catalogue in plain construction. If the item you are adjusting is not of plain construction, then you may or be one or two pixels off your ideal position; you can then use Andypic's "/X:-+#" and "/Y:-+#" parameter to adjust the last one or two pixels manually (and I am also assuming that you have the slimmed down body available from Andyfall or the Daggerfall Apparel Catalogue).
| Description | X | Y |
| 3/4-Cup Brassiere | 237 | 46 |
| Classic-Cup Brassiere | 237 | 46 |
| Demi-Cup Brassiere | 237 | 46 |
| Full-Coverage Brassiere | 237 | 46 |
| Soft-Cup Brassiere | 237 | 46 |
| Strapless Brassiere | 237 | 60 |
| Bikini | 243 | 86 |
| Briefs | 243 | 85 |
| G-String | 243 | 85 |
| Shorts | 240 | 85 |
| Tanga | 243 | 87 |
| Thong | 243 | 85 |
| Garterbelt & Stockings | 231 | 85 |
| Knee-High Stockings | 231 | 125 |
| Thigh-High Stockings | 231 | 112 |
| Elbow-Length Gloves | 223 | 70 |
| Fingerless Gloves | 223 | 82 |
| Full-Length Gloves | 223 | 61 |
| Wrist-Length Gloves | 223 | 92 |
| Basque | 231 | 60 |
| Bodysuit | 237 | 43 |
| Bustier | 237 | 57 |
| Merrywidow | 231 | 46 |
| Teddiette | 231 | 46 |
| Teddy | 237 | 46 |
| Thong Bodysuit | 237 | 43 |
For those who want to derive their own set of absolute image coordinates, the following information will be helpful:
1. The coordinates indicate where the top left hand pixel of the image will be. Note that even the "blank area" in an image counts: the computer moves an image based on the size of its canvas, and not just the actual size of the image in that canvas. Therefore it is a good idea to crop away all the extra canvas area from an image.
2. The game understands these coordinates to be the displacement from the top left pixel of the Daggerfall "Character Sheet" screen, the "F5" screen. To determine the coordinates for your particular image, first take a screenshot of the "F5" screen with nothing equipped on your character. Then load the screenshot in an image editor like Paint Shop Pro and try to paste your image correctly onto your character's body. Once you are certain about the image's position, all you have to do is measure the displacement of the top left hand pixel of the image from the top left hand pixel of the screenshot. You will get a pair of coordinates X and Y.
3. Now load up Andypic and input your new coordinates into the image file (.IMG, .CIF or TEXTURE), then load the game and check the position of your image. If it is off then you made a mistake in the pasting or measuring process, but most of the time it won't be way off and you can just use Andypic to manually move the image around a few pixels.
| Question: | How do I go about expanding existing texture files (adding images beyond the original limit) and "create" new texture files to put images into? |
| Submitted by: | Carey Sauerbrun |
The procedure to enlarge an existing texture file or to "create" a new one is nearly identical except for one or two parts, so I will break it down into steps below. But first, a brief explanation as to what is happening when texture files are enlarged or "created":
When a texture file is enlarged, it means that a program (in this case, Andypic) is used to add images to the end of a texture file. This image can be anything you like, and be of any size, as long as it is not larger than the character's display area in the inventory screen (I have a feeling that images larger than this might cause problems somewhere). The image that is put into the texture file will probably not be centred correctly, so adjustment of its x-y coordinates may be required. The game's programming will not realise that the number of images in the texture file has increased, so some hex-editing will be necessary to get the new image(s) to appear in the game. You have a choice of editing either the file FALL.EXE or SAVETREE.DAT, or both.
When a texture file is "created", it means that an existing texture file is copied into an empty texture file, meaning that the new file uses an extension that did not previously exist on the CD. Although the CD contains texture files whose extensions range from 000 to 512 inclusive, there are some extensions within this range that are not being used, and these "empty" texture files, in practice, can be used as user-defined texture files. For best results, the texture file being copied to form the new one should contain images that are also displayed in the inventory screen, such as armour, clothing or weapons. It is not known what will happen if a texture file that does not match this criteria is used. After "creation", Andypic is used on the file to add/overwrite images. Adjustment of coordinates and hex-editing is very similar to that done for enlargement of texture files. Texture files are not created from scratch as there is still insufficient knowledge as to how it can be done, and as a result can only be "created" by copying an existing texture file and overwriting the images within.
Enlarging a Texture File
The texture file used in this example is TEXTURE.237, which contains the clothing images for female human characters. It has a total 111 images, and can be expanded to contain up to 128 addressable images. To add the first image type the following at the command prompt in the ANDYPIC directory:
ANDYPIC TEXTURE.237 /B:PICNAME1.PCX /S:112
This puts the image PICNAME1.PCX into TEXTURE.237 at position 112. It is not known what the coordinates of the image will be, but that can be adjusted later on. Andypic will state that you are adding an image to the end of the texture file when it requests confirmation to proceed. It is not possible to add an image a position behind the end, that is, you cannot add an image to position 113 if there is no image in position 112 because position 112 is currently the end of the texture file. After adding an image into position 112, you can then add another image into position 113, and after that another in position 114 and so on, up to and including position 128. I believe you can continue to add images in positions after 129 and above, but no amount of hex-editing will allow them to appear in the game. If you are running out of positions for images, it may be time to overwrite some that you don't want, or "create" a new texture file and effectively give yourself another 128 positions. Now that you have enlarged a texture file, you will need to let the game know that they exist and allow for their display within the game itself. For information on how to do that, refer to Assigning New Images through Hex-Editing below.
"Creating" a Texture File
The name of the texture file being created in this example is TEXTURE.220, a designation not found on the CD originally, and the texture file being copied is TEXTURE.233, which contains the inventory images of weapons for female characters. To copy the file type the following at the command prompt in the ARENA2 directory:
COPY TEXTURE.233 TEXTURE.220
This will copy the contents of TEXTURE.233 into a new file called TEXTURE.220. You can then use Andypic normally to replace the images in TEXTURE.220, and can also enlarge the texture file by adding images to the end of the file (refer to Enlarging a Texture File above for information on how to do that). You will also need to let the game know about the existence of the new texture file and its images, so that they can be displayed within the game. Continue on to Assigning New Images through Hex-Editing below for the relevant information.
Assigning New Images through Hex-Editing
Assigning new texture files and images is done through the use of a hex-editor (DISKEDIT from Norton Utilities is an example of a hex-editor). The objective is to modify either FALL.EXE in the ARENA2 directory or SAVETREE.DAT in the SAVE? directory (where "?" is a number from 0 to 5 inclusive) so that the game will either generate items and assign these new images to them, or change the image assigned to an item already in the character's possession respectively. The biggest difference between choosing to edit FALL.EXE or SAVETREE.DAT is that in FALL.EXE, you would be editing the characteristics of a particular category of item, that is, the change will affect all future items in that category generated by the game, while in SAVETREE.DAT, the change only affects the items that have been modified, while items generated by the game remain unaffected.
For those new to hex-editing, an explanation of some jargon and terminology that will be used later is provided here, as follows:
| ASCII | American Standard Code for Information Interchange -- an established system where the value contained in a byte is representative of a certain symbol (like a letter, number, punctuation mark or other symbol not found on the keyboard), used to simplify the task of hex-editing and other communications/programming activities involving computers |
| byte | a pair of digits using the hexadecimal numbering system, or a set of eight digits using the binary numbering system -- in a hex-editor bytes are displayed using the hexadecimal numbering system for ease of display and modification |
| hexadecimal | a system of counting with numbers, where a single digit can take on values of 0-15 inclusive, and is represented by the symbols 0-9 for the values of 0-9, and A-F for the values of 10-15 -- in the decimal numbering system, one counts up to 9 before carrying over to get "10" (which is worth 10) and similarly, in the hexadecimal numbering system, one counts up to 15 (in this case F) before carrying over to get "10" (which is worth 16) |
| hex-editor | a program that allows humans to see a computer data or program file the way the computer sees it; as a sequence of bytes ranging in value from 0-255 inclusive, and to change the values of these bytes as they see fit |
In this example, the hex-editor is used on SAVETREE.DAT, which can be found in the save game directory of the character whose items you want to edit. The numeric component of the save game directory's name corresponds to the slot that your character's game was saved in, in that "0" is the slot in the top left corner, and moving downwards we would have "1" followed by "2", and the slot in the top right corner is "3", followed by "4" and "5".
Use the hex-editor on SAVETREE.DAT, and then use the editor's search function for the name of the item you want to edit (conduct the search in ASCII, not hexadecimal). This can prove confusing if you have multiple items with the same name, but you can edit any item that matches the criteria specified. You can also change the name of the item, which can have a maximum length of 32 characters including spaces, by typing the new name over the old one in the ASCII portion of the editor. A unique name serves both to personalise the item and to make searching for it easier in the future, both in the game and in the editor.
Now that you have found the item you want to edit, start at the first letter of the item's name and go forward 50 bytes (the byte that you start at doesn't count). The byte you are now at (BYTE50) and the following byte (BYTE51) control the item's picture, both in terms of texture file and slot position. This control is not split evenly between the two bytes, that is, BYTE50 is used to determine both the slot positon and to a minor extent, the texture file, while BYTE51 is used in conjuction with BYTE50 to determine the texture file for the image. The values of these two bytes must be changed to indicate the location of the new image for the item.
First take the slot position of the image you want to use for this item and subtract one from it (this is because the game considers 0 to be position 1, 1 to be position 2, 14 to be position 15 and so on). If the texture file the image belongs to has an odd-numbered extension, then you must also add 128 to the number. Now convert it to hexadecimal, using the in-built calculator in most hex-editors or a scientific calculator (you can also do the conversion manually on paper, but it is quite tedious), and change BYTE50 to this value.
Next take the extension of the texture file that the image belongs to and divide it by 2. If the extension is odd-numbered, then also round down the answer to the nearest whole number. Convert this number to hexadecimal, and change BYTE51 to this value.
Among other things, the colour of an item can also be changed with a hex-editor, provided that its image is of a mutable blue or grey. BYTE56 controls the colour of an item, and entering values of 00-09 inclusive (for mutable blue images) or 10-19 inclusive (for mutable grey images) will set the colour of the item to one of ten colours similar in shade to those used for the DarkC and LightC colouring schemes, in descending order. This saves one the hassle of having to search the stores for the item with the right colour.
Many other characteristics of an item can also be changed through hex-editing, with examples being cost, depth, enchantment points, protective value, type and weight. For more information on how to do all these and more, visit A.C. Crackpot's Daggerfall Page.
After all the images you want have been assigned to their respective items, and you are through fiddling with them, the last thing to do would be to have your character wear them and see if they fit, and use Andypic to adjust them if they do not.
| Question: | When bringing new images into the game, should they replace images that are located / worn in the same area, like bra with bra, bodysuit with shirt, stockings with boots and so on? |
| Submitted by: | Carey Sauerbrun |
This was one of the predicaments I found myself in while attempting to replace images when I first started out. Every item in the game belongs to a general category (like male clothing, female clothing, weapons or gems and so on) and a sub-category within that category (brassieres, loincloths and tights are sub-categories of female clothing for example). The images that an item can be assigned are separately specified for every sub-category in the game, and must all come from the same texture file and must occupy adjacent slot positions. All this data is stored in FALL.EXE, and basically it means that there is a limit to the number of possible images that an item can be assigned. Furthermore, when dealing with a texture file that is originally used by the game, you have to be careful about the images that you add or replace, as well as their slot positions, because the game directly refers to these files when assigning images for an item, and it would be difficult to avoid a lot of adjusting/editing work on both the texture file in question and FALL.EXE with anything more than a few small changes.
When adding or replacing images in the game, there are two ways to make them appear in the game, each with its own advantages and disadvantages. One way is to use the new images to replace old images that are already being used for assignment to items by the game. The advantage of this method is that it is simple; all you have to do is overwrite the old image and then adjust the new one with Andypic, and that no hex-editing is required. One disadvantage is that the number of possible images that you can have is limited by the game. For example, there are only three images available for assignment to the item "loincloth" (both male and female versions each have three images available), so you would only be able to have three different images in the game at any one time, even if you had more than three to start with. Another disadvantage is that there may not be any suitable images for replacement, because no suitable similar item exists in the game. The game does not have any clothing images or items that you could replace with the gloves you can order from the catalogue, for example.
The other way is to "create" a new texture file and fill it with the new images. Try to keep images in different sub-categories adjacent to each other, like all the bra images together, all the stocking images together and so on, so that it is easier to remember where an image is and assign it to an item later on. The advantage of this method is that you can have as many images as you want for each sub-category of item, and can add in images for items that do not have parallels in the game.The disadvantage is that it requires more work than the former, both with Andypic (to bring in and arrange all the images) and a hex-editor (to assign the new images to items since the game isn't doing it automatically).
All in all, the method to use depends on the number of images you have and whether or not these images have parallels in the game. With only a few images, the former method is quicker and easier. With many images or images without parallels, the latter method is more advisable.
Additionally, it is also important to note that specific articles of armour and clothing take up different positions on the body. This also applies to other items equipped on the body like weapons and amulets, torcs, bracers, marks, gems and so on. There are seven different positions for armour and four different positions for clothing. Thus, at any one time, your character can be wearing a total of 11 articles of armour and clothing, which will comprise of a helm, left and right pauldrons, gauntlets, greaves, boots, upper body clothing, lower body clothing and two cloaks (any combination of casual or formal cloaks). The position an article of armour or clothing occupies depends on the item category and sub-category it belongs to. At present, the only way to change the position occupied by an item is to change the category and/or sub-category that it belongs to; it is not possible to directly specify the position an item occupies, because it is not known where this information is stored in either FALL.EXE or SAVETREE.DAT.
Besides the position occupied by an item, its "depth" must also be considered. For lack of a better word, the "depth" of an item determines if its image will be displayed above or below the image of another item if they happen to overlap. This "depth" is stored in BYTE66 (count forward 66 bytes starting from the first letter of an item's name) of each item in SAVETREE.DAT. Acceptable values range from 00-FF inclusive, where a smaller value means that the image of the item will be displayed below the image of another item with a higher value and vice versa. It is not known how items with the same BYTE66 value will be displayed if both are equipped at the same time, but it is known that between armour and clothing items with the same BYTE66 value, armour will be displayed over clothing. Graphical anomalies can occur when replacing images without paying heed to the BYTE66 value of an item. For example, replacing a shirt image (all "shirt" sub-category items have a BYTE66 value of 28 initially unless changed by the user) with a bodysuit image, and then equipping the bodysuit with say, casual pants (which has a BYTE66 value of 10 initially), would cause the bodysuit to be displayed over the casual pants instead of under. This can be corrected by changing the BYTE66 value of either the shirt (now seen as a bodysuit) or casual pants, but a better way would be to have the bodysuit image assigned to an item whose BYTE66 value is already suitable for it.
As you know, two items that occupy the same position cannot both be equipped at the same time. The item currently occupying a position is automatically unequipped if another that would occupy the same position if equipped. At this point, I would like to bring to your attention this dilemma: there are only two non-cloak clothing slots (upper body and lower body), so how can one's character wear both undergarments and normal clothes at the same time, or in the case of female characters, wear both stockings and panties (both of which would logically belong on the lower body position) at the same time? Since it is still not possible to create new positions, the compromise (not a very good one but workable nonetheless) is to use some of the armour positions as clothing positions. The items occupying these positions are still considered to be armour by the game, but have clothing images instead of armour images. The category of an item in SAVETREE.DAT is controlled by BYTE32 and its sub-category by BYTE34. Following is a table of items and how to get them into the game, while still being able to wear them in combination with most other things. You are of course encouraged to experiment on your own, in the hopes of finding a better method or system. In all cases, the objective is to buy or otherwise obtain the "initial item", and then make modifications to it. It is assumed that you already know how to change the name and image of an item on your own.
| desired item | initial item | change BYTE32 to | change BYTE34 to | effect |
| gloves | tights | 02 | 01 | gloves are treated as leather gauntlets and take up gauntlets position on body |
| stockings | tights | 02 | 02 | stockings are treated as leather greaves and take up greaves position on body |
| shirt or dress | shirt or dress | 02 | 00 | shirt or dress is treated as leather cuirass and takes up cuirass position on body |
| pants or skirt | pants or skirt | 02 | 02 | pants or skirt is treated as leather greaves and takes up greaves position on body |
Notice that this system doesn't always work (a character can't wear panties, stockings and a skirt all at once, but it may be possible if one of them was shifted to the position occupied by the cloak(s)...), but I don't know of any better system so this will have to do for now. This problem of "positioning" is one I have often discussed with Daniel Fee (who runs the A.C. Crackpot page) in the past, but have not solved satisfactorily.
I have finally come to the end of my answer for this question. I apologise for the poor organisation of this answer, but there is simply so much to talk about and no easy way to arrange it. I have tried my best to resist the urge to just spew out everything I know and instead organise it logically. I will make changes to this answer if I can come up with a better way to convey what I know, some day. In the meantime, those seeking clarification need only drop me a line. Whew...
| Question: | Why is it that I cannot seem to get new images to appear in the game, even though Andypic displays them correctly and gives me the option to overwrite them? |
| Submitted by: | Aaron R Townsend |
Apparently, Andypic doesn't work well when trying to give it commands via the DOS box in WIN9X, and that it won't update the texture files properly unless one has already restarted in DOS mode. To make sure the texture files have been updated, you can check the dates of the texture files and see if they match the date in your computer. If they don't, then it's a sure sign that something went wrong somewhere.