| The Clone Trooper Helmet |

|
 |
 |
 |
 |
 |
 |
 |
 |
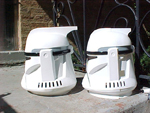
| Here are some of the progress pictures of the modifications I have been making on my Kellogg's clone trooper helmet mask this summer. |
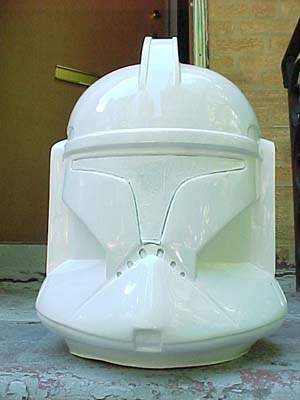
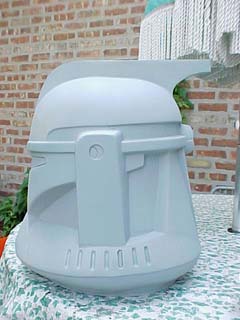
| I started mine a few days before Vince started working on his. Vince was improving his based on the mistakes I was making on mine. I decided to affix the two halves of my helmet together at an angle so it would have a more trapezoidal shape over all. Vince set his helmet apart as far as it could go, butting the two halves together at the seam to give the helmet the maximum amount of front-to-back head room. We left the visors in place and masked off both the insides and the outsides. We are intending to make these fit-to-wear as costume pieces eventually. I cut out and enlarged the holes in the frown to a dome-shape. I reinforced the entire inside of my helmet with fiberglass and resin. It was a mess! Vince used fiberglass cloth and resin to reinforce the areas of his helmet he intends to modify. His helmet is much lighter this way, however, it doesn't seem as sturdy as mine. It will be necessary eventually to put a lot of padding on the inside of mine, because the fiberglass is mighty pointy! We constructed new fins and ear pieces out of ABS plastic pieces we cut to fit the new shapes of our helmets. We applied BONDO body filler, BONDO scratch & dent filler and BONDO glazing putty to the seams and voids. We cut off the original neck-rings and inverted them and replaced them on the neck of the helmets. I reinforced mine with A LOT of fiber glass and resin, since the entire weight of the helmet will be resting on this area. After I had everything attatched to the outside of the helmet, I applied a rubberized automotive trunk liner spray to seal the inside. It rounded-off most of the pointy areas of the fiber glass, but it also made the inside quite smelly. It will be very difficult to wear this for any length of time because of the fumes. I am not going to do this on my next helmet. |
| June 2002 |
| June 2002 |
| September 2002 |
| September 2002 |
| July 2002 |
| August 2002 |
| I had always intended my helmet to be white and new-looking. I wanted it to be as flaw-less as possible. So I really took my time adding layers to the dome and fin joints, since these were not going to be hidden with either color rank designation stripes or "weathering" effects. I chose to fill in the small square openings in the mask. I constructed a 7th vertical slot under the ear piece. The clone troopers seen in the movie have only 6 slots. I know mine will be inaccurate in this regard, but then there are design flaws in this helmet in general. I am striving to re-create the look and the quality of the appearance more than I am going to be a stickler for absolute accuracy in the minute details. The fin is made of 6 separate pieces. I filled the center of the new fin with styrofoam to help maintain it's shape while I was working on it. I had also intended to add a functioninf light to the fin. I will re-constuct my next helmet with a better accommodation for a light. |
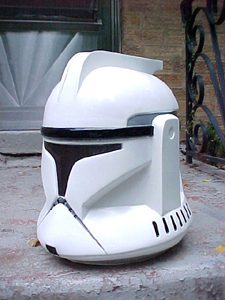
| After weeks of sanding and filing and shaping and re-doing I was ready to put on the first of 4 coats of sandable primer. I used an automotive grey at first, because I knew I was going to be doing a lot of sanding on it still and the grey gave me a contrast where I could see the problem areas. I used a white sandable primer for the final 2 primer coats. By the end of all of that, it was very, very smooth. I couldn't wait to see what it would look like painted. I used a white automotive glossy enamel paint. Next time I will start with two cans of it and paint it all at once. This was a very good quality paint, but it dried very quickly. I ended up putting on 4 coats of the white paint using one whole can for every coat. It ended up having a 90% consistant finish. There are a few spots that are slightly 'pebbly' Over all, it shines like a new penny and that was the look I was striving to achieve. I let the white coats dry very thoroughly before I masked of the areas for the detail paint. |
| I used the same black and grey glossy enamel paint I had left-over from painting my storm trooper helmet pieces for the details on my clone trooper helmet. The grey went on fine! No problems at all. I sprayed the frown grey and used that as a base for the darker gunmetal grey acrylic paint I brushed over the frown. The black details ended up giving me some problems. An agent in the paint ran under the masking tape. These runs did not harden like the rest of the enamel, so I was able to remove most of it with a solvent that did not affect the other paint. There were some small areas that I had to re-paint over by brush. Again, it isn't 100% perfect, but I do not have to resort to "weathering" the finish to make it look good. <-- The paint job on the slots looks even better than this in person. |
| October 2002 I have just received 2 more Kellogg's clone trooper helmets that I intend to first use as props for our this year's Halloween costumes. Then I plan on remodeling at least one of them like this one I have been working on, but with many improvements that will ultimately make it much more wearable as well as good-looking! |
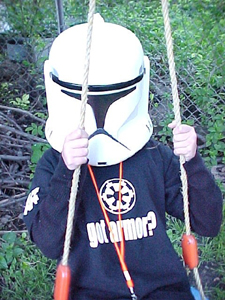 |
| May 2002 |
| We first received the Kellogg's helmets from Canada in May and wore them to the premiere weekend of Episode II at the local theater in Skokie. Here is Quincy on the back yard swing after we got back from the movie. We already got a lot of compliments and "hey, where did you get those?" from folks at the theater. |
| before..... |
| ....after |
 |
| before & after |
 |
 |
 |