| Color Sanding to Remove Scratches, Orange Peel, and Other Surface Defects |
| I took an autobody repair class some years ago, and I learned exactly how the professionals make those perfect paint jobs on show quality cars. You know the cars I mean--absolutely no orange peel, bugs, drips, "fish eyes," or dirt in the paint. The paint certainly didn't come out of the spray gun like that. A method called "color" sanding is used to flatten the paint, remove defects, and give it a finish as smooth as glass and as reflective as a mirror. I've tried the technique on automobiles before and it works great. The basic process is to wet sand and gradually move to finer and finer grit ending with 1500 grit or finer, polishing with fine cut cleaner and swirl remover such as those offered by MeGuire's Automotive Finish products, and then waxing (if applicable). The grit of sandpaper to start with varies depending on the "toughness" of the surface you are sanding and the extent of the defect you are trying to remove, e.g. is the scratch visible but does not catch your fingernail edge when dragged across it or does your fingernail catch. Over the years I've noticed other applications in which color sanding could produce some nice results. Some examples are "tree pinstripes" left on my vehicles left by brush and branches during my backwoods hunting excursions, the clear plastic gauge lense cover in my truck (that covers the speedometer, tachometer, etc), the plastic lense on my Timex watch, and the plastic lense on my scuba diving computer. Each of these items had numerous annoying scratches in them that drove me crazy until I decided to apply the color sanding theory to them. The most recent job I've done is the scuba computer, and I decided to take some step-by-step pictures to show you. Before you jump in and try color sanding, make sure to read my Important Note found at the bottom of this page because it can potentially be easy for things to "go south" and turn out worse then when you started. Trust me.... |
| Important Note: The surface you are sanding/polishing can vary from only a few mils thick such as paint up to several inches thick in the case of plastic/lexan. I've been using the technique for several years and am quite comfortable doing it, but believe me it takes practice. If you sand too much on surfaces such as paint you can obviously wear through the paint layer down to the primer layer or even to bare metal. If you have never done this technique before, I highly advise against doing your first attempt on something really important (such as your brand new vehicle). Rather, try the technique on something that doesn't matter so much if it doesn't turn out right. In the case of paint, take a piece of scrap metal and spray some paint on. Let it dry for a few days and color sand it. The spray quaility of spray can paint is usually much worse than a profesional automotive grade spray gun, so practicing on a test piece of metal would be good practice. If you are planning on color sanding a clear coat, spray a test piece of metal with a primer, then the desired color (make sure you use a non-gloss flat paint because with a gloss paint it will be difficult to tell if you've worn through the clear coat), and then the clear coat. This will replicate what you intend to work on, and you can see what the surface looks like when you make a mistake. Clear coat paint can be hard to work with and is often sprayed on vehicles from the factory as thin as possible. In the case of plastic you can practice your skills on a scrap piece. Try this at your own risk. I cannot be responsible for any damages you may cause to your property or someone else's. This page should be considered nothing more than a general guide to color sanding. It's an art, not a science. You won't learn everything you need to know by merely reading my page, someone else's, or a book. I took a college class in which I learned this technique. I've had a lot of practice at this, but I've also made some mistakes along the way. If you've never heard of color sanding before, I hope you've learned that sanding a car's paint is not always a bad thing. Color sanding is a learned skill like most anything else. I recommend talking with an autobody repair specialist, take your time when you work on your project, practice on something unimportant if you've never done this before, and if you don't feel comfortable doing it then don't. You could always pay me to do it : ) |
 |
 |
 |
 |
 |
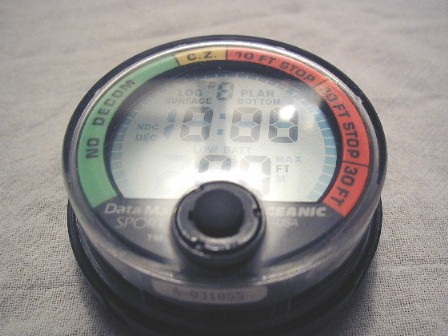
| Step 1: Estimate the damage to determine what sand paper grit you should start with. In this example I'm sanding a fairly thick lense on a scuba diving computer. Even with 24 grit sand paper it would take me a while to sand through and destroy the lense, so I know I have a wide range of grits to select from. I decided to start with 320 grit sandpaper to start wetsanding. I could start with a rougher grit, but I generally don't like to start with a grit that will leave a deeper scratch than the one I am trying to remove. I've occasionally used 180 grit dry sandpaper, but that's only for severe scratches on thick plastic surfaces in which I could feel my finger drop into the scratch and could safely sand more material off. 180 grit should never be used for color sanding paint. It's too rough and will cut right through the paint layer in just a few swipes. On my dive computer, I can feel the large scratches with my fingernail. For automotive paint color sanding for small areas like scratch removal, I often start with about 600 grit wet sanding. For a freshly painted vehicle I normally start with 1000. The grit level all depends on how bad the surface in question is, and how fast you want to do the job. Keep in mind that you can always choose a grit too fine and just take longer to do the job, but if you choose too rough a grit to hurry the job you could ruin it. Keep in mind, the whole intent of the color sanding process is to remove just enough material to eliminate the defect. Concerning paint, you don't want to remove too much and wear through the top paint layer or let the sublayer color bleed through, and in the class of plastic lenses you don't want to weaken the structural integrity such as the lense on my dive computer. I could tell by looking at the scratches in this example that the amount of material removed from my dive computer lense will be quite negligable and will not affect the structural integrity of the lense and will not be significantly weak enough to fail at depth while diving. |
| Step 1 Picture (nice and scratched) |
| Step 2: Start sanding! Ninety-nine percent of the time I am always wet sanding from start to finish. Very rarely do I do any dry sanding. Wet sanding should always be done with anything from 320 grit and finer, and make sure to use the appropriate paper for use with water. In Picture 2 I already wet sanded with 320 and just finished with 400. It looks awful, doesn't it!?!? Have no fear, it gets better. I know when I'm done sanding plastic/lexan when I can no longer see the original scratches. When color sanding a car, you can see the orange peel texture as you start sanding. The tops of the peaks become dull, and the "valleys" remain shiney. As you slowly wear down the peaks you can see the entire surface eventually become dull (this is normal and an expected thing). I normally stop color sanding a car with the starting grit just after the peaks are no longer visible. I don't want to take off any more paint than I have to. This is where you have the most potential to take too much material off especially along sharp edges where you are prone to apply more force, so you must be extra careful. This is why a show car typically has several layers of clear coat applied. They fully intended to color sand the car and want enough paint on so they won't have to worry about easily sanding through. Many paint jobs from the car factory often have as thin a clear coat as possible to cut costs and is often too thin to even bother with. I've been able to completely sand and/or do touch-up scratch fixes on Toyotas though. Every vehicle manufacturer is different, so be careful. It's better to start with a grit too fine than too harsh. |
| Step 2 Picture (yikes, it looks worse now!) |
| Step 3: Continue with finer and finer grit. In picture 3 of the dive computer I started with 1000 grit and just finished with 1500 grit. Notice that the surface looks a lot less hazy since the 400 grit sand paper. Concerning paint, you still have potential to wear through a paint layer so you still need to be careful especially along sharp edges. Since the original defects are gone, you only trying to remove the scratches left by the previous grit sandpaper. Regardless of the material type I am sanding, whether it's paint, plastic/lexan, or even aluminum (I've polished truck wheels this way before), I always end with at least 1500 grit sandpaper. Stopping with anything coarser will still leave visible scratches even even after buffing. |
| Step 3 Picture (starting to look better now) |
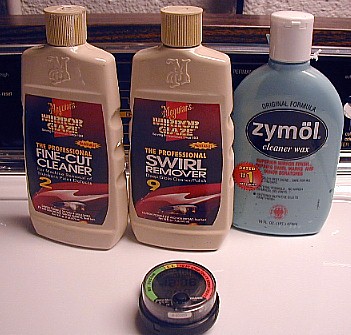
| Step 4: This is the home-stretch and consists of buffing and waxing. I prefer the buffing compounds made by Meguire's (pictured at the end of this page). For small areas such as the dive computer, I just use a rag and do the work by hand. For larger areas such as a full car, by all means use a buffing machine. I start with MeGuire's #2 fine cut cleaner. It removes the scratches left by the 1500 grit sand paper. Then I use MeGuire's swirl remover. It removes the marks left by the fine grit in the #2 cleaner. If using a rag, use a different rag for the #2 cleaner and swirl remover, and if using a machine buffer make sure to use different pads. You don't want any residual cleaner grit to remain from the cleaner while using the swirl remover because swirl marks will inevitably remain. Finally, add a coat of wax of your choice if applicable. |
| Step 4 Picture (looks like new!) |
| Here's a picture of the MeGuire's polish and Zymol wax I use. |