|
|
|
|
|
|
|
|
|
|
|
|
|
|
|
|
|
|
|
|
|
|
|
|
|
|
|
|
|
|
|
|
|
|
|
|
|
|
|
|
 |
|
|
|
Battery Compartment Upgrade |
|
|
|
|
|
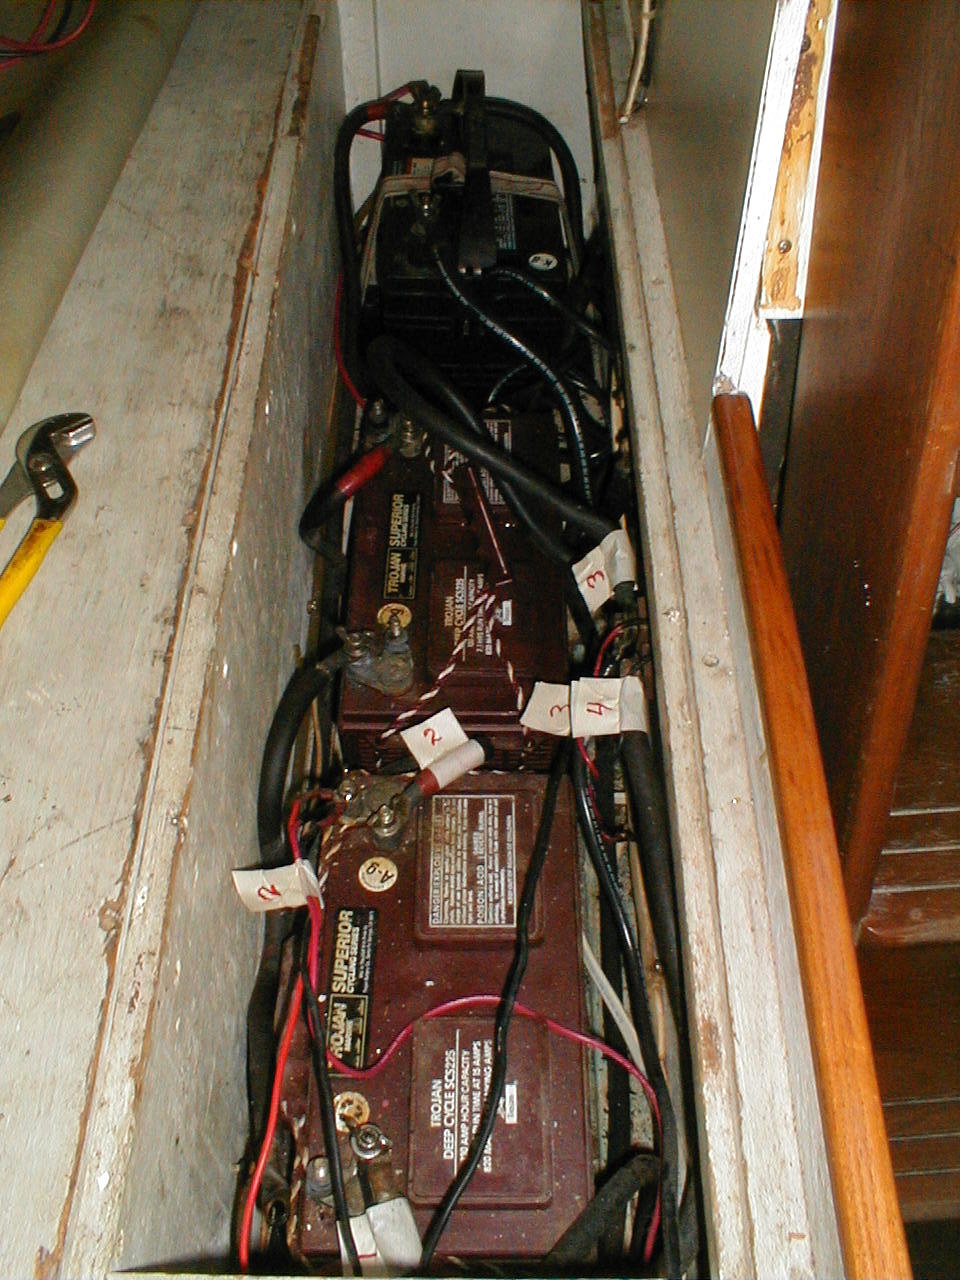
A project that often gets overlooked on an older boat is the battery compartment. Cruisers and DIY'ers certainly enhance and maintain their house and starting battery systems, but few delve deeper unless absolutely necessary. While we were upgrading our battery bank system it became apparent that ours warranted some attention prior to our moving aboard full-time.
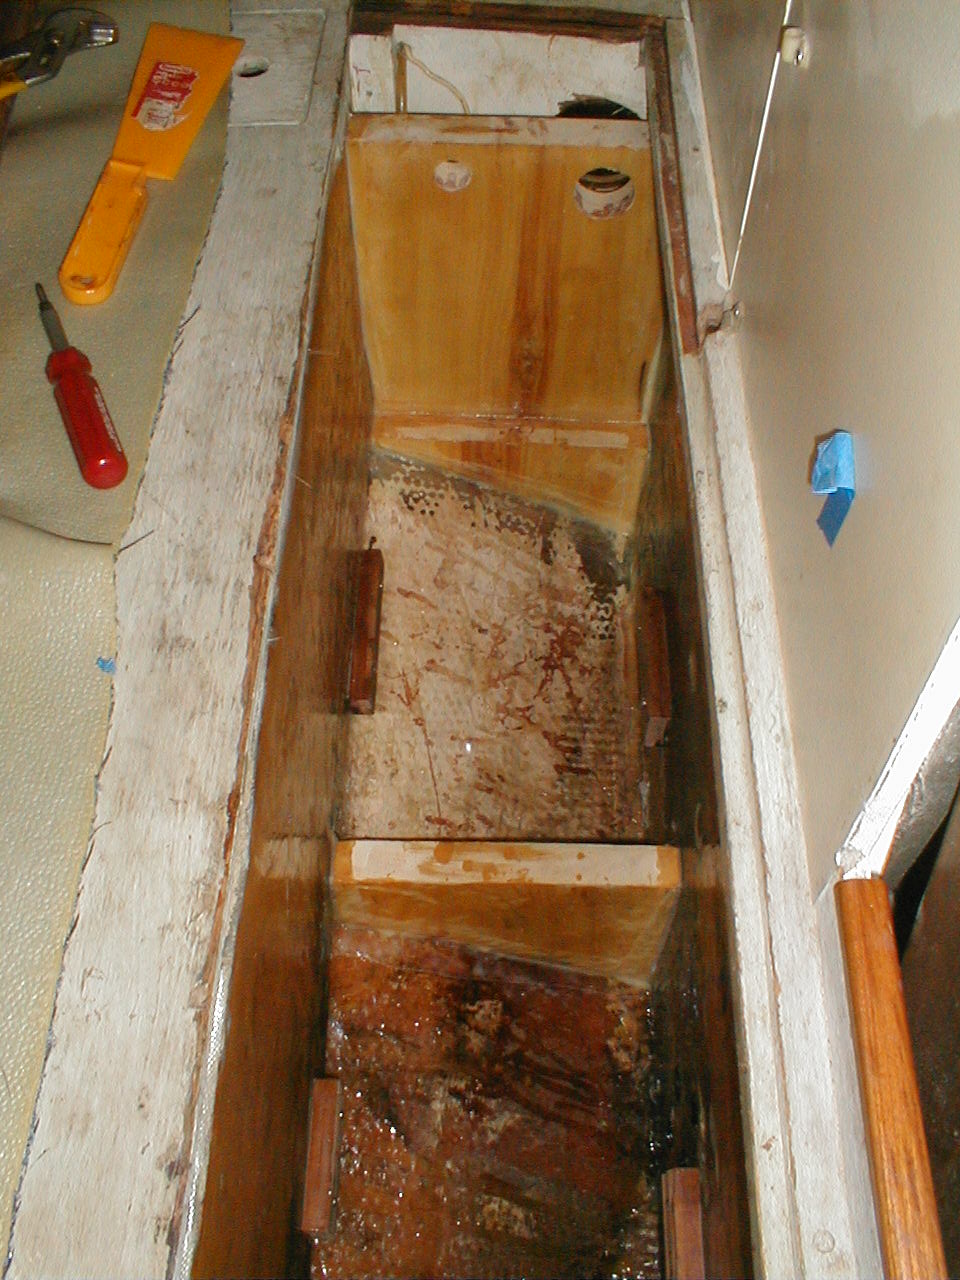
The first thing we did was remove all the old batteries. You can see from the middle shot below that the compartment itself was pretty trashed from the sulfuric acid fumes. We decided to gut the original compartment and rebuild it as a separate, vented battery box. |
|
|
|
Battery Compartment with old bank |
|
Battery Compartment emptied out |
|
|
|
|
Battery Compartment tear-out |
|
|
|
|
|
 |
|
|
|
 |
|
|
|
|
 |
|
|
|
|
|
|
|
|
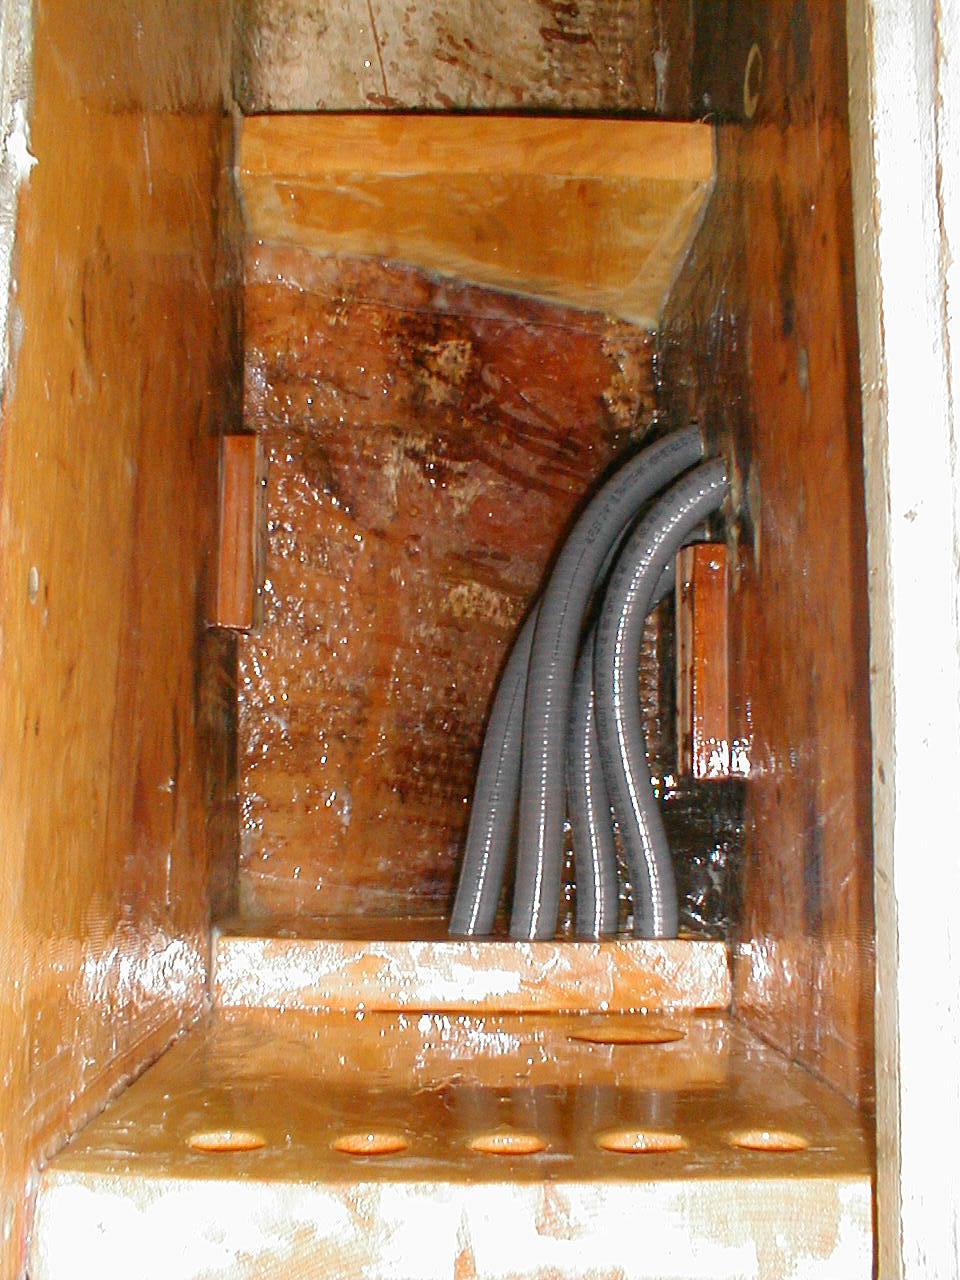
The next step was to measure and cut floor supports, end-caps and sides for the compartment, then glass them in with mat and resin. For us it was a 2-person job as someone needed to cut the fiberglass mat and wet it out, while the other person layed it into the compartment, and rolled-out any air bubbles. Ed had cut access holes in the end-cap pieces for the outside vent hose, the battery wiring and the conduit piping which will lead out of the box and into the engine compartment.
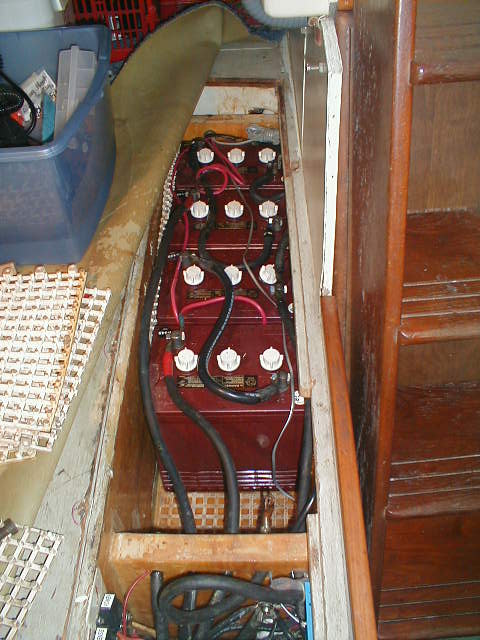
We decided to align the batteries sideways rather than longways, with dri-dek squares under and between the batteries, and between the batteries and the box sides. This allows airflow and takes up any additional wiggle room as well. |
|
|
|
Battery Compartment showing floor supports and end-cap pieces. The view looking aft. |
|
The forward portion of the box showing the conduit and the wiring holes. |
|
|
|
 |
|
 |
|
|
|
The box after the house bank deep-cycles are in and hooked up, but still waiting for the starting battery to go in the last slot. |
|
|
The box fully glassed-in. |
|
|
|
|
|
|
 |
|
|
|
 |
|
|
|
|
|
All batteries should be secured in such a way that if the boat was knocked down or broached, the batteries wouldn't become flying missiles below decks. Not only would this be bad for people, duh!, but could also mean holes bashed in the boat or the flattening of other items. In our case we chose not to trust webbing straps which could deteriorate over time, but to build-in security by means of a locking system.
The side of the inner box has a lip overhang going along it's length. By reorienting the batteries sideways we found they would fit just right in the box under the lip. We cut a battery-sized access slot in this lip at the "front" of the inner box which you can see in the shot on the right. This allowed us to set each battery in and slide it aft, effectively "locking" it in. We used dri-dek under and around the batteries to help with ventilation and heat dissipation while also removing any extra wiggle room. Additionally, the inner box lid also fits under the lip and is then screwed down on the opposite side. Finally, the original outer box lid is screwed down. While this makes it a little more tiresome when checking battery water levels it gives us a great sense of security knowing the batteries are not going anywhere even in dire conditions. |
|
|
|
 |
|