| Helicopter Experiences |
 |
 |
 |
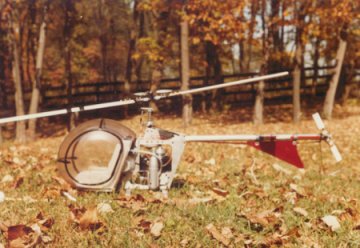
| Schulter Helibaby I purchased this used Helibaby in the late 70's. It was designed for a 40 sized engine and to carry an 'Action man', 'GI Joe' type figure in the cockpit. It was for 4 ch control and the blades were fixed pitch and solid mounted to the head. With no gyro, mixing, exp, computor, or any other of the modern ameneties this bird was beyond my ability to fly. A couple of years later I tried a W.E. Zenith that was almost identical to the helibaby but the blades held to the head with a single bolt thus allowing the blades to swing backwards. I assumed this would reduce crash dammage. It didn't. |
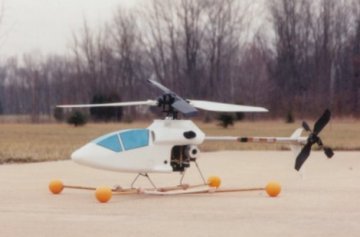
| Lite Machines LMH Spring of 2000, I purchased a used LMH from a friend who was not having much sucess with it. Since the parts are inexpensive I thought this could be the thing to revive my interest in chopper flying. When I could get the engine to provide enough power for lift off (not very often) I managed to fly a few laps. I refrained from attempting lengthy hovers as my previous experience had taught me that this was difficult with a fixed pitch model. Although not a completely satisfactory enterprise I was convinced that I should be able to fly a chopper with all the mod cons available on todays radios |
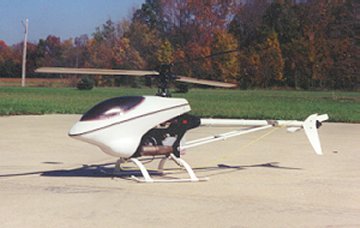
| Thunder Tiger Raptor After reviewing many comments on the net, Sept 2000, I purchased a Raptor, OS 32 and a Telebee gyro. I used a Futaba 6X radio with standard S3003 sevos. After some initial problems with the set up and clutch I quickly learned to hover. Forward flight however I found to be more difficult. |
| Revised feb 2008 |
 |
| Raptor Clutch problem The Raptor pictured above experienced clutch problems from the first day. I set all controls as per instructions and made sure the throttle positons lined up with the frame pitch indicator 'beginner' settings.That is to say, at low throttle it was at the bottom mark, middle at the center mark and high at the top mark.I did not have a pitch gauge but eye balled the min throttle to be zero pitch and so I believed the rest of the pitch range to be correct. After starting and adjusting the engine I slowly increased the engine speed.I got to full throttle stick and and with the engine bogged down, the raptor showed no signs of lifting off. I adjusted the needle valve and tried again without success. After several more failed attempts I decided to pull the engine and bench run it. Upon removing the engine I found the clutch shoes dammaged, as can be seen in the attached pic. After bench running the engine, a check showed that the blade pitch settings were far too high and this was the reason for the failure to lift off. As no replacement clutch was available I reassembled with the old clutch. I burned about a half gallon of fuel and successfully learned to hover with this set up before replacing the clutch. |
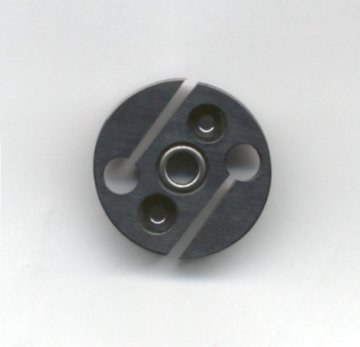 |
| This is a new Raptor cluch after a few failed take off attempts; clearly showing permanent distortion. This dammage due to:- 1. Too large a clearance between shoes and liner 2. Too soft a metal 3. Insufficient metal area at the point of high stress 4. All of the above |
| Clutch replacment As soon as an alternative, (Quick HD), became available, I purchased and fitted one along with a shim. (I do not believe the shim has any effect on the early failure problems but it does make good engineering practice.) I hoped that by buying from a different manufacturer I would eliminate problems 2 & 3 above. As the old lining had worn very thin (even after only such a short use) I was able to glue the new lining over it and achieve a minimal clearance, eliminating problem 1 above. I pulled the engine to inspect this new clutch set up, after more than 6 gals of fuel and discovered it to be in perfect condition. Update - five years of use and still going strong |
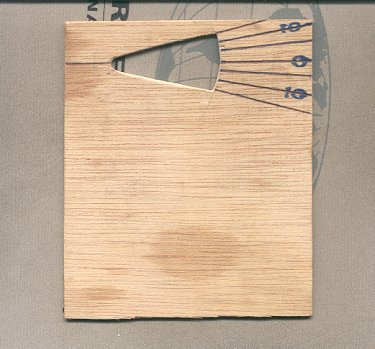 |
| Simple Pitch Gauge All the commercial pitch gauges rely on eyeballing an edge to the flybar.The pic shows my simple arrangement for performing the same task. It is cut from ply but almost any material will do.The 0 deg line is first drawn parallel to the top edge. A center is marked on the left side and lines at + - 5,10 and 15 degrees drawn in. An arc is drawn from the left center mark slightly larger than your blade chord. Drill a 1/4" hole at the left center mark for the blade leading edge and cut out as shown. To use- slide over the blade and sight the top edge on the fly bar. Hold the gauge steady in your right hand with index finger pressed on the blade trailing edge.Adjust until the top edge is level with the fly bar. Read the pitch on th gauge. Numbers below the 0 line are positive while those above are negative pitch. |