Fog Lamp Install on a
2001 Dodge Stratus Coupe SE
Tools Required:
Phillips screw driver
Shorty Phillips screw driver
10mm & 12mm wrenches
Wire cutter/stripper/crimper
Test Light
Drill
Supplies needed:
2 fog lamps
approx. 30 feet of 14 or 16 gauge wire (25 feet for power, 5 feet for ground)
2 relays (20 amp or better)
1 switch (10 amp or better)
Either one fuse block with 3 appropriate fuses (one for switch, two for relays)
OR three inline fuses
6 circular battery terminal connectors (four for ground, two for battery hookup)
22 female wire connectors
1 dual male connector (attaches to wire and has a place to add two female connections)
1 small male connector
Electrical Tape
Wire Loom (optional)
Time needed to complete the job: about 3 hours
Total cost: OEM Fog lights – between $98 and $132 each if new from a dealer
Relays $5.99 each at radio shack
Wire: $4.00 (or use some you have lying around already)
Switch: $2.00-$4.00 depending on style
Inline fuses or fuse block (with fuses): $5.00-$15.00
Wire Connectors: ($0.15 each) $3.60
Total cost – Between $220 and $300, most of the difference is in the price of the fog lamps themselves.
The cost of wiring this way is between $27 and $39
How to install the fog lamps:
Here’s the disclaimer – I am not liable for any damage that may occur on your car if you follow these instructions. They are only a guide and I am by no means a professional electrician! Follow these at your own risk!
Make sure you have all the required tools and the supplies. If you’re prepared, it will save a lot of frustration and angry trips to the hardware store. I am only stating what I did, I am sure there are many ways to go about installing these fog lamps.

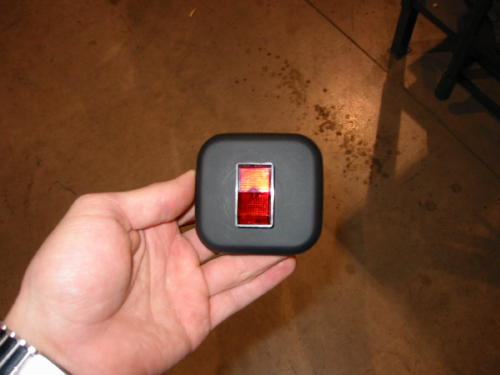
I began the wiring starting inside the vehicle with the fog lamp on/off switch. I used a 20 amp rocker switch mainly because I liked the way it would look in my car. The amperage isn’t too important since it is only used to turn the relays on and off. If you choose to wire the fog lamps without a relay, you’d definitely want a higher amperage switch.
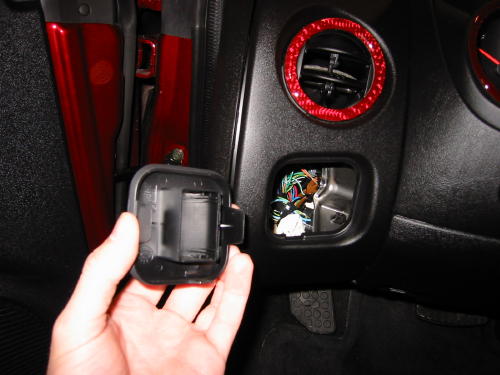
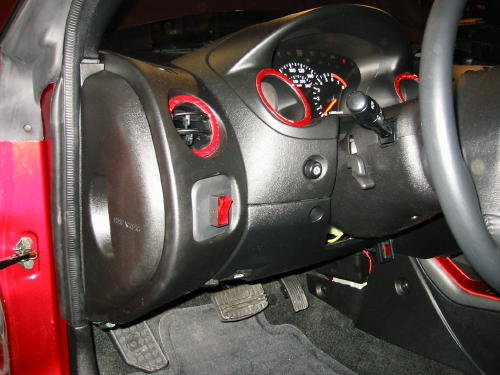
The stock Stratus R/T coupe fog lamp switch is located in the little square panel to the left of the steering wheel on the dashboard. This seemed like the perfect place to add my new switch. This panel can be popped out of the dashboard by opening the fuse box and reaching behind. There are two tabs on either side, pinch them together and the panel pops right out.
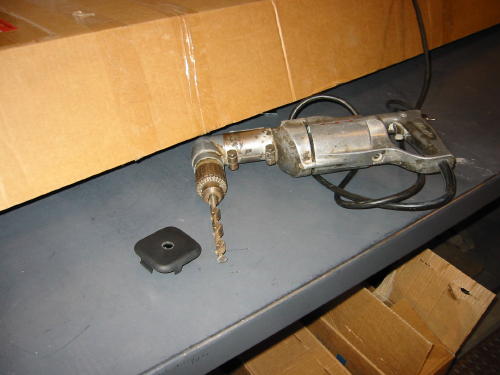
I used an extremely scientific method to find the center of this panel. Two rubber bands stretched from corner to corner. Drill in the center and throw away the rubber bands which will now be broken or twisted around your drill bit. Start with a small bit first to make sure the hole is centered and switch to a larger bit once the first one is through. The switch I used needed a ˝” hole so I needed to break out a big drill.

Now you’ll need to start running wires for this switch. I chose to wire mine so that I can only have the fog lamps on when the key is on in the ignition. You’ll need to use a test light to find an open space in the fuse block. I found an slot that did just this in the fuse block right behind the switch. The test light is on in that picture even if it doesn’t really show up too well with the camera flash.

You’ll need to use the small male connector now to plug into that space in the fuse block and use one female connector to plug into the right connection on the back of your switch. You’ll have to figure out which male connector on the switch to plug it into since you most likely won’t use the same switch I did. Once you’ve got the connections made, use the test light to check your work. Connect one end to a ground and put the other end on the open connector of the switch. The test light should turn on and off when you turn the switch on and off.
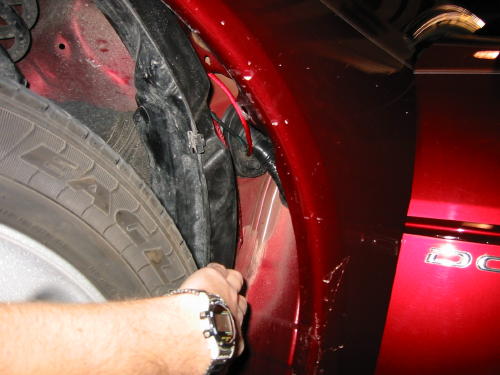
Once that is all working, you need to get a wire from the engine compartment to the back of the switch. The best way I found to do this without drilling a hole in the firewall is to run the wires above the plastic inner fender. First, remove all of the bolts and the screws that hold the plastic inner fender on, you’ll need your shorty Phillips screw driver and the 10mm wrench to do this, there are fasteners on this. You’ll also want to take off the plastic cladding that is just in front of the driver’s door on the bottom, there are three Phillips head screws holding this on. Once you take all the screws out and realize the cladding still won’t come off, get a good grip on this piece (if that is humanly possible) and just pull it towards you, there is a plastic retaining clip in the middle of this piece that holds it on. It shouldn’t break on you if you’re worried, I’ve had this piece on and off twice already and its still good. This is a good opportunity to wash behind this panel to remove all the sand and gravel that gets trapped in there!

Now that you’ve got all the fasteners off, pull the plastic inner fender back a little bit starting from the bottom near the drivers door. It will be stuck behind a metal lip but with a little effort you can pull it out. You’ll probably want to pull the plastic inner fender off as far as the first bolt that was on the upper lip of the fender. Once you pull it off past that point you can get the inner fender to stay behind the wheel (out of your way) without something holding it. Now don’t think that you can just remove a few of the fasteners, save a whole lot of effort and remove them all. The first time I ran a wire this way I tried to only take a few fasteners out but gave up and took them all out in the end.

Now that you’ve got the inner fender pulled back you should be able to see where a large plastic bundle of wires is going through a grommet that is about 2” in diameter. This is where you’ll run the wires into the passenger cabin. Use a screwdriver to pierce the grommet and run the wire through the hole. It is easiest to do this all from the outside of the car and run the wires into the car. If you try to run the wire from the inside of the car and go out you’ll have problems unless you’re a midget and a contortionist because this grommet is way up under the dash. Its easy to reach with your hand if you’re lying on the floor but almost impossible to see.
Feed your wire into the hole and grab it from the inside. Hook up a female adapter on the end and connect it to the back of your switch. Test the switch again. If it all works, snap the plastic panel into the dash and replace the plastic cover on the fuse box. Congratulations, you’re done on the inside of your car!
Back to the wheel well again. Take the wire and string it above the plastic inner fender. It will be a pain to do this even though you have all the fasteners out once you’re towards the front of the car. There must be some clip that still retains the plastic inner fender. I just ran the wires over the top of the inner fender and out the front of the inner fender so that the wires are in the open space behind the bumper where your future fog lamp will be. Replace all of the fasteners that hold the inner fender in and replace the cladding.
Bring the wire up into the engine bay, the easiest place is the drainage hole that is in the metal, its fairly easy to see when you’re lying under the car with the hood open because it’ll be the only spot of light shining from above.
Now comes the complicated part. Constructing the wire harness.
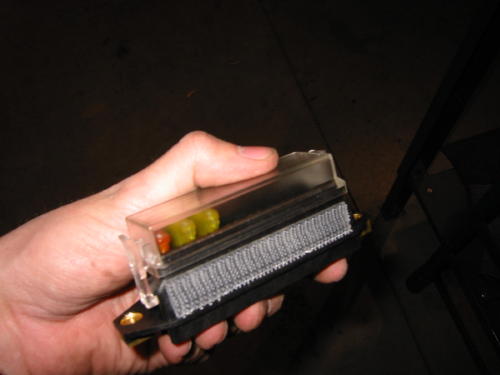
I chose to use a 10 space fuse block since I’m always adding power accessories and inline fuses can be a mess if one blows and you have 10 of them to search through, although if this is the only electrical thing you’re going to be adding you may want to consider using inline fuses because they’re cheaper and don’t eat up a lot of space like a fuse block.
I used three spaces on the fuse block for the fog lamps. One fuse is for the line coming in from the switch (I used a 5 amp fuse for this) and the other two are between the battery and the relays (I used two 20 amp fuses for these). I put 3M plastic Velcro on the back of the fuse block so I can tuck it away under the fender but still easily remove it when I want to access it in the future, whether it be to add something to it or to replace a fuse.
The first wire running off is the turn on wire for the relays. Connect one end of the wire to the fuse block and the other end to the dual male connector. Now take two more wires and put female connectors on both ends of them. Connect one end to the dual male connector and the other end to the turn on attachment of the relay.

Take two more pieces of wire and put female connectors on both ends. Connect one end to the fuse block with the 20 amp fuse and the other end to the 12v power in connection on the relay.
Cut two longer sections of wire which will reach from the fuse block to the battery. Put female connections on one end which will attach to the fuse block and circular battery terminal connectors on the other end. Don’t connect them to the battery yet, you don’t want to give yourself 12 volts of wake the hell up by accident.

Now its time to find a ground connection for these relays. The best one I found is the ground connection for the factory headlights, its only about 4 inches from where I was installing my fuse block. Cut two short sections of wire for the ground, put a female connector on one end and a battery terminal connector on the other end. Attach the female connectors to the ground connection on the relays and put the battery terminal connection on the bolt which will be your ground connection. Remember this bolt, it won’t be the last time you use it for a ground.

Wow, look at that wiring nightmare. You aren’t the only one wondering if this will all work in the end. I’m pretty skeptical myself at this point, its been awhile since that test light has been used and there’s a lot that could be wrong. But don’t lose hope yet!

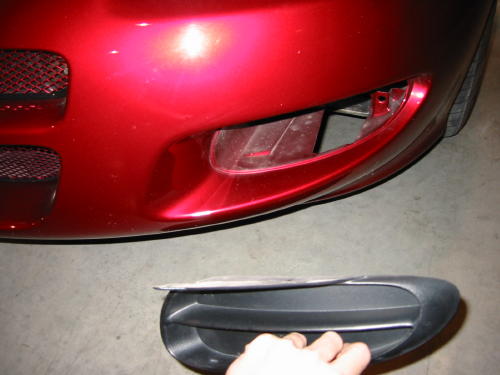
Now you finally get some visual gratification for the 2+ hours you’ve been working on this. Take off the plastic inserts in your bumper where your fog lamps will be inserted. They’re held on at the top with two Phillips head screws.
Cut a piece of wire that will reach from the relay to the back of the fog lamp. Run the wire down to the fog lamp through the same hole you brought the wire up from the switch to the fuse block earlier. Put a female connector on each end, connect one end to the relay. Make sure you run the wire and then put the connectors on because the connectors (the ones I used anyways) were too big to fit down the drainage hole when there was a wire running through it already. Now cut a ground wire the same length. Put a circular battery terminal connector on one end and connect it to the same bolt you used as a ground for your relays earlier. Put a female connector on the other end.

Turn your keys to the on position in the ignition and turn your fog lamp power switch on. Put your test light on the power and the ground connections which should now be hanging out of the front of your bumper. If the light turns on, you’ve got it made. If it doesn’t, you’re on your own. It turned on the first time for me!

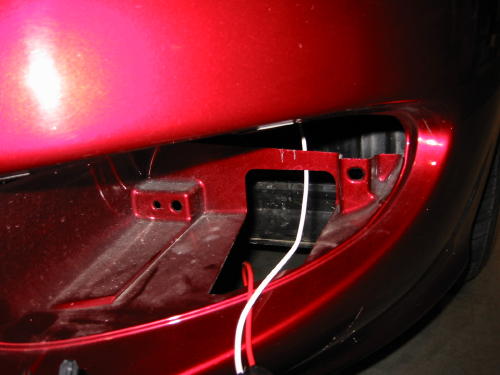
Now make sure your wires are going through the right part of the fog lamp hole like they are in this picture. If they go through another opening, the fog light won’t fit in the opening right because the wires will be jammed behind it.
Connect the power to one terminal on the fog lamp light bulb and the ground to the other. It’s a light bulb so it doesn’t matter which connection gets power and which gets ground.
Put the fog lamp assembly in place and replace the two screws you took out when you took the fake grille out.
The moment of truth. Try that fog lamp out.

Once you’ve got that one lamp working, the rest is a walk in the park. Cut a length of wire that will reach from your last relay to the other side of the car. I ran the wire down through the drainage hole, wrapped it around the lower radiator mounting brackets to keep it from hanging below the bumper, and out the fog lamp hole in the bumper.

There is a bolt for a ground on the passenger side of the car for the passenger side headlight. Use this for a ground for the passenger side fog light. Female connector on one end, battery terminal connector on the other. You’re probably catching on to this wiring stuff by now. Run the wire down next to the windshield washer fluid bottle and out the fog lamp hole in the bumper. Connect the wires to the fog lamp, install the fog lamp, and turn them on.

Look at that! An SE with fog lamps. And I don’t even need to have the headlights on when the fog lights are on, so in my mind its better than the factory installed lamps on the R/T! Drive up to a wall or something flat with your headlights on and aim the fog lamps. Mine seemed to be aimed pretty darn good right out of the box so I left them alone.
Now that its all working, make sure you attach your relays to something so that they aren’t bouncing around in your engine bay. You can use wire loom to clean up the wiring mess that is lying under your hood.
A few notes: I used 14 gauge wire and 30 amp relays to run these fog lamps. This is overkill, but I did it this way so that if I ever get 100 watt bulbs to put in the fog lamps I won’t have to worry about the wires melting. The upgrade wiring harnesses that you buy usually use 14 gauge wire and two 30 amp relays. I could’ve easily gotten away with 20 amp relays and 16 gauge wire, but now I’ll never need to worry about the wiring.
I know there is an indicator light on the control cluster of the R/T’s that lights up when you turn the fog lamps on. It looks like the high beam indicator except it has a slash through the beams. I can see the outline for this on my SE but I didn’t feel like ripping my dash apart just yet to wire this indicator light to my switch. It will be done in the future though, probably in the summer and I will add directions on to this page on how to do it.
I have also heard rumors that some 2001 SE’s came with the factory wiring harness for fog lights already installed. As far as I can tell this is BS, I haven’t heard of anyone actually finding the wiring harness on their car and I didn’t find one on mine. My car was built in July 2000 so it had to be one of the first off the line and there isn’t a wiring harness hanging there.
If you've got any questions or comments you can email me.
For more information about the 2001 Stratus Coupe please check out 2GStratus.org or Stratusphere.org.