| Fletching |
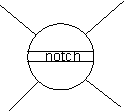
The arrows would have been made from any straight grained wood as this means that stresses pass down the length of the arrow thus reducing the risk of snapping. A notch is made in one end either by cutting or by burning in with a hot wire or similar tool. A good modern tool to use for this when making arrows at home is a tile saw but this is not to be used in the living history encampments. The notched end of the arrow may then be tapered if desired. The arrow is then marked round at 2 and 7 inches from the notched end to assist the placement of the flights. Feathers for the flights would probably have been from geese although turkey feathers are used now as they are easier to acquire. Of course feathers from any large bird are suitable and I imagine they would have used whatever was available where they were. The feathers are split down and cut into 5 inch lengths then glued onto the arrow between the two lines and at 1/4 points round, making sure that the notch is lined up with a gap between the flights.

The glue could have been made from various sources - one of which was fish or other bones. Modern glue should be lacking in distinctive colours or odours for use in the village. Their use can be disguised by putting them into a small pot or wrapping the tube/bottle in a piece of cloth. Once fixed in place the spines are trimmed from both ends of the flight which is then bound in place with linen thread. The arrow heads were attached by one of two methods depending on the design. Heads with a 'tang' (a spike) were fitted into a hole in the end of the arrow then bound with thread to increase grip and reduce the risk of splitting. Heads with sockets were fitted over the end of the arrow and held in place with rivets. Our re-enactment arrows are fitted with rubber birding blunts to prevent injury but one or two people have 'sharp' arrows for display purposes.