Wallpapering

*Do It Yourself*
- It is best to start hanging wallpaper in an inconspicuous corner of the room, or at a door or window. These are places where you don't have to worry too much about an imperfect match.
- Set up the stepladder and use your yardstick to measure off a section 1" narrower than a strip of your wallcovering. This is your starting mark.
- Place a thumbtack in the starting mark as close to the ceiling as possible and hang a chalked plumb line from it. At first the line will swing, but when it stops, hold it firmly at the bottom and snap the string. This will leave an easy to follow line on the wall. Remember to snap a new line on each wall.
- Measure the height of the wall, adding 8"-9", and cut a strip to that length. Place the water tray by the wall and fill it to the level mark with lukewarm water. Each strip of wallpaper to go up is rolled into the tray loosely, pattern side in, back side up. Soak for the length of time indicated by the manufacturer.
- Pull the strip slowly from the water. Fold without creasing, paste-to-paste. The top fold should be no longer than the bottom fold. Allow to "cure" for the length of time specified by the manufacturer. (Some pre-pasted wallcoverings can be applied to the wall directly from the water tray.)
- Unfold the top part of the strip only. You're now ready to line up the right-hand edge with the chalk line. Don't be afraid to slide the wet material around until you have it even. Remember to allow the strip to overlap the ceiling by about 2". You can trim top and bottom excess later.
- Smooth out the strip, working down the center and out to the sides to remove wrinkles and air bubbles. If you're working from a corner, allow the excess material on the left to wrap onto the adjoining wall. Then roll over the edges with a seam roller; small bubbles will disappear with drying.
- Using a putty knife as a guide, trim top and bottom of wallcovering with a sharp razor-knife blade (also around door or window frame, if that's where you started). Rinse baseboard, ceiling moulding, and wallcovering with clean water and sponge.
- Find your pattern match and cut the next strip, soak, and hang, with the seam butting against the first strip. Do not overlap. The width from the beginning of the last strip to the corner is bound to be less than the width of the roll. So measure the distance between the starting edge of the last strip and the corner, add 1", and cut the strip to that width. Hang the strip just like the other ones, wrapping the extra inch around the corner.
- Unlike inside corners, outside corners can be wrapped with a full strip if the wall is plumb. Before wrappig the strip around the corner, cut a slit at the top and bottom so the strip will fit snuggly against the wall. If the wall of the outside corner is not plumb, cut the strip vertically 1/2" around the second wall. Measure the remainder of the strip and drop the plumb line 1/2" from the corner. Apply the remainder of the strip so that it is true with the plumb line.
*How To Repair a Tear*
- Keep leftover wallpaper for repairs. If a tear occurs, cut out a piece of the saved wallpaper larger than the tear and prepare it according to the original hanging directions.
- Place it over the tear, making sure it exactly matches the wallcovering pattern.
- With a razor knife, cut through both layers of wallpaper, either following the pattern design or in an irregular cut.
- Remove both wallpaper and the patch waste, then strip the damaged piece from the wall.
- Insert the patch into the cutout, and the fit will be perfect. Wash and roll the seams, and they will almost disappear.
*Tips For Hanging Borders*
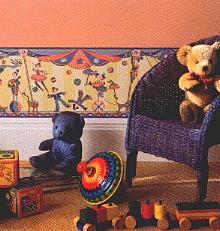
Youngsters love to look at colorful pictures, so choose a wide,
bright border and hang it above the baseboard.
- With pre-pasted wallpaper borders, brush the back side with lukewarm water to activate paste, rather than immerse the whole border in water.
- If the border puckers as you paste it around corners, make small horizontal cuts in the turned edge to help it lie completely flat.
- When hanging a longer piece of border, get someone to work with you and help keep the paper straight.
STOP!
Don't toss out the odds and ends from your wallcovering project until you see what else can be done with them.
- Coordinate a lamp shade--wrap an entire shade in a border...or edge just the bottom (works best with straight-sided shades).
- Cover kitchen canisters--you can accent ceramic jars or create your own canisters from coffee tins in various sizes.
- Frame a feature such as recessed shelves, around a doorway or windows.
- Customize a window shade--applied to the lower edge, a wallcovering border makes a plain-shade fancy.

Visit my other pages!
Home
Main Directory
My Family ~ Country Cookin'
Craft Projects ~ Webrings ~ Favorite Links
Decorating Center ~ Household Tips ~ Rainy Day Projects
Holidays ~ Awards Received ~ Winners ~ Make and Save ~ Bookstore
Parenting Funnies ~ Computer Humor ~ Special Causes
Favorite Short Stories ~ Banner Exchange
Gifts Received
Sign My Guestbook
 View My Guestbook
