|
This is the old pond that had to be torn down before we could start on the new one. It was falling apart and leaking very badly. A car jack was used to level it three different times but it was beyond saving at this point.
|
|
 |
It took a lot of effort to get the old pond torn down. It was built to last and it did well for 10 years. You can see an old swimming pool liner in the picture. It was used as a liner under and around the entire inside of the pond and the EPDM liner was put on top of it.
|
|
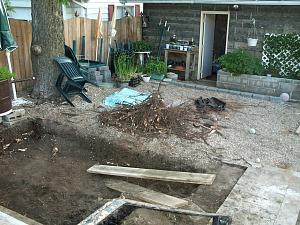 |
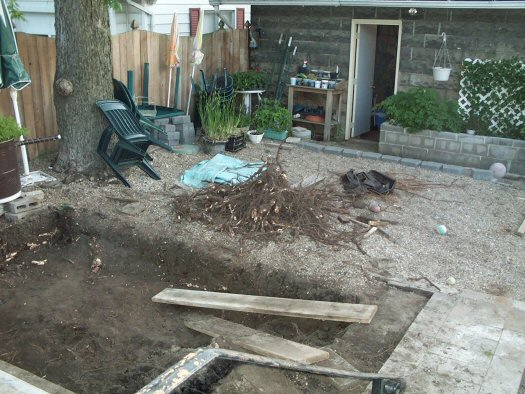
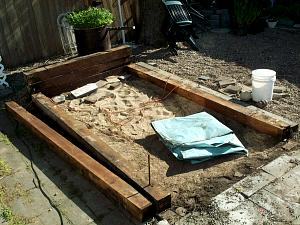
| You can see the pile tree roots. This hole had to be hand dug since it was right next to the swimming pool and there was no way to bring in equipment other than man power. |
|
 |
The excavation continued for a few days. You can see the area being dug for the concrete footer to be poured. No more jacking up the pool using the car jack. This one would stay level!
|
|
 |
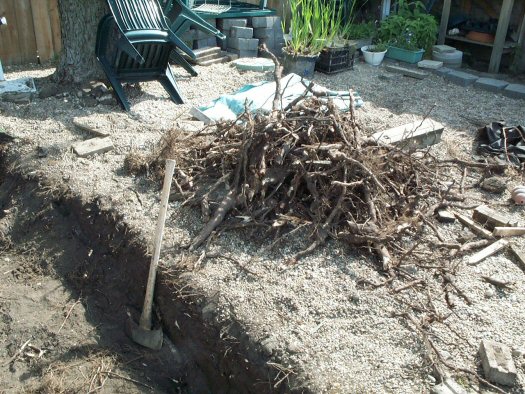
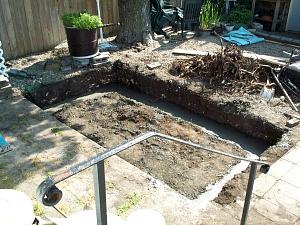
The root pile continued to grow. They were cut out with hatchets and saws. This was very hard work.
|
|
 |
Finally leveled and ready to pour the footer.
|
|
 |
The concrete footer has been poured. Notice the biofilter waiting for the pond to be finished.
|
|
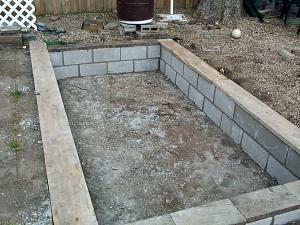 |
The concrete block work has started. The entire pond will be made of concrete block with a EPDM liner on the inside.
|
|
 |
The boards are to protect the concrete that has been poured inside the concrete blocks.
|
|
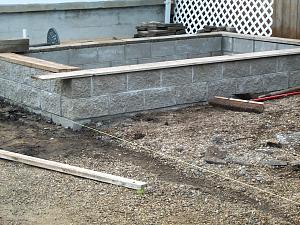 |
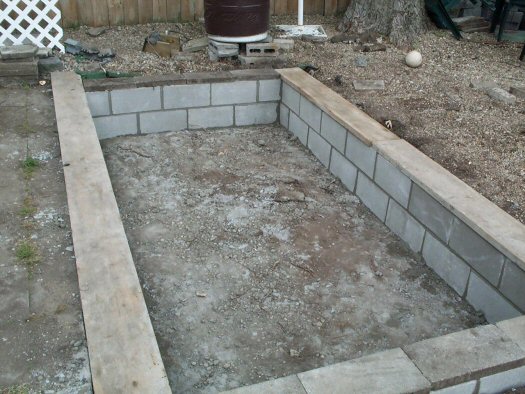
There are 4 layers of concrete blocks but only two will show above ground.
|
|
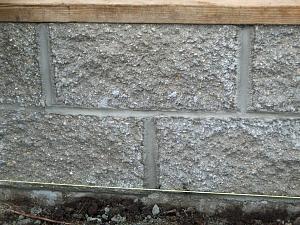 |
This how the outside of the pond will look.
|
|
 |
We decided against making the bottom concrete,as we originally planned. We went instead with using soft sand. Here we are getting it level and getting ready for the liner. You can see the concrete that has been poured in the blocks. They also have steel bars to reinforce the structure.
|
|
 |
Here they are getting ready to pour the concrete that will go around the pond. You can see in this picture how close it is to the pool.
|
|
 |
In this picture the liner is in. This was really a job. The liner weighed what seemed like a ton, and we had to make the corners flat so that the cap blocks could be put in place.
|
|
 |
Here we have already trimmed the liner and have blocks holding it in place while we try to figure out what will hold the liner and be small enough to allow the cap blocks to fit correctly.
|
|
 |
The liner has been completely trimmed and is being held in place by strips of stainless steel screwed into the liner and the concrete.
|
|
 |
A close up view of the stainless steel strips holding the liner in place under the cap blocks.
|
|
 |
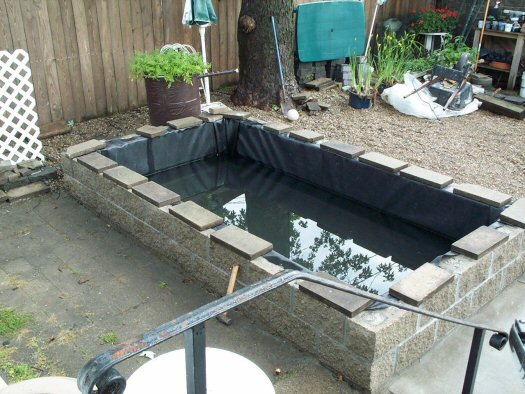
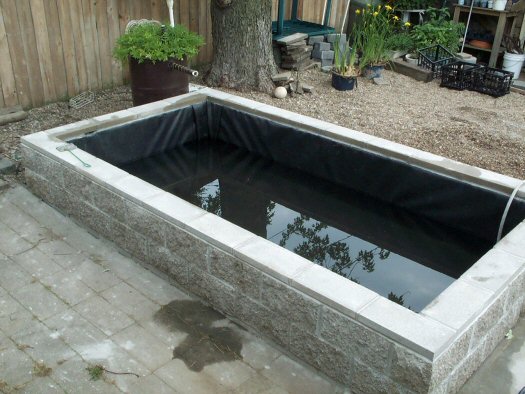
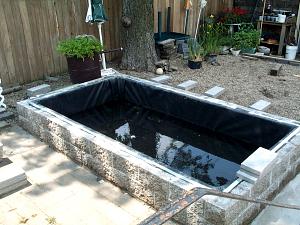
The cap blocks are in place and we are adding water.
|
|
 |
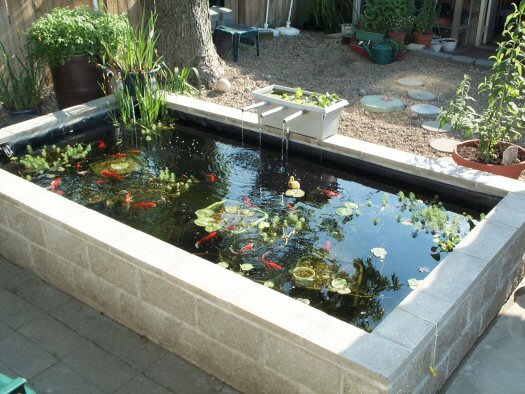
Shortly after adding the fish and plants. The fish had been in the garage in holding tanks for almost a month. They seemed to enjoy having a little over one thousand gallons of water to play in.
|
|
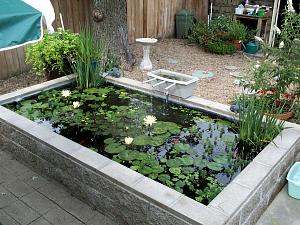 |
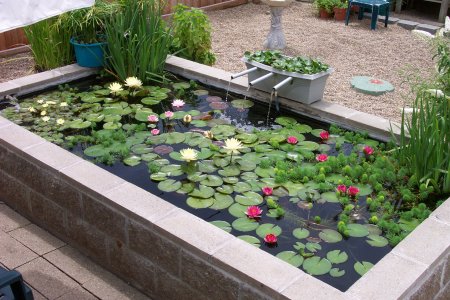
Finished pond later in the summer. The plants are growing well and so are the fish.
|
|
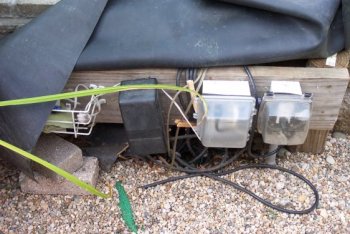
I have had many questions about the electrical outlets for the pond. They are all buried and at the end of the pond by the bio-filter. |
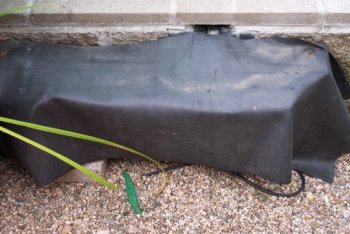
Here are a couple of pictures of the how the electrical hook ups look.
|

|
One thing you must do with new concrete blocks is seal them. If you don’t rain water or water from a hose that goes across the blocks and into your pond will make your water too alkaline. If your pH is out of range it can kill your fish and plants. I use Seal-Krete on my pond blocks.
|