

|
Here's another one of those very frequently asked
questions. I know it has been answered in numerous tutorials before,
but now that you're here why not give it a try? Besides: this methods
is, as usual, very simple and quite satisfying.
|
|
 |
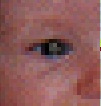
Open your photograph with redeye |
 |
Use the zoom tool, zoom in a couple of times till you've got a clear view of the work area |
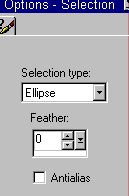 |
Click the Selection tool, choose settings as shown here |
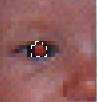 |
Select all of the pupil. |
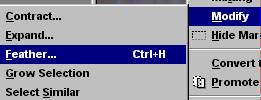 |
Go Selections > Modify > Feather and make feather =1 or 2. Now the selection should include all of the pupil, and about one pixel of the iris. |
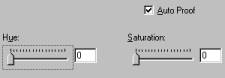 |
Color > Colorize. Hue is not important here, but drop the saturation to 0. This will eliminate the red. |
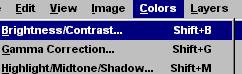 |
Color > Adjust > Brightness/Contrast: |
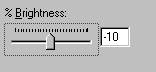 |
Drop the brightness to -10% |
 |
Deselect, and start the same procedure with the next eye. |
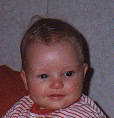 |
This is, you must admit, quite an improvement! |
|
I sincerely hope this little tutorial will help those who, till now, had trouble improving their photographs! If you have any need for a specific tutorial, just send me a note: I'll be very glad to help if I can! |
|
That's all, folks!

![]()
© Fried Kampes - Randwijk, the Netherlands, January 2000