![]()
Contents
Indoor Tools
Outdoor Tools
Techniques (coming eventually if not soon)
Links
lndoor Tools
My Homemade Plant Growing Shelf Unit
Materials List
| No. | Double 4 Foot Lights (80 watts) | $/item | total cost | Since each 4 foot light can have 2 - 24" plant trays beneath it I only need 2 lights, one per shelf. It does not matter that the light AND the trays will extend 6 inches beyond the actual shelf since the majority of the tray weight still remains on the shelf and will not tip over. |
| 1 | 5 shelf metal unit 3' x 6' x 18" | 20 | 20 | |
| 2 | 4 foot flourescent shop light | 9 | 18 | |
| 2 | 4 foot flourescent light tubes (2/package) | 4 | 8 | |
| 1 | nylon rope 20 feet | 1 | 1 | |
| 2 | extension cords for 3 prong plugs | |||
| 4 | plant trays and peat pots | 2.50 | 10 | |
| TOTAL | $ 57 |
My plant shelf is not the most beautiful thing in the world but it is efficient and as cheap as I could make it. Yes the 4 foot lights stick out six inches on each end but they are also much cheaper than the alternative 2 tube 2 footers at $13 each or the single tube 3 footer at $18 each. My plant trays will stick out beyond the shelf but since 3/4's will remain sturdily supported I am not worried. I could always add a 4 foot long piece of 1/4" plywood or other scrap lumber underneath if I wanted.
Attaching the shop lights to the shelves I use the nylon parahute cord stretched lengthwise across the shelf above and hanging over a bare inch or two. To each end I attach the chain and S-hook that comes with the light. The rope/chain should be long enough to suspend the light about 2 inches above the plant tray cover (or the tray if you don't use covers but I highly recommend them). When the cover is removed as the plants grow taller then I will shorten the chain by moving the hook up the links to raise the light higher.
I leave the lights on for 10-12 hours a day, plants also need darkness. I use a timer to keep from going up and down stairs just to turn the lights on/off.
And remember as outdoor planting time approaches place your plants outside in a protected location for a few hours each day to acclimate them to the weather.
Outdoor Tools
Gardening Stuff That's Nice to Have
A wheel barrow or other nifty mover of stuff like a garden cart.
Soaker hoses and Y fittings with shutoff valves so you can keep one hose running if the other side is too wet. (I highly recommend using a regular hose until you actually get to the garden else you'll end up with a lovely grassy green line to it.) Drip irrigation is nice too.
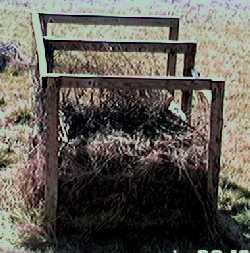
Tomato cages or other similar supports (If you get very large top heavy plants be sure to anchor the cage to the ground or a fence or else the cage and plant can and will fall over.)
Plastic mulch, great as a weed preventer and moisture preserver (run the soakers under the mulch) It does not need to have the tiny holes for rain to penetrate when using the soaker hoses. Also, remember when you make a hole to stick in your plant the rain will get in there too. However, in very hot climates in may be good to add a mulch as straw to keep the ground from over heating.
Good tools, not necessarily the most expensive, but you don't want the metal end of your hoe falling off the handle so be sure to get one with a "nail, rivet, etc" driven through the metal sleeve that holds the business end on the handle. This also applies to short hand tools like trowels.
A tiller is nice, although I find them extremely hard to handle. We bought a used one and it's become a pain to start if it starts at all. This year I plan to borrow my neighbor's and let my husband operate it. But I will return it clean and gassed. It's always nice to offer whatever produce he/she isn't growing too. Otherwise I just use the old 4 prong spade fork and my spade shovel to turn over the soil.
![]()
Generally I get along with only these tools:
If you are on a limited budget you can get by with just the shovel, trowel, and hoe, but eventually I do hope you get most of them. Mine have lasted for years, just don't leave them out in the rain or sun this will help avoid rust and wood splitting.
![]()
Techniques
As I think of each technique I will put it here. I will include the techniques that I have tried or friends have tried and hopefully worked. I will discuss the problems with them if any and solutions to those problems if any. If there are any you have tried and liked or if you have questions EMAIL me. I check my mail daily (unless I'm on vacation) and I will answer.
These last two years (1997 & 1998) I have planted my potatoes in trenches rather than the traditional "hills", which arises from the need to hill dirt up around the tubers if they show above the surface. (Potatoes in the sun turn green and become poisonous.) Trenches are usually shallow, about 4 inches deep. I go 6 to 8 inches and fill up the trench as the plants grow. During the droughts this has come in handy as the trench holds what little water any rain will provide. I have found a major disadvantage, however. I have clay soil and my garden slopes. Even after loosening the clay, if my soaker hose got too near and was left on too long my trenches filled with water and did not drain quickly. Soggy potatoes can become rotting potatoes. Fortunately, the very lack of rain kept me from absolute devistation, I couldn't possibly over water last year without running the water for days and emptying my well. This year the potatoes will be upslope from the tomatoes and hopefully not become waterlogged. Incidentally, it is good to plant your potatoes in a different location every year. Potato loving insects that over-winter will find themselves among plants they do not necessarily enjoy.
In 1998 I planted marigolds that were supposed to be repellent to potato bugs. These marigolds have a SMELL. They are not the pretty, large cushiony ones. Those hybrids and in fact many flower hybrids have had scent sacrificed in favor of size, shape and color. These smelly marigolds are species Tagetes tenuifolia. Specifically one called Starfire Mix which I found in Park Seed's catalog (alas, no longer). Other hybrids are not supposed to work though they may look nice. Since potatoes grow in cool weather, plant your marigold seeds far in advance indoors so they will bloom it time. Mine bloomed after the bugs hit; not very effective.
I tried again in 1999 but my marigolds still bloomed too late. My plants became infested with beetle larvae. Sevin did not work, however Rotenone worked admirably!
I had a neighbor who used aluminum pie plates and large, smelly soap bars impaled on posts around her garden. I think however, the best repellent we both had was her German Shepard Dog and my Labrador Retriever. Daytime is not a problem. Night is another matter. In VA I had a 4 foot plastic mesh fence around my vegetables which would not in any way deter a hungry deer. Mainly I installed it to deter a curious puppy. I found, however, it may have helped against the local ground hog. Something small however still found it's way in and munched a good number of tomatoes. Our other best deterent against deer seemed to have been planting our septic drainfield in clover. Deer love a nice clover. So, if you can, provide an alternative food and maybe they'll leave you alone. Or plant extra.
In MI I have a 6 foot chain link fence. This would not always stop a deer, 8 -10 foot fences are preferred, however since it encloses a space only 12 by 12 feet I think the deer deem the space to small to successfully get back out of so they do not attempt.
I have also heard about fox and other predator urine and other chemicals that are supposed to repel deer according to the manufacturer. I do not know if they work, if anyone has tried it I'd be happy to post their results here.
Your seed packets or plant labels will usually give you a minimum to maximum spacing for rows and plants within the rows. Follow them and use the MAXIMUM distance. I have tried the minimum and sometimes even tried squeezing in a few extra; all that walkway space seemed SO wasteful! Well about August when you are trying to climb over 4 foot tall tomato plants without stepping on your cucumbers that have intermingled with them and your zuchini; when weeding becomes impossible because you can't get to the ground without destroying produce, and you have to watch helplessly while the weeds go to seed and spred before your eyes; when it's easy for your tomato hornworm to just cross over the vine bridge from one plant to another; you will wish you had spaced them each a MILE apart. (or a kilometer if you like metric). So I force myself to keep wide spaces though I do encourage the cukes and zukes to climb the fence.
As I probably mentioned elsewhere I used plastic mulch around my tomatoes and peppers for the first time last year (1998). It worked really well for me. My plants were totally weed free and the soil was protected from the baking summer sun, even though the plastic was black. The black color also helped warm the soil faster in the early spring. The soaker hoses were placed under the plastic so the water also did not evaporate before it could be absorbed into the soil. I trayed hay once, big mistake, it sprouts. People claim straw is better but I've seen seed heads in those bales too.
One year I tried to go relatively organic since my neighbor swears by it and seems to do fairly well. I used BT and Rotenone, "organic pesticides". My garden was very bugged and I was very frustrated. Since then I returned to my favorite pesticide Sevin which can be dusted on within days of harvest and rotenone.
![]()
Links