
ASSEMBLING THE CONCRETE ROCK:
Step One: The Pond Pro makes his own faux rock formations out of special molds.
These slabs weigh around 80-100 pounds each. They are cut with a special saw and fit together like a puzzle and put in place with wet concrete. Because of the special molds used they have a good quality of detail of the original rocks they were molded from.
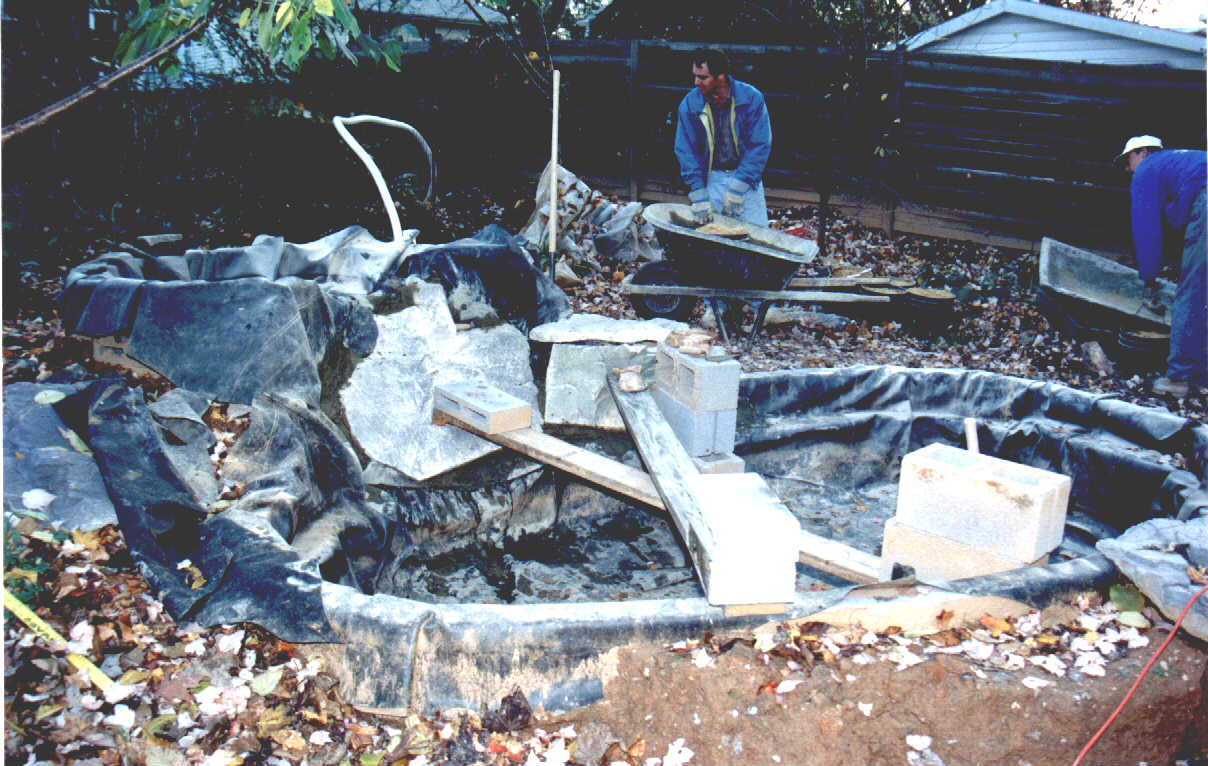
Step Two: After the slabs are solidly in place the gaps between each piece are filled with more concrete and allowed to set 2-4 hours before carving. This was one of the most creative methods that I enjoyed. I spent several nights after work trying to finish off areas by myself. As it was already dusk when I started I used a drop light and a "Scoot-n-Do" to manuever around the pond while I carved out rock formations. Several times I found myself the only human in the neighborhood awake while scooting around with my carving tool in the dark.
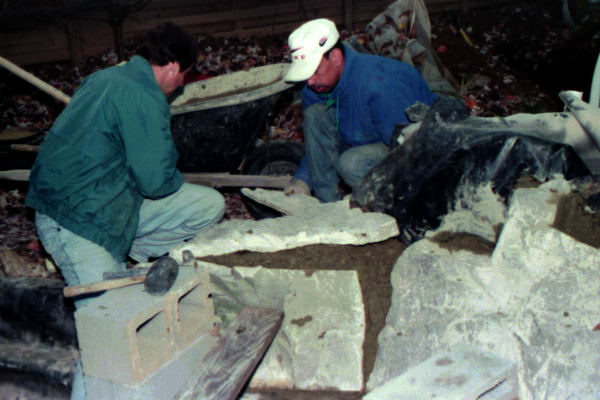
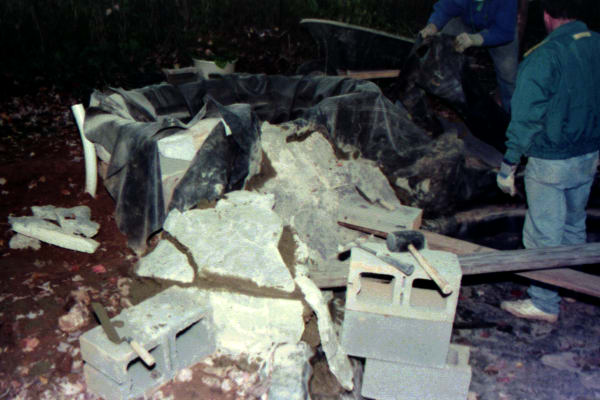
Here you can see the gaps between the slabs. There is an incredible amount of concrete used to create a sturdy base to hold these slabs together. It is tempting to use rock for filler to save on mixing so much concrete, but I don't recommend it as it will add the possibility of faults when everything settles and you may have severe leakage that you cannot control.
Step Three: After the waterfall and main face of the pond were created we covered the edges with concrete and impressed the sides with a latex mold to add detail. This was much quicker than the carving, but does not allow anywhere near the depth of detail. Alas, my Pond Pro didn't quite like the heaviness of the formation around the lower pond, but it is on a slope and I didn't want to bring the dirt up to the edge of the pond since it would create very little standing and sitting room in my small yard.
Here is a detail of a gap area filled in with wet concrete and carved. The darker area is the pre-molded slab with pigment. As an accent I added real fossils that were found in Arizona.
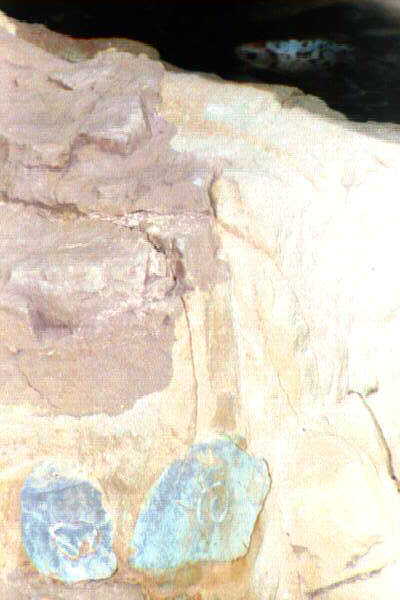
This photo doesn't really show the true colors very well, and with time the concrete should take on some discoloration with moss, etc.
Using these methods we created the different formations and textures as desired. There were several places that didn't quite look right and I was able to reapply more concrete after it dried and carve away.
If I did it again, I'd use a more jagged technique of carving, but this is only my first try. Give me more land and a truck load of concrete and I'll be set in faux rock!
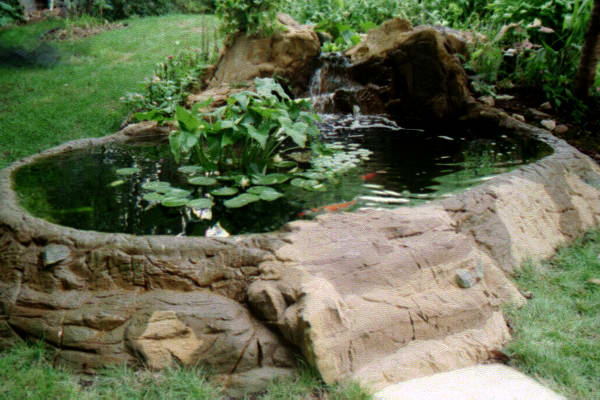
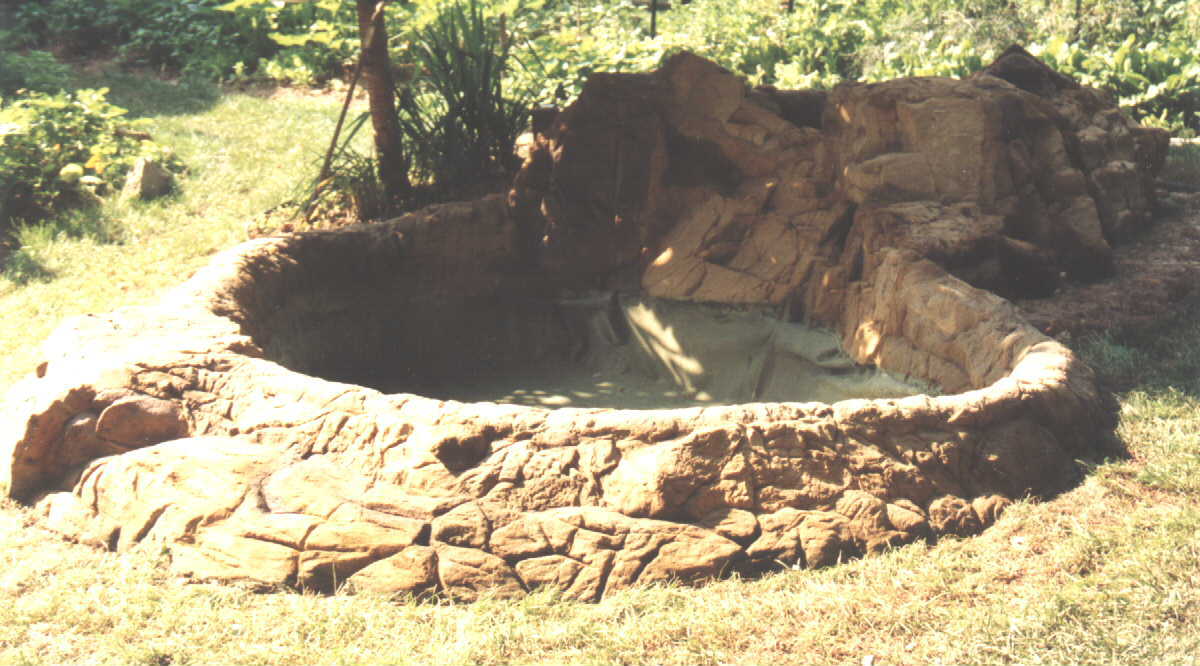
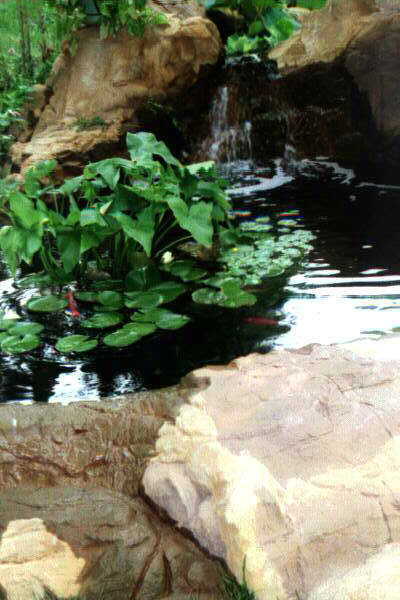
Here is the finished product. It is difficult to see in this photo, but the different slabs of molded concrete have been mixed with pigment before setting and show a variation in color. The multiple colors give a different dimension than just one solid coloration, just as natural rock tends to show. The dark areas here are from the water overflowing. The filled areas were all originally grey as concrete is known to be. I used two colors of a special acid wash to give the concrete a worn patina look and to nuetralize the pH at same time.
The only drawback to this was the extra expense and I had to apply generous amounts of lime to neutralize the acid wash around the soil of the pond. Another option would be to add pigment to the concrete while mixing. This may be desired if you cannot replace the surrounding soil. Through our constant trampping on the dirt and the chemicals I had to remove a good 6 inches of soil and replace it when I was ready to install my plants around the pond. This destroyed soil is currently being rebuilt near my compost pile. It will probably take several years at least to renew, but I did see a good population of "critters" inhabiting this soil the last time I disturbed it.
If you are in the DC/Maryland/Virginia area and wish to contract my Pond Pro, please do! He's not really pleased with my pond, as he is a perfectionist and since I was involved in the actual construction and had a lot to do with building it MY way, well, he's not taking credit for the final design, but he does have some excellent ideas and is quite qualified to build ponds, as many pond building companies are not as experienced as they claim to be. I would suggest making sure the person bulding your pond is an actual pond owner themselves, as they should have a better idea of how to keep a ponds' ecosystem balanced.
Pondering After Thoughts:
My pond is only 24" deep and does not have built-in shelves which I prefer because of the threat of raccoons being able to sit in the shallow water of the pond on the shelf and attack the fish. The fish are safer since it's too steep and deep for the critter to sit in the water and catch them and because they are hand fed, they are friendly and vulnerable. I place black plastic milkcrates on their sides and lay a 2ft sq. slab of slate on top. This creates a nice shelf and shelter for the fish in case something bad comes by, or they just want to hide. Although this set up could be a base for preditory birds to stand on, stringing monofilament or netting could deter them. The pots of potted waterplants are very sturdy on these and they can be moved around. They also serve as protection and give the fish a sense of security in the winter when the plants are removed.
I would now like a deeper pond as my koi are getting bigger, so we are contemplating on creating an additional pond below the larger of the two existing ones and have the water flow into it over the ledge as it already has this capability, being the lowest part of the pond. I will keep the 24" pond as a plant/small koi pond and put the large guys in the new one, hopefully it will be at least 4-5 feet deep. Since large koi eat plants this will be a way to enjoy plants and have large koi too. The upper (smallest) pond is where the water feeds back into the pond from an underground line and is also my biofilter. I have put bags and crates of matting and netting in there and it works quite well. I intend to put the lotus back there next year, as the leaves look quite grande in it.
 This itkl site is owned by This itkl site is owned by Meilie Moy-Hodnett. Want to join the The Internet Tour for each Koi Lover? |
|---|
| [Prev 5] [Prev] [Random] [Next] [Next 5] [List Sites] |