
Tutorial

Buttons are used in many places in constructing web
pages as well as in email stationery.
The above is an example of a simple raised button.Ā This tutorial is based on using
Paint Shop Pro 5 or later and assumes the viewer has a basic knowledge of that program.
1.Ā Open a new image with a background color of your choice, 250 x 125 pixels.Ā For this exercise we are using a light color for the sake of clarity.

2. Select the Selection Tool from the tool pallet, press the letter O to open the tool pallet and use the above settings.Ā Click and hold the left mouse button and outline an area about 75 x 125 pixels.Ā Do not close the outline marquee.
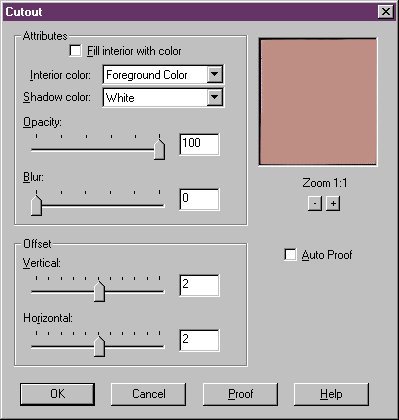
3. Select from the Main menu - Image/Effects/Cutout and use the above settings and press OK.

4. From the Main Menu choose Image/Effect/Drop Shadow.Ā Use the above settings and press OK. Close the marquee.

5. Select the Text Tool from the Tool Pallet and click in the approximate center of your button and, using the above settings and text, press OK to insert the text.Ā Do not close the marquee surrounding the text.
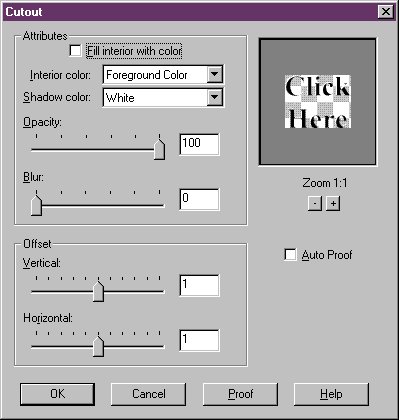
6. From the Main Menu select Image/Effects/Cutout.
Ā Use the above settings and press OK.
This will give your text a raised effect.
7.Ā Close the marquee surrounding the text. Ā Your button is finished.Ā You may now resize it, and add any other effects you desire.Ā Give it a name and save it using the Files/Save Copy As selection.
This is a simple button, made using only those tools which are standard in Paint Shop Pro 5.ĀĀ No plugins or additional filters are required.
Additional simple tutorials will appear here from time to time.Ā Please come back and visit this page again.
You are viewer number

to visit this page.
 |
This page is not maintained by Jasc Software, copyright holders of
Paint Shop Pro.
Mention of trademarked names is intended for illustration/reference purposes and does not
imply any endorsements by Jasc.