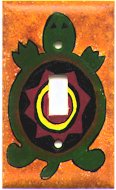
Painted Switch Plates
While browsing at the library I found a book with
scroll saw patterns. One of the patterns was for a light
switch plate. Boy, did that get my creative juices flowing.
It just gave me the idea of changing my bland beige
plastice covers, but how? Well, one thing lead to another
and my marriage of computer and crafts once again proved
fruitful. Inspiration struck as I looked through my
stained glass pictures and went to work.
I copied the basic switch plate template and opened
it in Microsoft's Image Composer. Then I opened the
stained glass picture and resized it to fit the template
and then merged the two. Then I went over to Paint Shop
Pro and printed it to the exact size of my plastic switch
plate.
Now I removed my plastic switch plate from the wall,
sanded it with a sanding sponge and then basecoated
it (it is very important, otherwise the paint does not
adhere very well). Now I traced the design with carbon
paper on the plate and then painted it with acrylic
craft paints and finished it with a few coats of varnish.
I am very pleased with my first creation. The owl on
the switch board now matches my stained glass owl on
my mirror in my crafts room.
The boy switch plate came about because my 80 year
old father-in-law requested it.
The lighthouse started out as a stained glass design
that I shrunk to size.
The sun is a stencil that I outlined with fabric paint.
I find that using the small cosmetic wedge shaped sponges
work great for stenciling small designs with acrylic
craft paint.
For the house switch plate I incorporated the double
light switch. The design comes from a stencil as well
as the sun is a stencil. The grass and the sky is sponge
painted with a mixture of several colors at the same
time on the sponge.
|