This overview provides a brief introduction to some of the capabilities
and basic user interface features of DMesh. It contains a number of screen
captures of models being built, along with the final renderings of the
model.
|
Creating a Male Super Hero Leg
(this is a rendering of the model covered in this section)

(download the above DMesh model)
|
| We begin by creating the basic shape of the object. Shown
here is a basic starting shape for a leg. The general shape of the Foot
and Ankle can be seen at the bottom, the expanded Calf and smaller Knee
area, and the larger Thigh and Hip areas.
Generally, the basic shape need not be very detailed, (as is apparent
here,) since it's only purpose is to provide a surface to attach additional
items or muscles to. Typically you will also define the Anatomy segments
at the same time, which in this case would be the Foot, Calf, Thigh and
Hip. |
 |
| To this basic shape, we begin adding the musculature system.
The following screen captures show the completed muscle positions and
overall layout as displayed by the internal OpenGL preview window. Different
colors have been used to better illustrate the individual muscles. Red
and Green show the main muscles, while blue is used for ligaments and the
Shin and Ankle bones. |
|
Inside

|
Front

|
Outside

|
Back

|
| In addition to the OpenGL preview, there are a number of
other editing windows used for creating, moving and otherwise modifying
individual items. The two main ones are the Surface Map View, (which allows
you to create, delete, resize and otherwise reposition muscles,) and the
MDL View, (which handles editing of the shape of individual muscles.) |
|
UV Grid View

|
Muscle are created and attached in the surface map coordinate
space of the object. Typically, the models uv texture layout is use as
the surface map. As such, they are simply drawn on a flat uv map.
This screen capture shows the major muscle definitions for the above
leg, with the Sartorius muscle of the upper Thigh selected. It can then
be repositioned or resized using the standard windows rectangle dragging
interface. |
|
MDL View
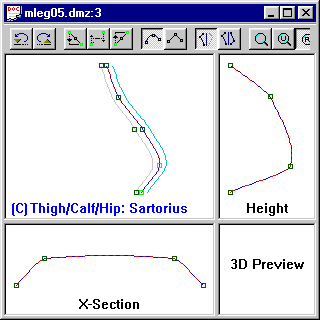
|
For additional adjustments, the curves defining each muscle
are refined by modifying their control points.
This screen capture shows the main curves used to define the same Sartorius
muscle. The control points are modified by dragging with the mouse, using
the various keyboard commands, or by setting them manually. Additional
options are available through dialog boxes and the context menus. |
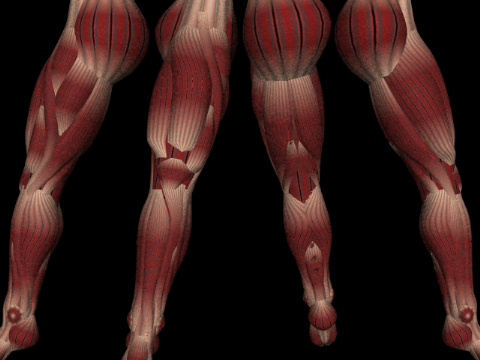
| Finally, we export the model and render it.
(note that for illustration purposes, these examples have quite pronounced
musculature. To produce more realistic results you would likely reduce
this effect. This is a fairly simple task of reducing the displacement
values for the appropriate items, or by changing the scaling factors for
specific layers as a whole.) |
| First, just the muscle layers were exported, and a human
muscle texture applied to the individual mesh objects. |

|
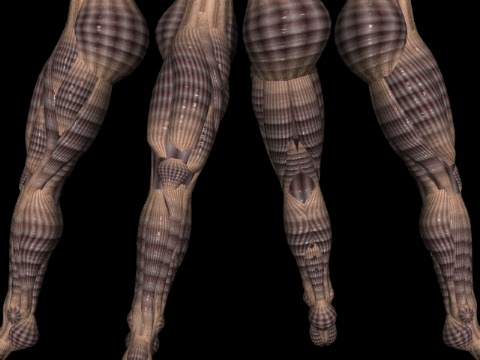
| This version uses the same approach, while applying a more
alienish texture for the individual muscles. |

|
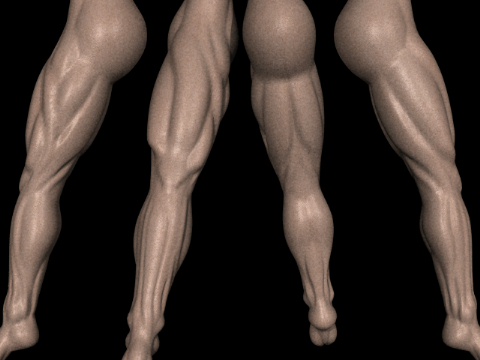
| Finally, the actual skin layer is exported and a more realistic
skin texture is applied to the model. |

|
|