| 1997 Toyota 4Runner Door Panel Removal
Instructions |
| |
|
This write-up is useful for things such as lubing your
power window motors and slides, changing speakers or general
cleaning. I'm sure there's more reasons you can think of, but
whatever your reason, here's the write-up!
|
Tools needed:
Small flat-head
screwdriver
Icepick-like tool if available
Phillips
screwdriver (preferably 2 sizes: large and small)
Duct
tape
|
|
1. First, start by
opening the door. :) In case, for some reason you've never seen it
before, this is what it looks like: |

|
|
2. On the inside of the
door towards the front of the truck you will see a plastic center
pin clip. To remove this clip, simply press in the center of the
plastic clip with an ice-pick like tool or screwdriver. Remove the
entire clip by carefully prying the outer ring with a tiny flat-head
screwdriver.
To put it back in, push the center
pin back through the outer ring so it sticks out the other way.
Place the entire clip back in the hole and press in the center pin
to lock it in place. |

|
|
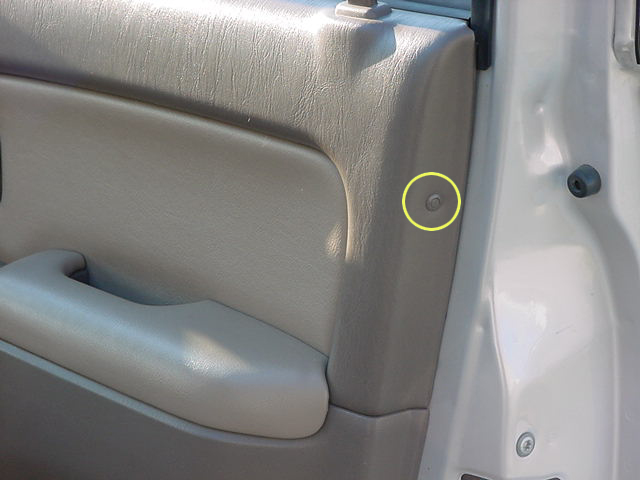
3. At the back of the
door towards the rear of the vehicle you will see another plastic
center pin clip. It's smaller than the one above, but is removed the
same way. |
|
|
4. Carefully pry up the
armrest at the front, middle and back. If you get that much open and
it won't come out cleanly look underneath it and use a flathead
screwdriver to push the final one or two white plastic clips to get
it out. There are potentially 6 or so plastic clips that are
breakable so be careful when you do this.
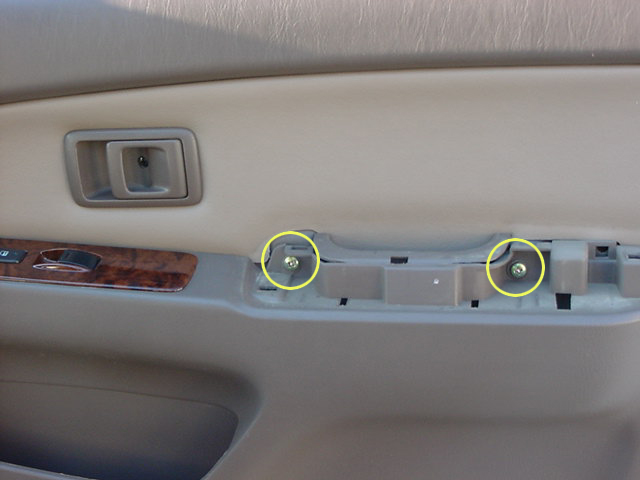
5. After you've removed
the armrest you will see two screws which you need to
remove. |
|
|
6. The next step is to
remove the power window and door lock panel. Pry it up ONLY AT THE
FRONT of it. There is one plastic/metal clip that will give and once
you pop it up, slide it forwards toward the front of the truck to
remove.
7. Detach the two wiring
harnesses to take the panel completely off. The wiring harnasses are
different so you can't make a mistake when you try to plug them back
in. |

|
|
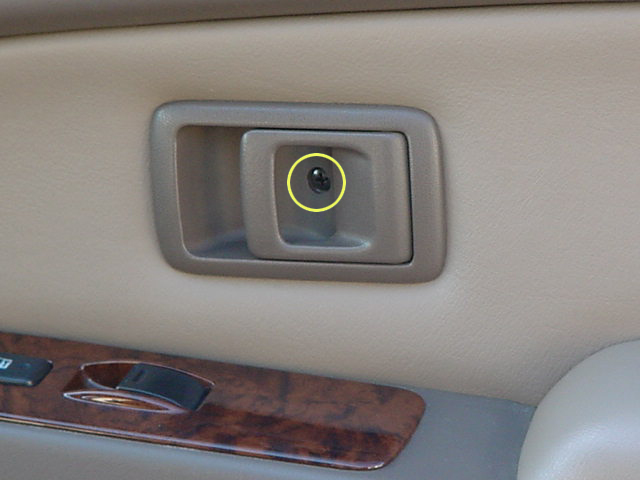
8. Now remove the small
screw holding in the door release handle. Using a Phillips
screwdriver, take the screw out. It will be smaller than the
previous two you had to remove. |
|
|
9. Door latch time. This
is a little tricky, but if you're careful you won't break the tiny
plastic pieces. The plastic door handle release is connected to a
metal wire in the door by yet another plastic piece. Your goal is to
remove the plastic door handle WITH the little plastic connecting
piece, leaving the metal wire on its own.
At the bottom of the (in this picture
it's green) plastic piece there is a little clip which holds it to
the metal wire. Use a flat-head and pry it gently downwards so it
can release from the metal wire and rotate it. Once it's not holding
the metal wire via the little clip on the bottom, you can now slide
the door handle and plastc piece upwards to detach it from the metal
wire. |

|
|
When you're finished, the door panel
should look like this: |

|
|
The removed plastic door handle
should look like this. You can see in this picture that it is white
instead of green. I had already pre-purchased two of these plastic
clips from Toyota in preparation for replacing them (and just in
case I broke them). So this what the new piece installed looks
like: |

|
|
10. Ok, we're almost at
the end now. On the bottom half of the door panel, it's held in by 7
plastic clips. You will need to grip the bottom of the door panel at
each of these 7 spots and pull forcefully, but carefully. Once you
have all the clips off, push the entire door panel upwards and it
will come off.
You can see the spots where the 7
clips will be found here: |

|
|
Door panel now completely
removed: |

|
|
11. When we pulled off
the passenger side door, there was an extra black plastic clip that
is shown in the pictures below. Strange thing was that this was not
present on the driver-side door. I get the feeling the doors panels
had been taken off before and the original owner lost one. You can
see below where the plastic clip goes both on the door and the door
panel: |

|
|
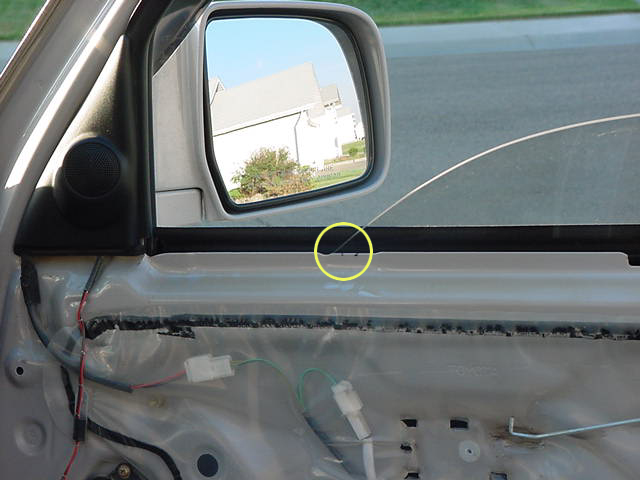
12. If you need to remove
or replace the plastic sheet (used to prevent water and dirt from
collecting within your doors) be sure to remove the two grommets
(shown in the picture below) first:
Also note that this is a good time to
inspect the condition of the plastic sheet and make sure it's sealed
properly all the way around. I like to be extra sure so you can see
the start of my duct taping all around which I did on both front
doors. |

|
|
That is all! Installation is the
reverse of removal. |
| |
 |
| |
| Back to the HBoss.Net 4Runner Page |
| |
|