automating X |
|
FTPSync - Updating Your Series X Resources |
|---|
|
Home Macros Scripts Weblinks Other Tools FAQ Links About
|
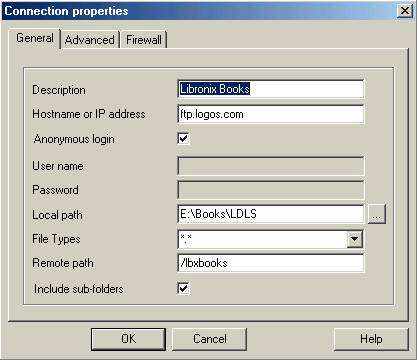
Steps 1 to 3 should be performed the first time you use FTPSync. After the first time you can go straight to step 4. 1. Configure FTPSync for connecting to Logos FTP Server as illustrated below. The description can be anything that is meaningful to you. The Local Path should be set to the directory on you hard drive where your Libronix Books are located. Set the Hostname and Remote Path should be set as illustrated.
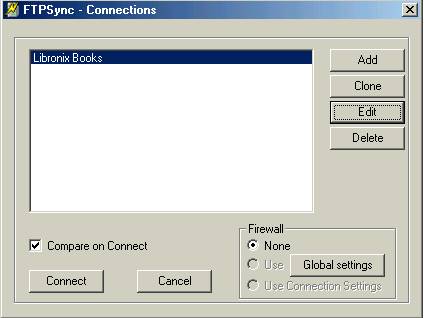
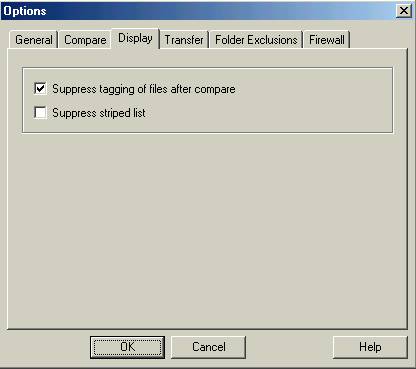
3. Click on the Global settings button to open the Options Dialog Box. Click on the Display Tab and select suppress tagging of files after compare. Click Ok to return to the Connections Dialog.
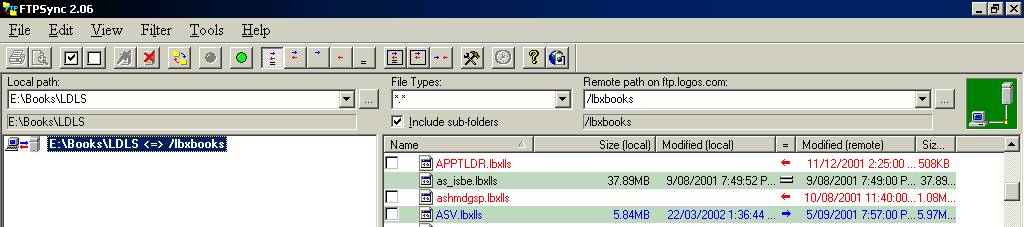
4. In Connections Dialog Box (see step 2) select the connection and click on connect. You will be taken to the main window of the FTPSync program. It is divided into two halves. On the left hand side the directories being compared will be listed.
On the right hand side notice the green box showing a computer connecting to a server. This will be green when you are connected to the Logos FTP server. It will be blue while the connection is taking place and red when there is no connection. On the left hand side will be a entry: local path <=> remote path eg. E:\Books\LDLS\ <=> /lbxbooks. Click on this entry and the files on the remote server will be shown on the right hand side of the screen. You can click on one of the column headings eg. Name, Size or Modified to sort the list of files.
Files in red fall into two categories. The first is files that are on the Logos FTP server but not on our local hard drive. If you have all of your unlocked resources on your hard drive then these will be files for which you have not unlocked. These can be easily identified because they will not have an entry in the modified(local) column as can be seen for the files APPTLDR.lbxlls & ashmdgsp.lbxlls above.
The other type are files that are on both your hard drive and the Logos FTP server, with the file on the FTP Server being newer than the one on your hard drive. These can easily be identified because as well as being in red they will have a timestamp entry in the Modified(local) column as can be seen above for the entry for aehl.lblls. (Note the file acmirror.lbxlls in blue. It is on the local directory but not on the remote server. In this instance the most likely explanation is that the resources belongs to a third party and so in not on the Logos FTP Server. In this case the particular file in question is the Ausberg Confession, a resources on the Luther's Works Collection.)
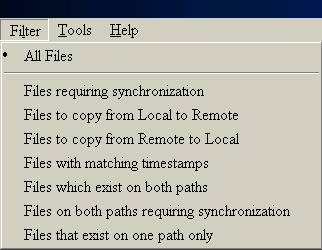
The default is for all files to be selected. If you want to view all files on the FTP server that you either do not have on your hard drive or require updating on your hard drive choose: Files to copy from Remote to Local. This will restrict the list to all files coloured red. If you want to view only files that you already have on your hard drive that require updating choose: Files on both paths requiring synchronization. This include files coloured both red and blue that exsist on both your local drive and the FTP server. (Remember you will be only interested in those in red.)
|
|
| |
Other Tools
|
|
|
|
This site is maintained and updated by Andrew. Page Created: 03/06/2002. Page Updated:12/10/2002 Current Date: |
|||