|
Home

Macros
Scripts
Weblinks
Other Tools
FAQ
Links
About
|
|
The following example will show you how to activate the XP Look Toolbar. If you know the location of your
custom toolbar folder then you can skip the step1.
- Identify the location of where your personal LDLS user files are stored. For instructions click on the version
number of LDLS you are using:
Version
1.1a or lower Version
2.0 or higher
- In Windows Explorer Naviagate to the Root Path
- A folder called CustomToolbars should exist within the root path.
eg. E:\My Documents\Libronix DLS\CustomToolbars\
If the folder does not exist open windows explorer and navigate to the root path and create a foler called CustomToolbars.
- Save the custom toolbar file in this folder. Note custom toolbar files have the extension .lbxctb
- Go to Tools -> Customize
- Select XP Look and then click Close
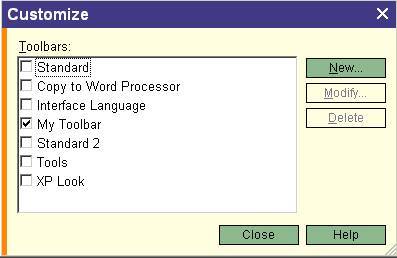
- Click on Icon on XP Look Toolbar

- Series X interface will be reset to have XP Look
- To turn off XP Look click on icon on XP Toolbar
|
Standard Look
|
XP Look
|
|

|

|
|