|
Home

Macros
Scripts
Web Links
Other Tools
FAQ
Links
About
|
|
To install a toolbar script you need to attatch it to a custom button on one of your toolbars. (Remember you
must have Series X 1.0b or higher.)
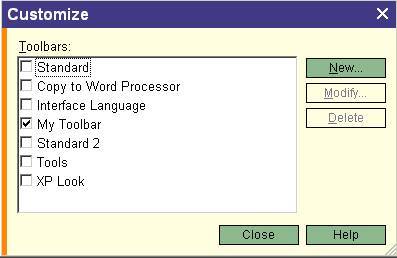
- Go to Tools, Customize. This will open up a box that will list all of the toolbars you currently have and the
option to create a new one. Select the toolbar you want to add the script to and press modify(or create a new one
if you wish).
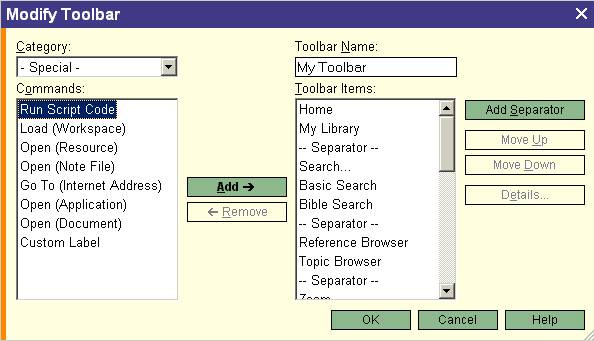
- This will open up the modify toolbar dialog box. On the top left hand side you will see the category drop down
list. Select Special. In List of Commands Select Run Script Code then click Add. Run Script Code will be placed
at the end of the list of toolbar items. SelectRun Script Code in the Toolbar items list and click on Details.
- The command details dialog will open. In the name box change name to something appropriate. Style determines
how the button will be displayed ie. text, image or both. To set the image you want to display on the toolbar click
on change.

- In the templates drop down list choose custom code. Open the text file for the script you downloaded and copy
the script out of the text file and paste it into the blank script code box or type in your script if creating
your own.
- Click on Ok to return to modify toolbar dialog, click Ok again to return to customize.Make sure the toolbar
that you added the script is selected. Click close. Your new toolbar button should now be ready to use.
|