 |
 |
 |
 |
 |
 |
| CLICK ON PICTURES FOR A LARGER VIEW |
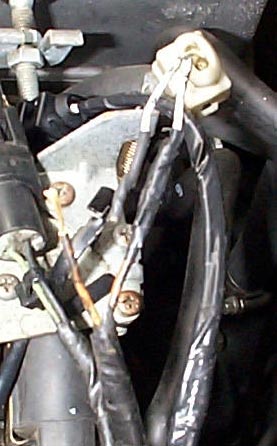
| The first step is to disconnect and strip back the tape on your old injector clips. You will see that these clips on my car are not the origional. They were replaced several yeras ago, but I decided to use a better type of connector. I got the new ones at Top End Performance (www.racetep.com for $26), they are the style that you push on the ratianer clip to remove, not the stock style where you have to remove the retainer clip, which then gets lost. See the link at the bottom of this page for a part # and picture. You must do the leads one at a time, being careful to keep the polarity correct. If you get the polarity wrong, the injector will not work. It is a VERY good idea to double check that the ignition is off, the ECU supplies a constant +12 volts to the injectors while not in use (the ECU fires the injectors by grounding them). You don't want to chance blowing the ECU driver circut. Cut the lead as close to the end as possible. |
| After you have cut the lead, you want to strip back about 1/2" of insulation. You will probably have to remove about 1/2" of factory wire, look at the color of the copper, if it is clearly corroded you will want to cut it back a littl further to ensure a good solder bond. After cutting back the insulation you discover that the entire length of the wire is corroded inside, you will just have to stop cutting and live with the corrosion. Mine were corroded to about 3" from the connector, I stopped cutting there. Remember, you want to leave it as long as possible, don't cut more than 4" off. You can scrape most of the corrosion of with a knife to get a better solder bond After you cut the wire, put on your shrink wrap tubes if that is what you are using. I always forget this till after I have solderd it : ) |
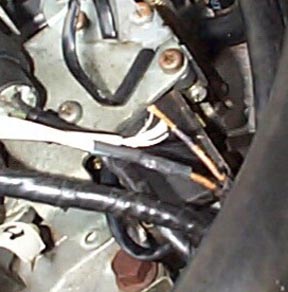
| Next step is to solder the wire. Be sure to get good penetration, a cold solder joint is a real bummer to troubleshoot! A little soldering 101: A propper solder bond is only accheived by heating the work, NOT the solder. You want apply the heat of the iron to the copper wire till the wire itself is hot enough to melt the solder, otherwise you'll end up with a cold solder joint. Cold joints often don't conduct at all! Be sure to apply enough solder to the wire that you see it wick deeply into the insulation, this gives the joint additional strain relif. It will be the strongest point in the wire. When I bond the wires together, I spiral twist them around each other, this keeps them from moving while I solder, and makes a VERY strong joint. As you can see. it is also low profile so putting the shrik wrap over the joint is easy. |
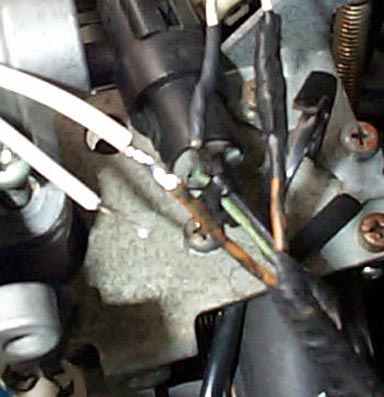
| After you solder the joint you slip on the shrink wrap tubing. This stuff is found at most any electrical parts store like radio-shack, and even Home Depot. It's fairly cheap and does a REALY nice looking job. It also ensures you dont' get any moisture in the joint. You can see the left one has been shrunk, and the right is ready to be shrunk. I carefuly use the tip of my iron to shrink it, but a heat gun is recomended. I have also used a lighter in a pinch, but not realy a good idea around the fuel system like this. |
| Here I've shrunk the tubing, but now I have put on about 3" of black tape around one of the joints. WHY? because I once had a joint in my stereo system rub against the neighboring joint, after about 1 year it broke though the insulation and shorted out the system. I blew fuses and couldn't find the short for about 6 hours. I was PISSED ! Turns out the shrink tubing isn't as durable as tape. Now whenever I put 2 shrink joints next to each other like this, I tape one for added reliability and piece of mind. This may also save your ECU some day. |
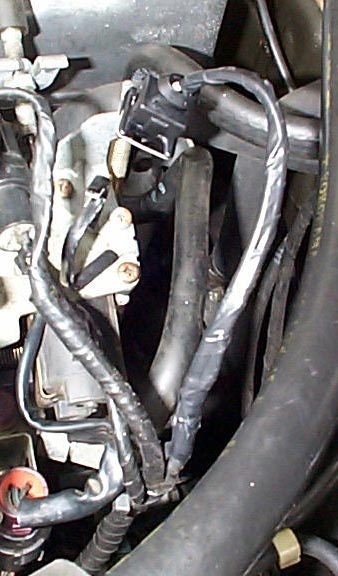
| Here is the finnisehd product. I spiral wraped the new leads starting at the connector and working twards the harness. You want to be sure the tape is overlaping so you get ateast 2 layers thick of tape the entire length. You want to tape it all the way past where you cut off the factory tape, and then wrap back over the joint several times. I am a bit overboard when it comes to little details, but tape is cheap and it looks as good or better than the stock harness did. if you are in a wet climate, you probalby want to put some calking or glue in the back of the connector to keep out condensation. I use silicone gel. The connector is water proof on the inside, but not at the back for some reason. |