 |
| Enclosure Buidling and Inside |
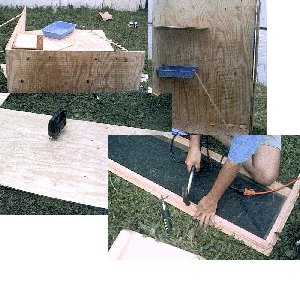
| Building the enclosure the credit has to go to my husband Jason, If it was left for me to build id still be cutting it out next year. Im lousy with tools, thankfully I have a great husband that did the work, and put up with my "attempts" to help. All though I do need to say I have made major accomplishments in helping to build this enclosure, I was able to hammer three nails in a row without bending them, AND used a jig saw and got a straight cut. If you know me these are MAJOR accomplshments LOL. Ive been banned from most power tools after Jason and other family memebers saw me using them (should say attemtping to LOL). I helped where I can, I designed it, Jason made a few econicmal and working decisions then I painted it, along with my daughters help. |
 |
 |
| Building of the enclosure was a bit trying to say the least. My husband and myself had to do a few revampings of our ideas. A few changes and seeing that some of my ideas were unable to be done, making some financial decisions. We finally got started. We built the enclosure with 1/2 and 3/4 inch plywood, pet screening, a few finishing nails, and put together with screws for easy assemble/disassemble. The enclosure has a solid back, bottom, and side, The front is solid half way up with a screen window . The door is made of woodframed screening, with handle and latch. The top is not permant right now, for now we have it divided into three sections, two holes cut out one for the basking lamp, the other for the active uvb we will be receieving shortly. After leaving the enclosure out to dry someone decided to have fun destroying it. Knocking it over and pulling the door off hard enough to damage the hinges. After a few very upset moments, and some new planning we were able to salvage the frame and door. |
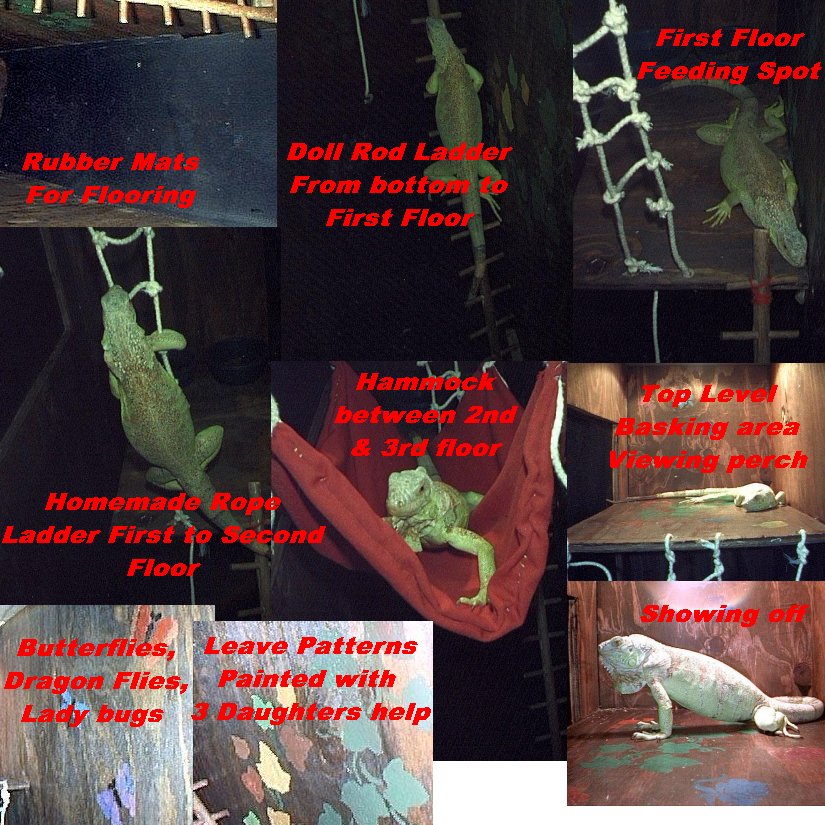
| The inside of the enclosure was a bit rough to design. First thing we did was to stain the enclosure, two coats of stain, lots of stain on myself and everything around me. Then painting the touches on, Roses, butterflies, dragon flies, lady bugs, and leaf patters were painted on with my daughters help. Then sealed with polyerathane after adding a few decals on the outside for decoration. The inside of the enclosure gave us a bit of planning headaches. We ended up with heavy rubber mats covering the bottom floor for easy pull out and hosing off. From the bottom floor a doll rod ladder made by my husband leads to the second level, the feeding spot/bed spot. This shelf we use to hold Double D's food/water bowls, she also likes to climb down here for a nap or even at night occasionally. From the second level is a homemade rope ladder that leads to the third and final level. Inbetween the second and third level is a hammock, that is used on occasion, hopefully she will get more comfortable with it as time goes on. On the third shelf is her basking spots. Its also known as her IM bigger than you are and im watching you spot. From this spot she can see all that is in our front room. The front screeing and the side door screening has also become an extra special climbing toy. She is really enjoying her new enclosure. Im thinking of adding a few other little tid bits as time goes on but for now shes really liking her new digs. |
 |