For Christmas-Tree Baubles
You need:
Expanded-polystyrene balls
Various pretty Christmassy-coloured paper serviettes (one will cover about two
baubles)
PVA glue
A long needle
Pretty thread: silver or gold is best
Extra-fine glitter
For Easter Eggs
You need:
Expanded-polystyrene eggs (chicken size is probably best)
Various prettypaper serviettes (one will cover about two eggs)
PVA glue
Extra-fine glitter
Christmas-Tree Baubles Method:
First make the hanger by using a LONG needle and pretty thread, dig the needle
both ways through the bauble, and then knot the end. Now continue as for the
Easter Eggs.
Easter Egg Method:
Cover table!!!
Put the PVA glue into little bowls with at least its own volume of water. Detach
the extra one or two ply paper from the back of the serviettes.
Tear the serviettes into small pieces, probably about the size of a thumb nail,
or a little bigger. Dip the paper into the glue and stick to the egg. I hold
the eggs at the ends, and cover them last.
I also ensure my fingers are damp (and gluey), as otherwise they take the covering
off. Continue until the egg is fully covered. You can make some areas more of
a single-colour block if you wish.
Before the egg dries, sprinkle glitter over it, but not too much as you can
overdo this. THIS MUST BE DONE OVER A TRAY, otherwise you get ALL the glitter
on the floor. If it's on a tray, you can recycle it!!!
Allow the eggs to dry on a clean surface.
When my girl friend from Florida taught me this, we spent about an hour doing
two eggs - so Guides will probably take longer. My Guides did two in an evening
(1.75 hours) and played some games.
It's the clearing up that takes the time.
| Method: | |
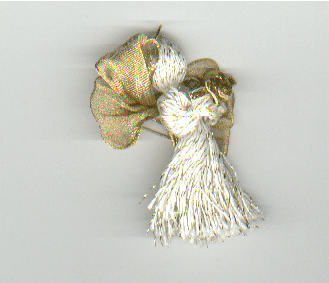
| Head: | Cut chenille into 1.5" (4cm) and 4.5" (12cm) lengths, glue one end into the head bead |
| Gown: | Using 9" wire, make a small eye in one end by folding back about 1cm. Insert eye into the binding of the 1" ruffled lace, this will be the "neck", and push the lace to the other end. Using pliers, place the two naked parts of the wire together, cut off the excess (with the eye still on it) and twist to secure. Thread the neck onto the chenille (with the head on it). Repeat with the 3" ruffle to make the gown. Bend the end of the chenille. |
| Wings: | Using the lace ribbon, make a bow, with no streamers, and secure with a piece of wire. Attach to back of neck, using either the wire, glue, or the end of the halo (see later for this). |
| Hair: | Using the scissors, pull the ribbon across the sharp edge to curl it. Put some glue on top of the angel's head, also put some glue in the middle of a piece of hair, and attach to the head. Repeat with the other two pieces of hair. |
| Halo: | Twist the 4.5" chenille into a halo, leaving 1 cm free to attach it to the neck. Put some glue around the outside edge of the halo and attach some of the length of gold beads to it, cutting off the remainder. Attach the halo to the neck of the angel. |
| Bow: | Use the remainder of the metallic beads to make a small bow, tie this at the centre of the metallic thread to secure the bow, and then tie the bow to the front of the angel's neck, leaving enough thread to make a hanger with the ends. |
|
|
|
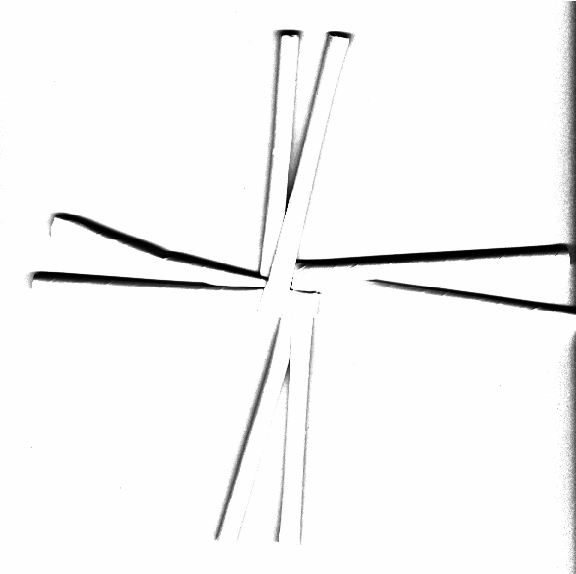
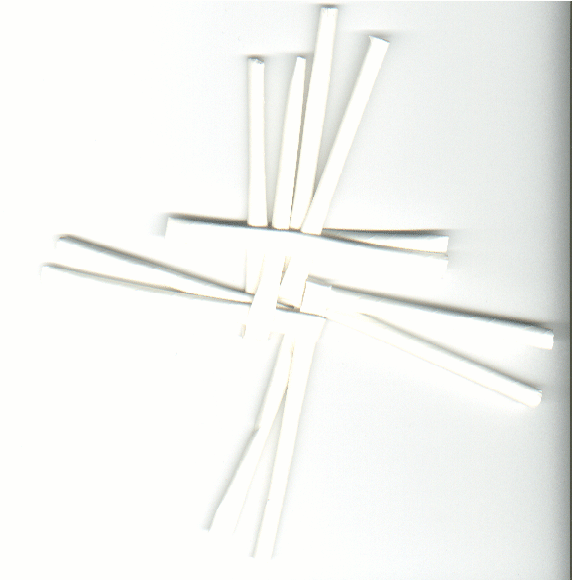
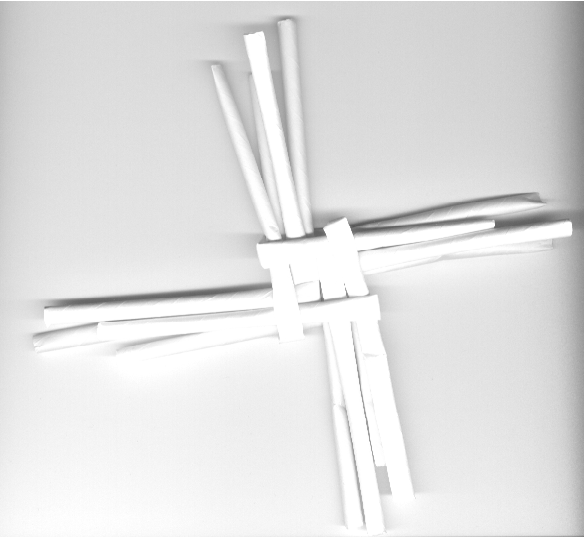
| First Round of Cross | Start of Second Round of Cross | Completed Second round of Cross |
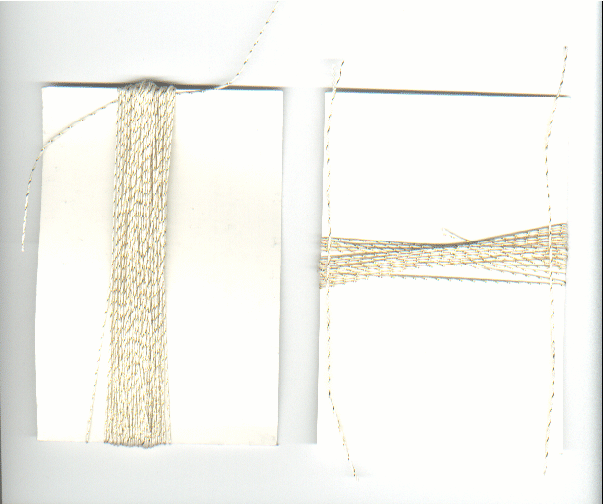 |
 |
| The Angel threads wrapped around the cardboard | The completed Angel |