
I made this page to display some photos of the Gundam models I built. G Gundam being my favorite show out of the Gundam TV series I've seen so far, I wanted to get some figures as sort of souvenirs. Then I decided that the model kits would be more fun than figures since I'd get to put them together myself. I wanted to keep things simple and get small models, so I ended up purchasing all ten of the 1/144 scale, normal mode G Gundam models. I also got the "Grade Up" kit for the first five models, the Shuffle Alliance guys, because it was cheap and has some neat parts and stickers to make the models look even better. At the 1/144 scale there are also gold plated hyper mode models of the Shuffle Alliance Gundams, but I've seen some pictures of them and they look a bit odd to me, so I'll probably pass on them.
As noted, I wanted to keep things simple and fortunately the kits are kind of made for that. Parts are molded in plastic of different colors, the pieces snap together, and there are stickers to help make it look a little better. That means you don't have to paint or glue the models if you don't want to. I'm sure the more you do to the models, the better they can look, but I didn't have the time or desire to go all out here. I did want to do a little more than just put them together as is though, so I got some Sharpie markers in a couple colors. That way I could draw in some panel lines and color in some of the larger areas on the models that were molded in the wrong color (if it looked like I could do so over the color of the molded plastic and still have it look OK). That means that not of all the colors are perfect, but I'm not stressing out over that. But that was it, no real painting, no de-seaming to eliminate gaps, nothing like that. I just put them together and used the markers to color in some areas to help make it look a little bit more accurate. My pen work isn't always great, but usually as long as you're not right on top of the model the little mistakes don't stand out. It took me roughly 3 hours to build each model.
After I finished building the models, I took a quick photo using the little digital camera I have. Basically I stood the model on my desk in front of a white folder to have a uniform background, tried to make sure the lighting in my room wasn't horrible, and snapped a photo. I tried to put the model in a sort of mixed mode (e.g., Gundam Maxter only has one boxing glove on) so that you could get an idea of how it looks in all forms. Nothing particularly fancy here so the photos probably aren't great, but they serve the purpose of getting pictures of the models on the computer. The photos should all be 640x480 and in JPEG format; file sizes vary but they seem to be coming out at roughly 30 KB per image. At the moment I haven't used all of the grade up stickers. If the sticker made a part basically the correct color, then I used it. If not or I didn't think the real Gundam had such markings, then I didn't. I may still put the last batch of stickers on, but I can't really take them off once I do which is why I decided to hold off on some of them for now. Some additional parts from the grade-up kit may not be pictured either. Sometimes the kit gave new versions of regular parts and I can't put them all on at once.
So after all that talk, here's what you've been waiting for, the pictures! :) There will be at least two photos for each of the first five models, one taken before using the grade up kit and one taken after. The grade up kit includes quite a few stickers for those models and I wanted to keep the pre-upgrade images here. There are quite a few images here, so please be patient while the page loads. Enjoy!
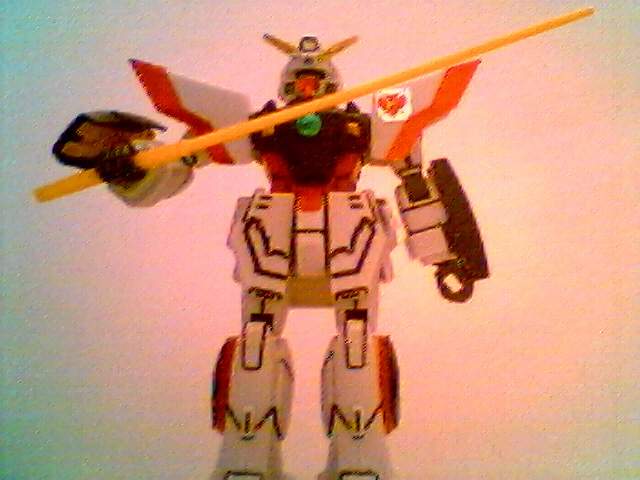
This is with the battle mode face plate on; there's also a normal mode one.
After Grade Up:
Grade-ups not done (yet): "SG" initials sticker for front of right shoulder armor, King of Hearts sticker for outside of left forearm.

After Grade Up:

Grade-ups not done (yet): "Dg" initials sticker for outside of left ankle.

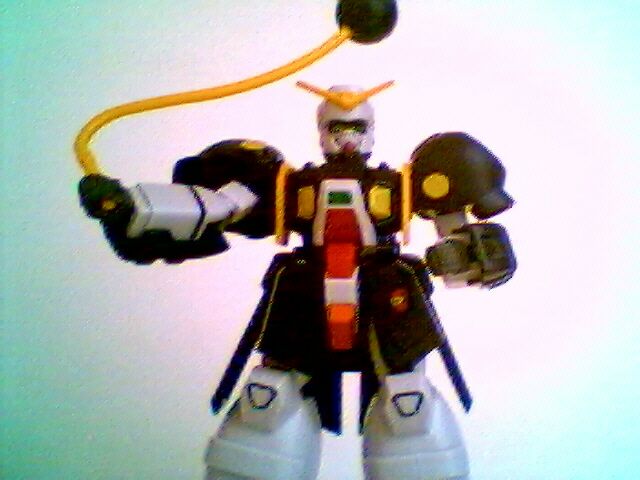
After Grade Up:

Grade-ups not done (yet): "Mx" initials sticker for front of right shin, silver sticker with blue "No.1" for front of left ankle, silver sticker with blue star left shoulder armor / boxing glove.
P.S. -- The V shaped piece on the helmet is actually broken and needs to be glued. It's currently held together with tacky wax. :)

After Grade Up:

Grade-ups not done (yet): "GR" initials sticker for outside of right hip. BTW, the piece under the shield with a rose bit in it is a spring loaded launcher -- it can actually fire that rose bit which is pretty cool. ;)
After Grade Up:
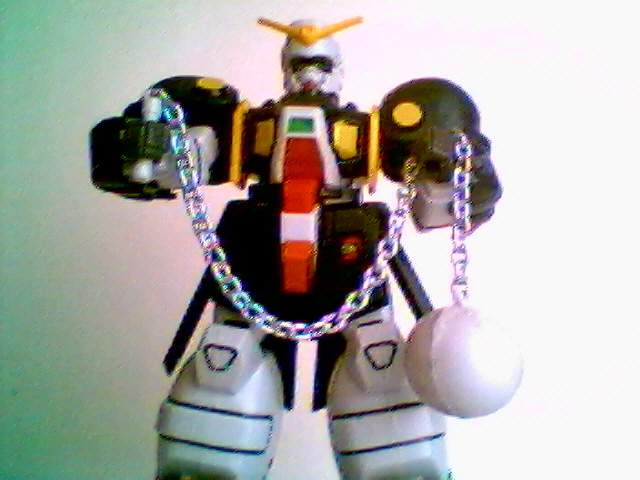
Grade-ups not done (yet): "BG" initials sticker for outside of right forearm, two gold stickers with black circles for the raised plates across both shins/thighs, a black sticker with gold trim for the front right skirt armor, black circle sticker with red star for front of left shoulder armor. BTW, that is a real metal chain on the Graviton Hammer. :)


I think she has at least one more weapon, a gun, but there really wasn't any place left to put it.

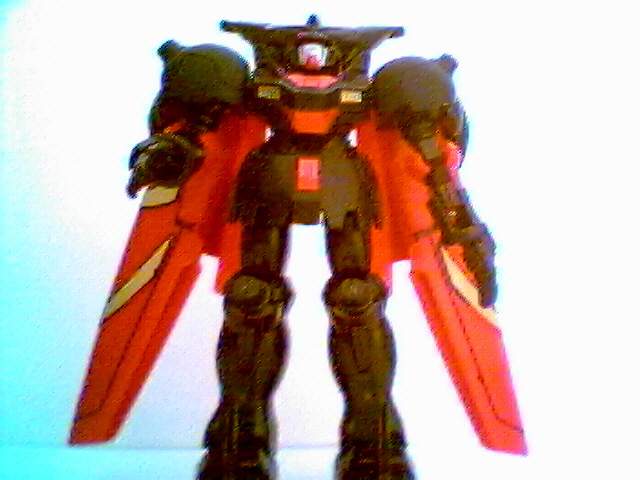
This model transforms between the mode pictured here and a regular, standing mode just like all the other Gundams. I think the manual calls the one pictured Mobile Armor Form (I usually call it the giant Gundam head mode) and the standing mode Mobile Suit Form. This is a bigger Gundam than the rest (if you've seen the show you'll remember how big the Dark Gundam was) and in the regular standing mode it's about 1.5 times the height of the other models. I usually keep it in the mode pictured here because a few large pieces are molded in the wrong color and they're mostly hidden this way; stand it up and they become much more obvious. Oh, it's possible that the smaller neck piece should have been used in this mode, I had trouble figuring that out.
This page has been visited times since March 31, 2009. Free counter courtesy of PHPJunkYard.com.
View standard disclaimer for my personal web pages.
Return to my main index page, my about me page, or my hobbies/interests page.