
First off go to this page HERE
on the TEMPOHPERFORMANCE
website for an overview on the instructions.
I suggest printing this page out and having it while you read this
and while you do the install. Also read this through
completely before attempting so that you're not caught half way through
the job and need something to finish it.
The difference between to two procedures is that instead of removing
the entire cluster prior to peeling off the
black gauge faces, I peel the gauge faces off while the cluster is
still in.
Have you got the page handy?
read and follow instructions 1-3 on it.
skip steps 4-7 (this involves removing the cluster)
follow steps 8-13 Just as it says in the instructions BE CAREFULL when
prying the needles off, the speedo one
is particularly hard. I broke mine off also, but had a spare
so no biggy.
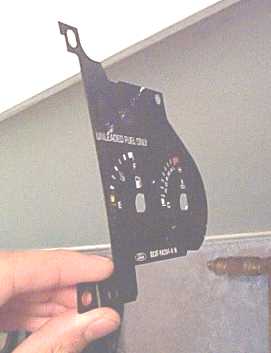
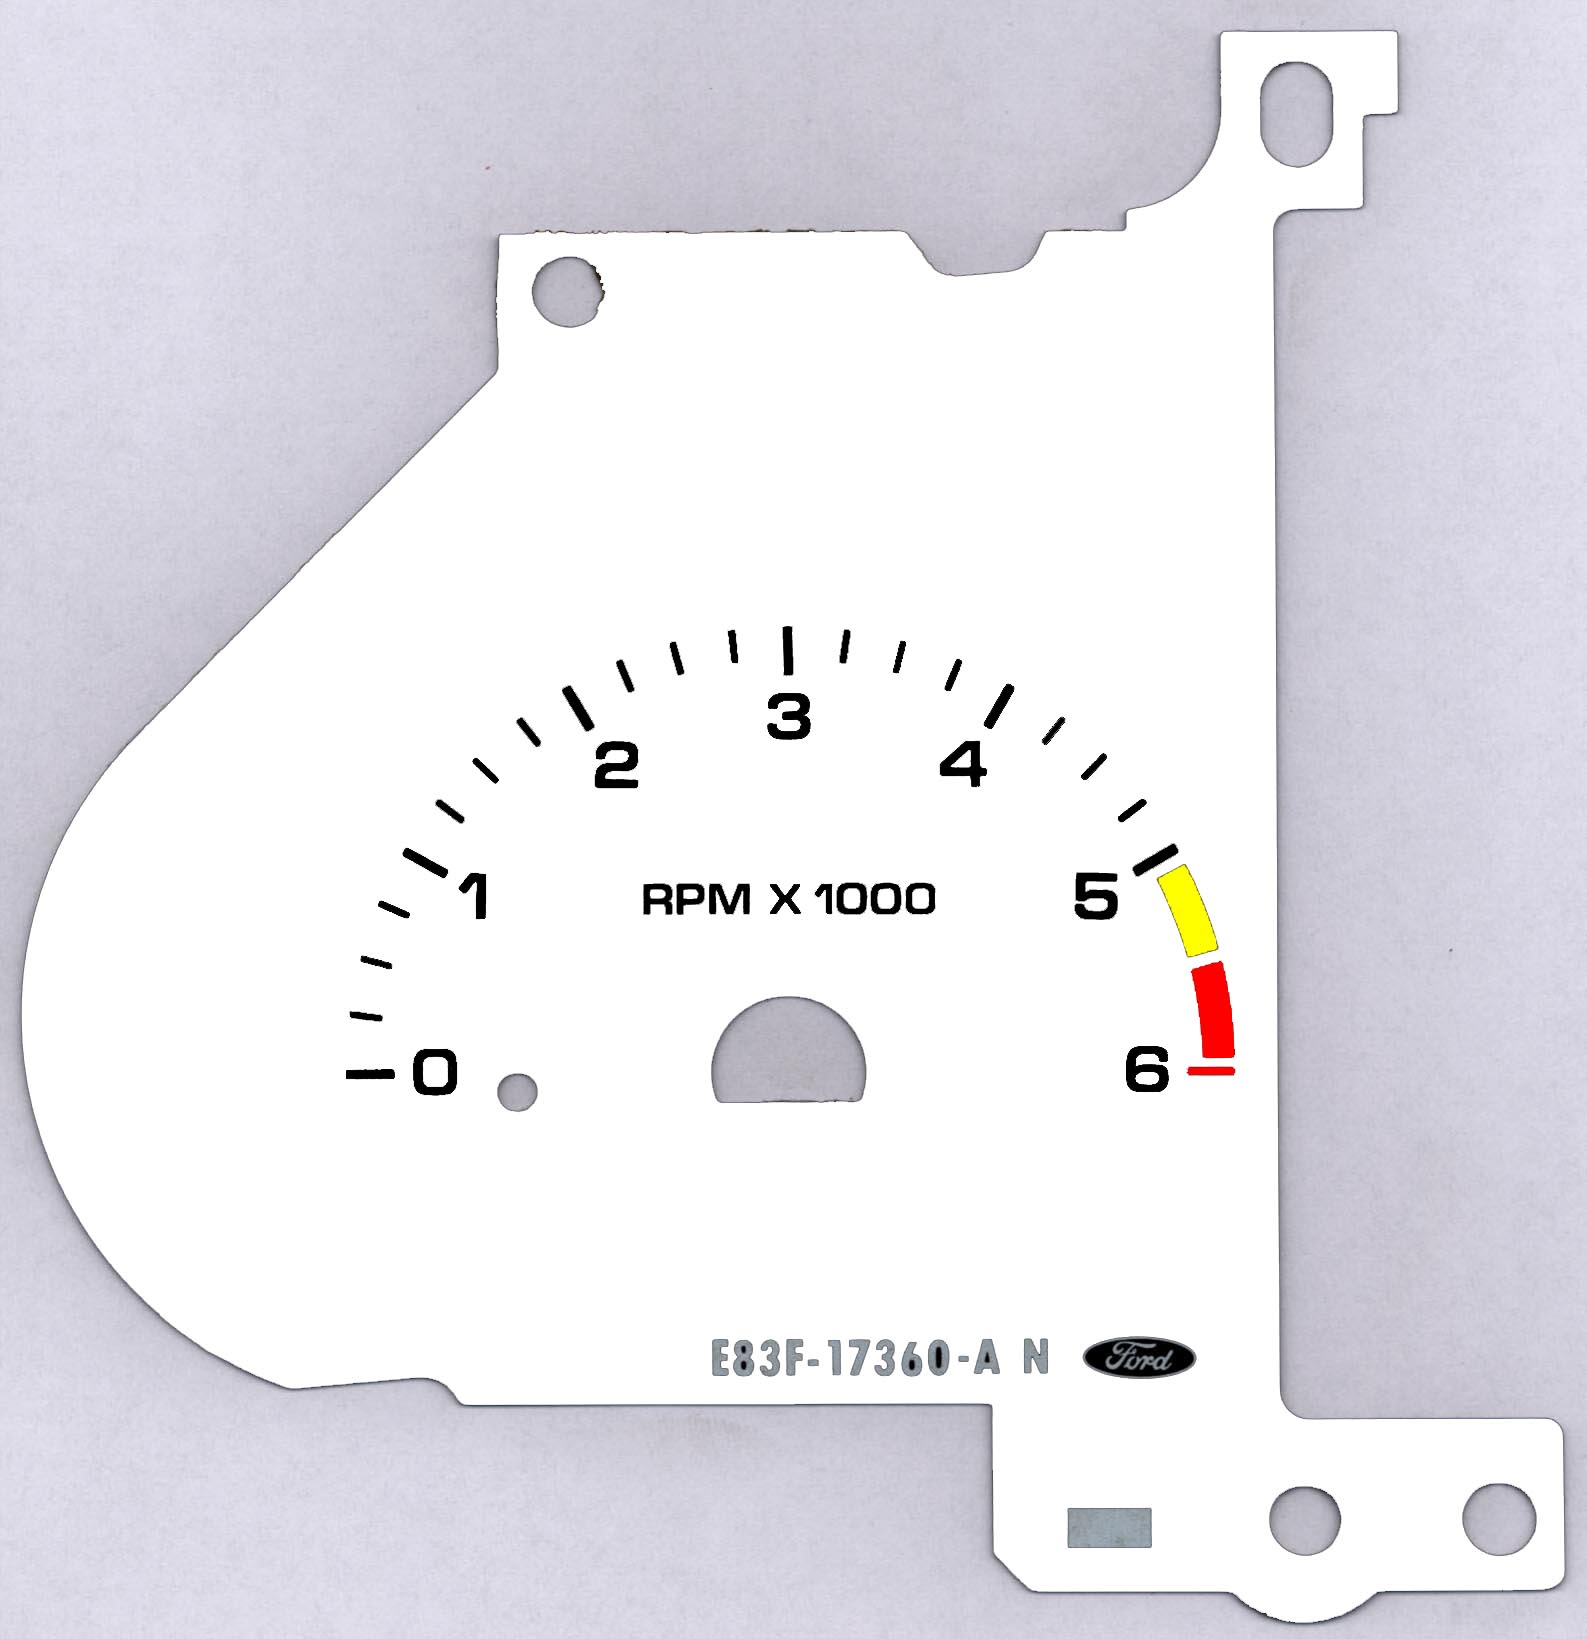
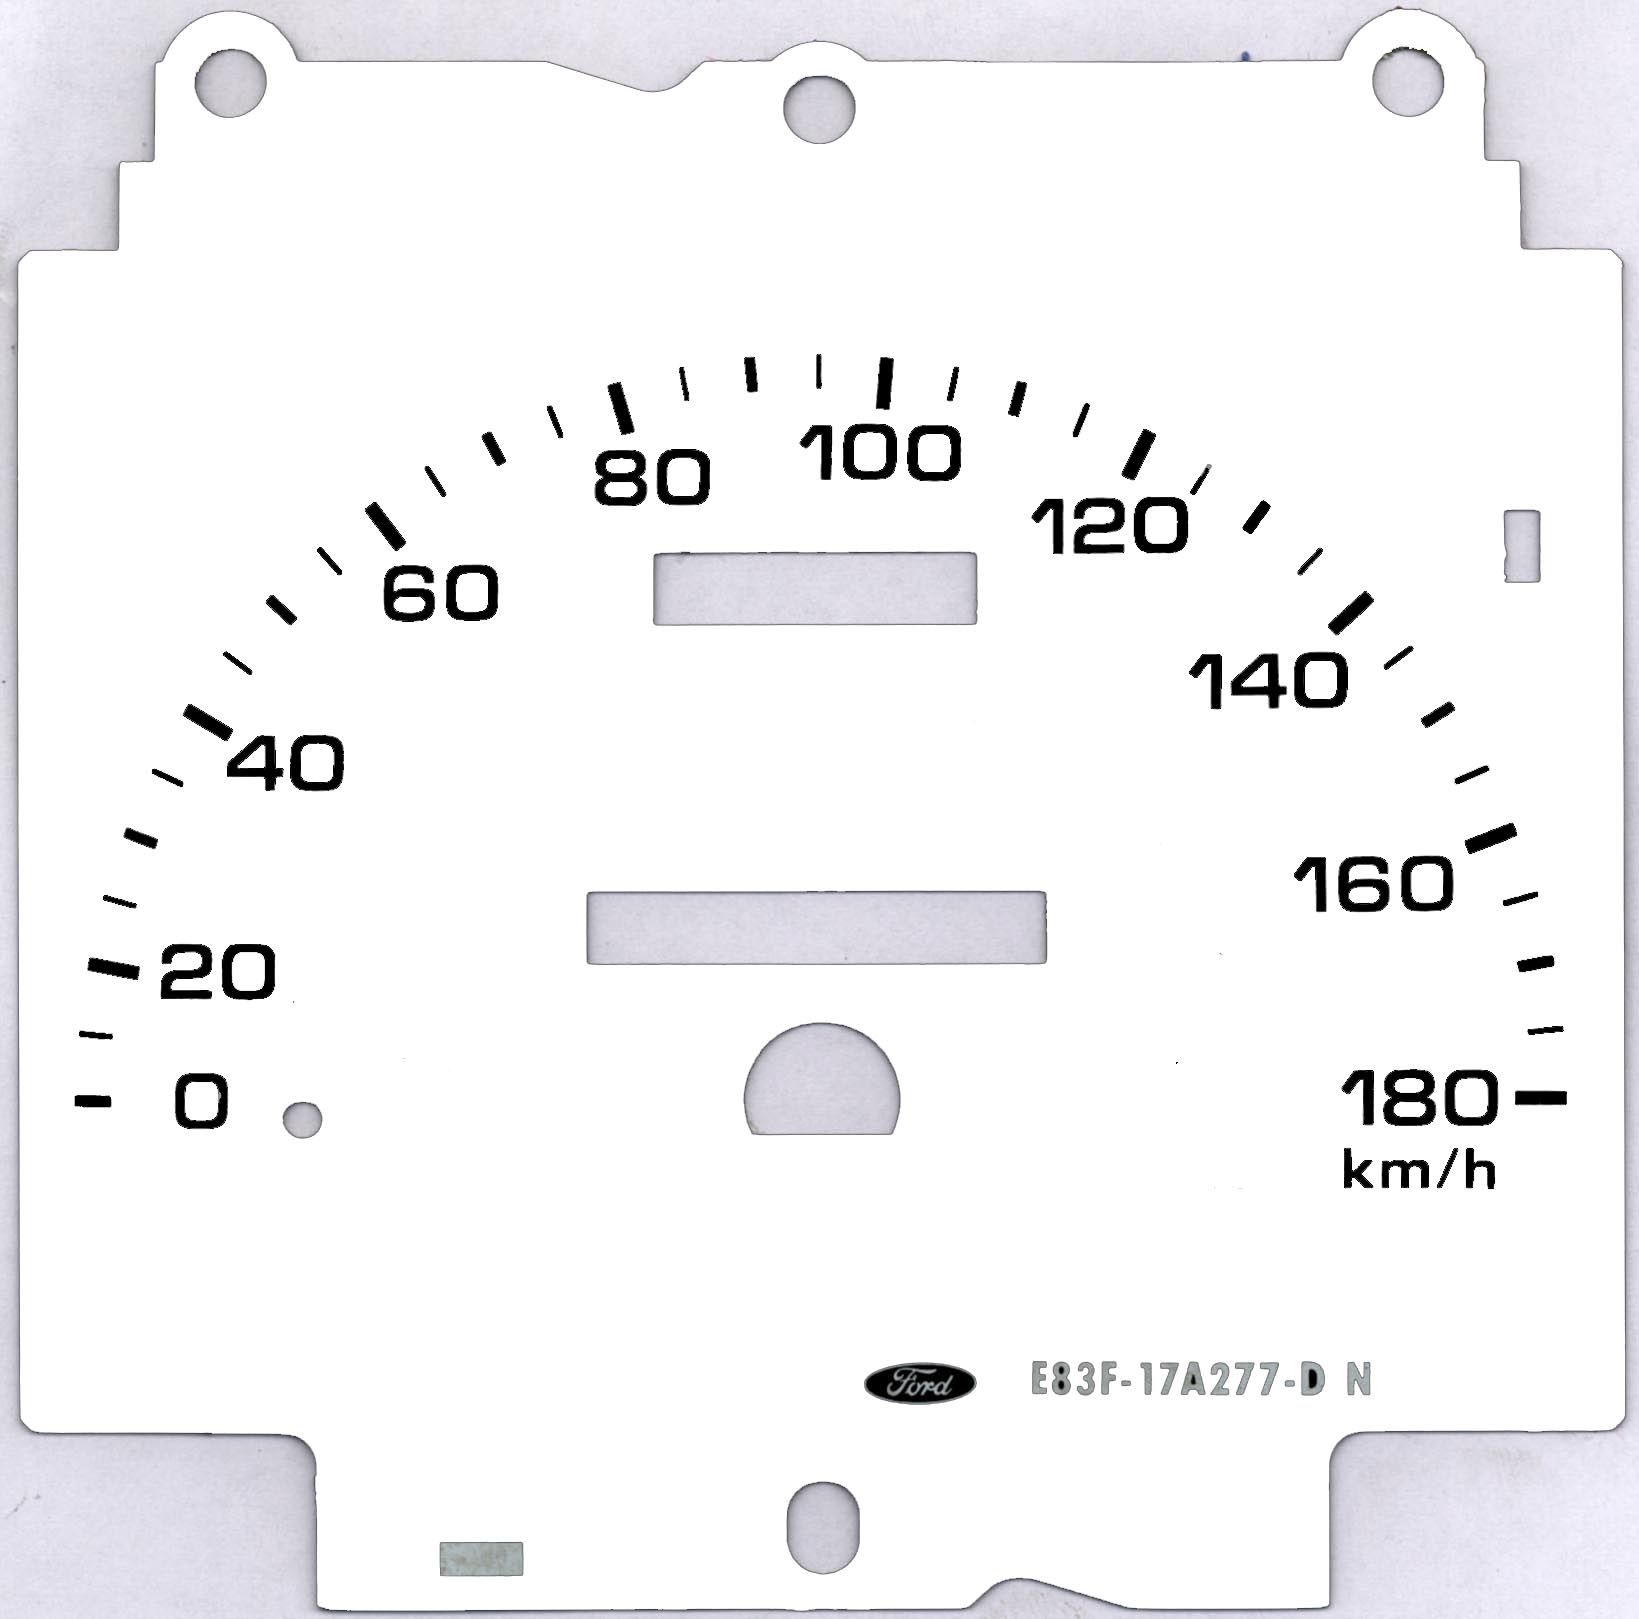
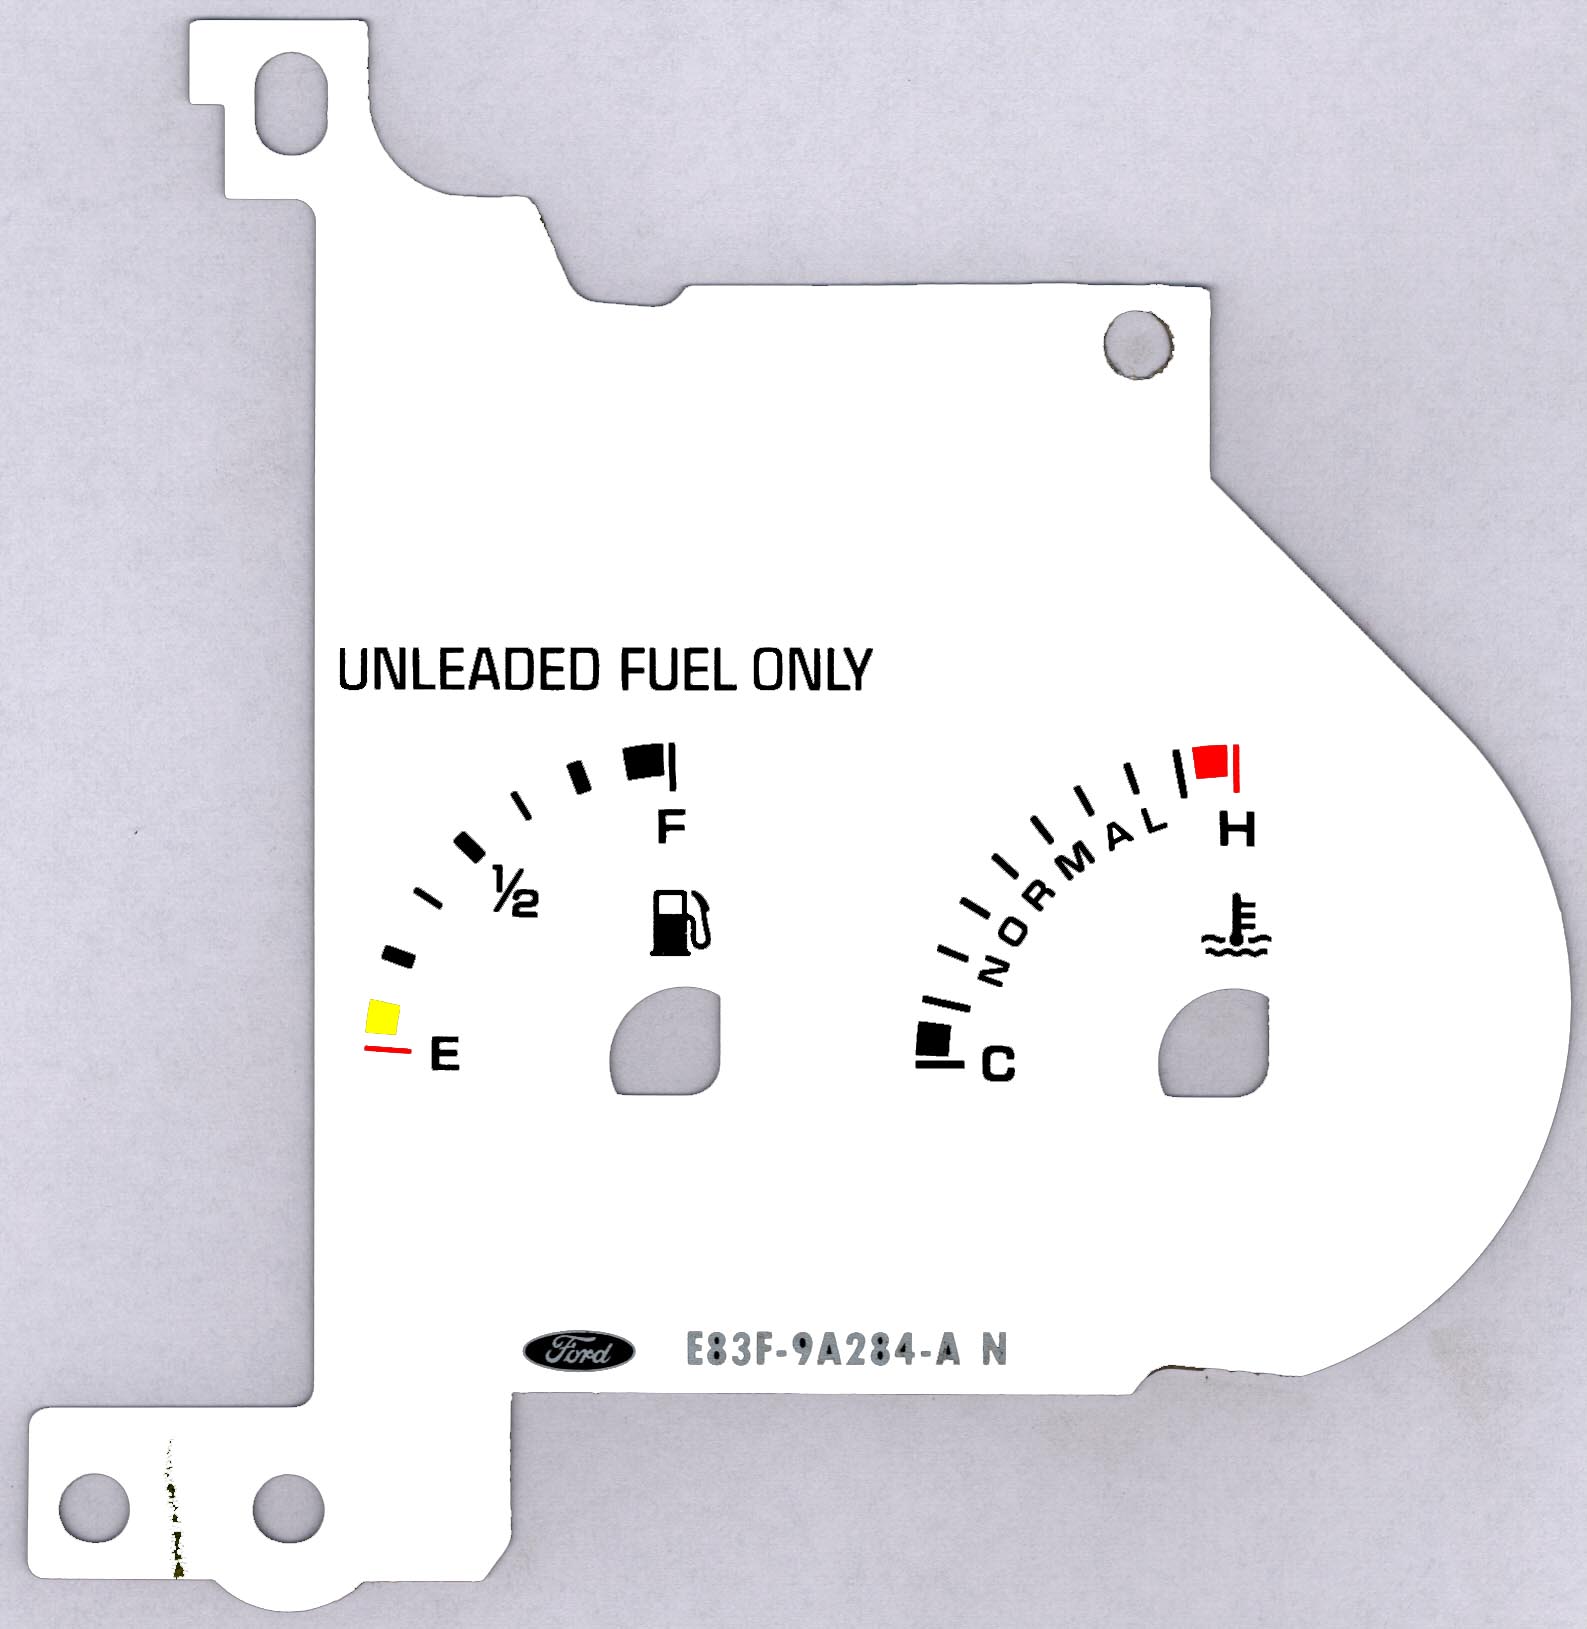
You should now have 3 gauges faces like so
This is where we part ways. Instead of using tape to tape off the hash marks here's what I did.
First I scanned in the gauge faces like so
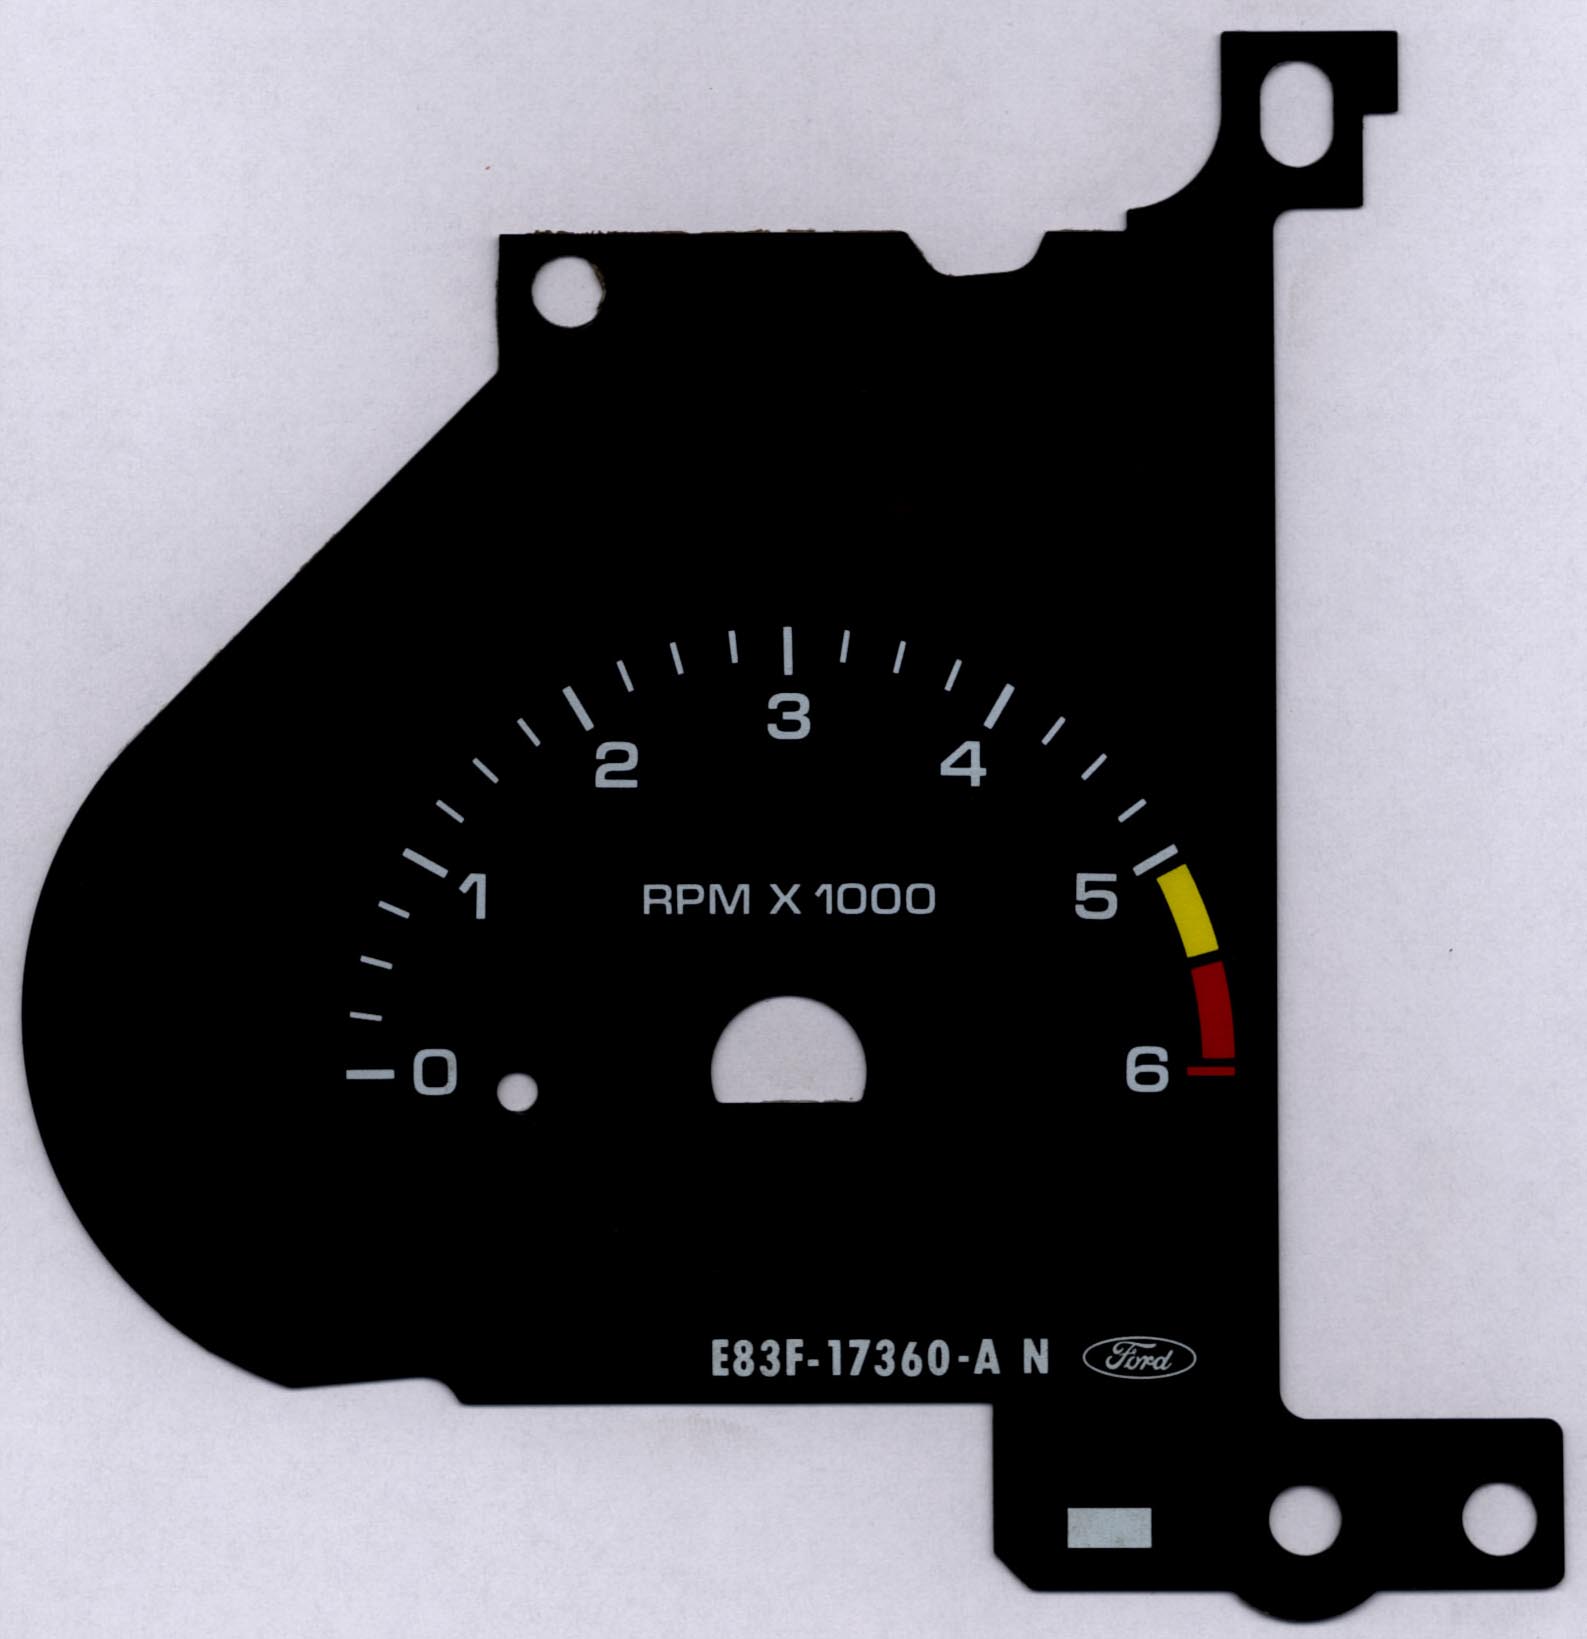
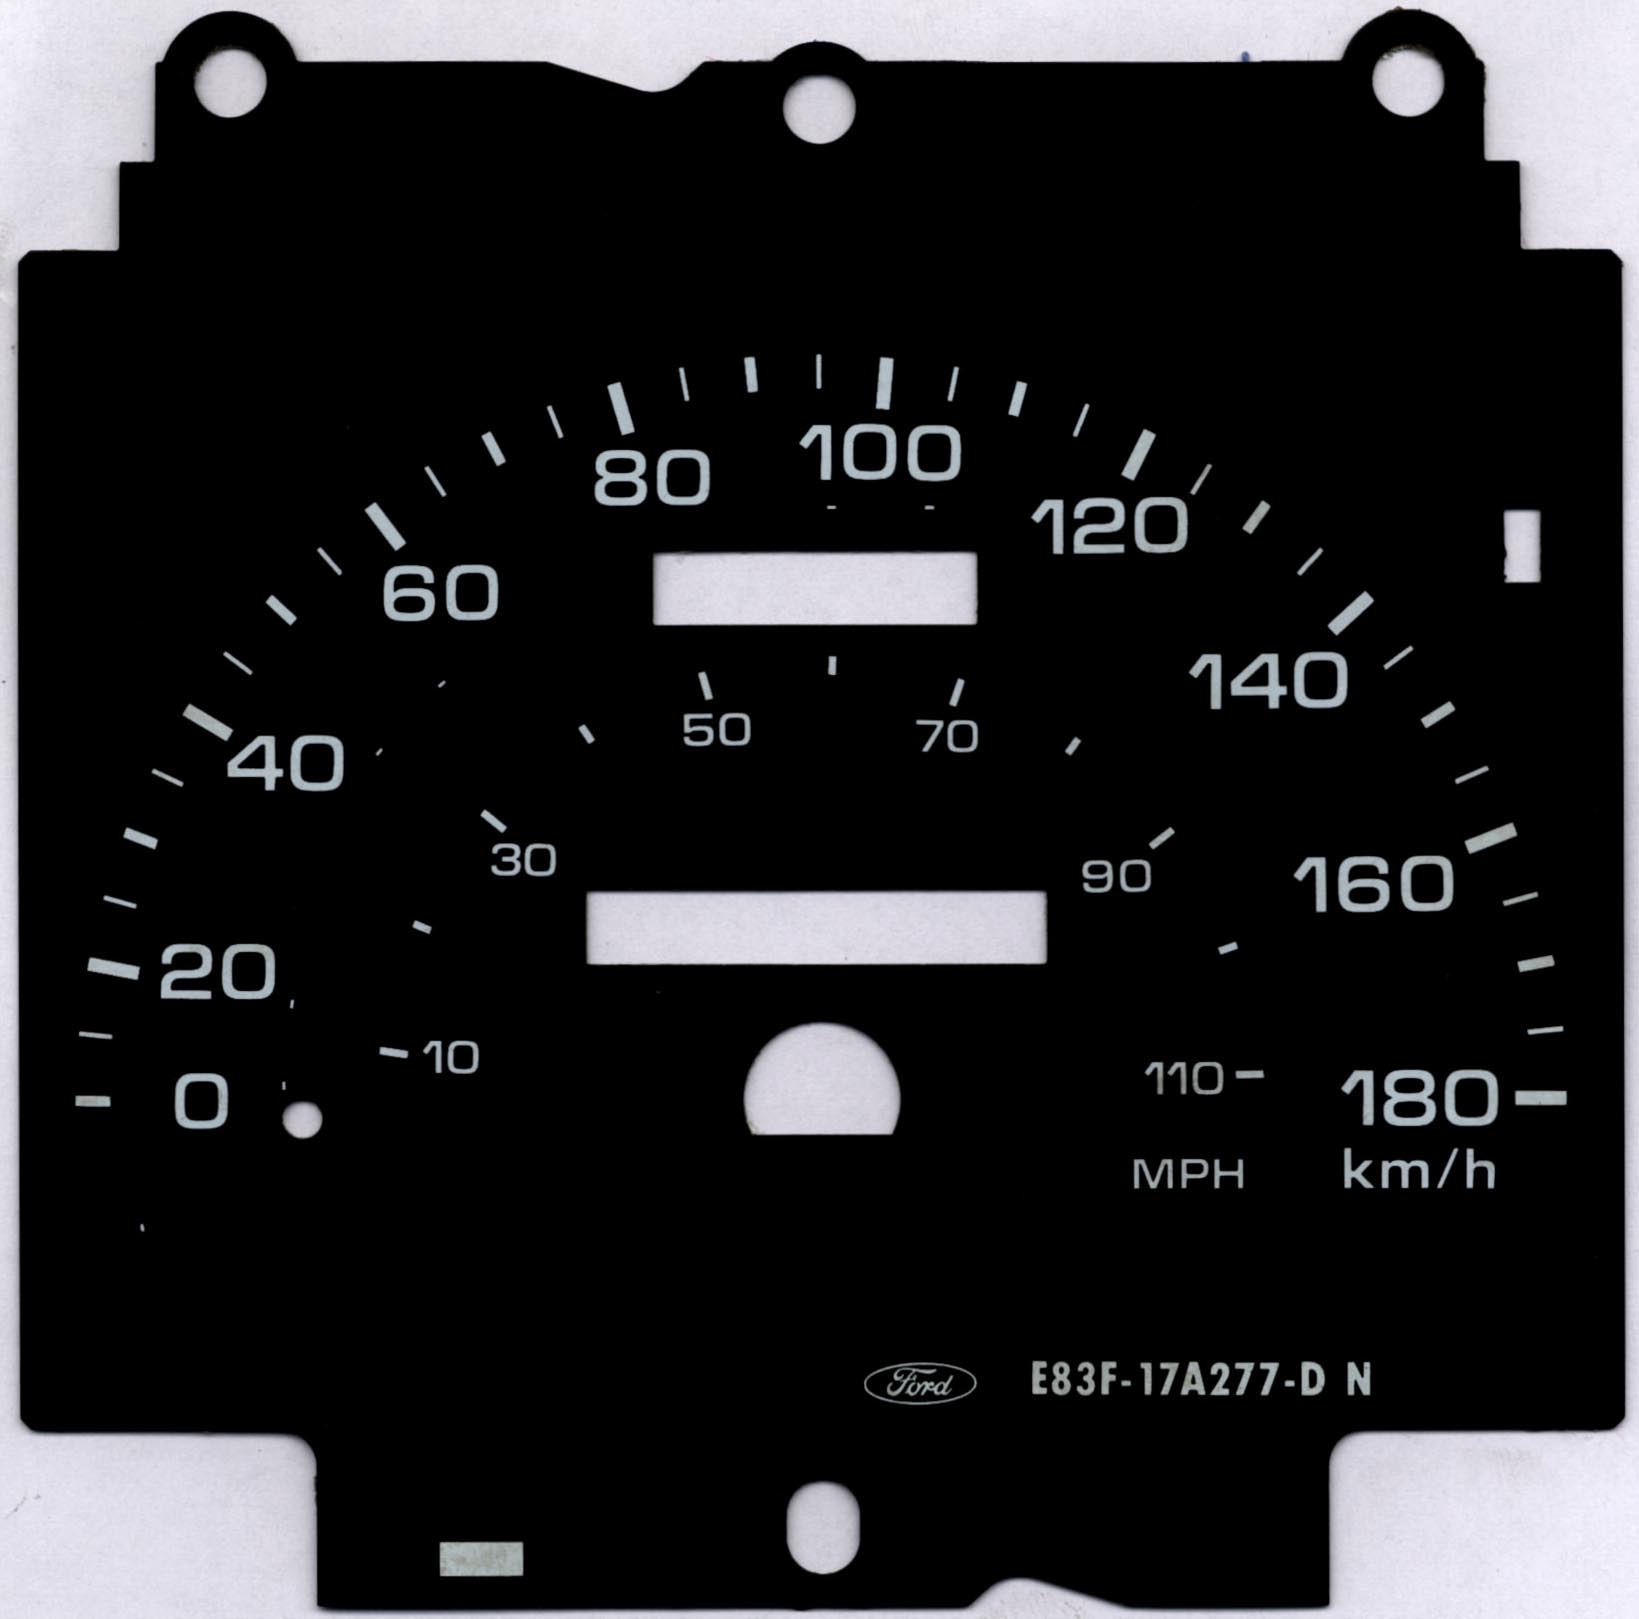
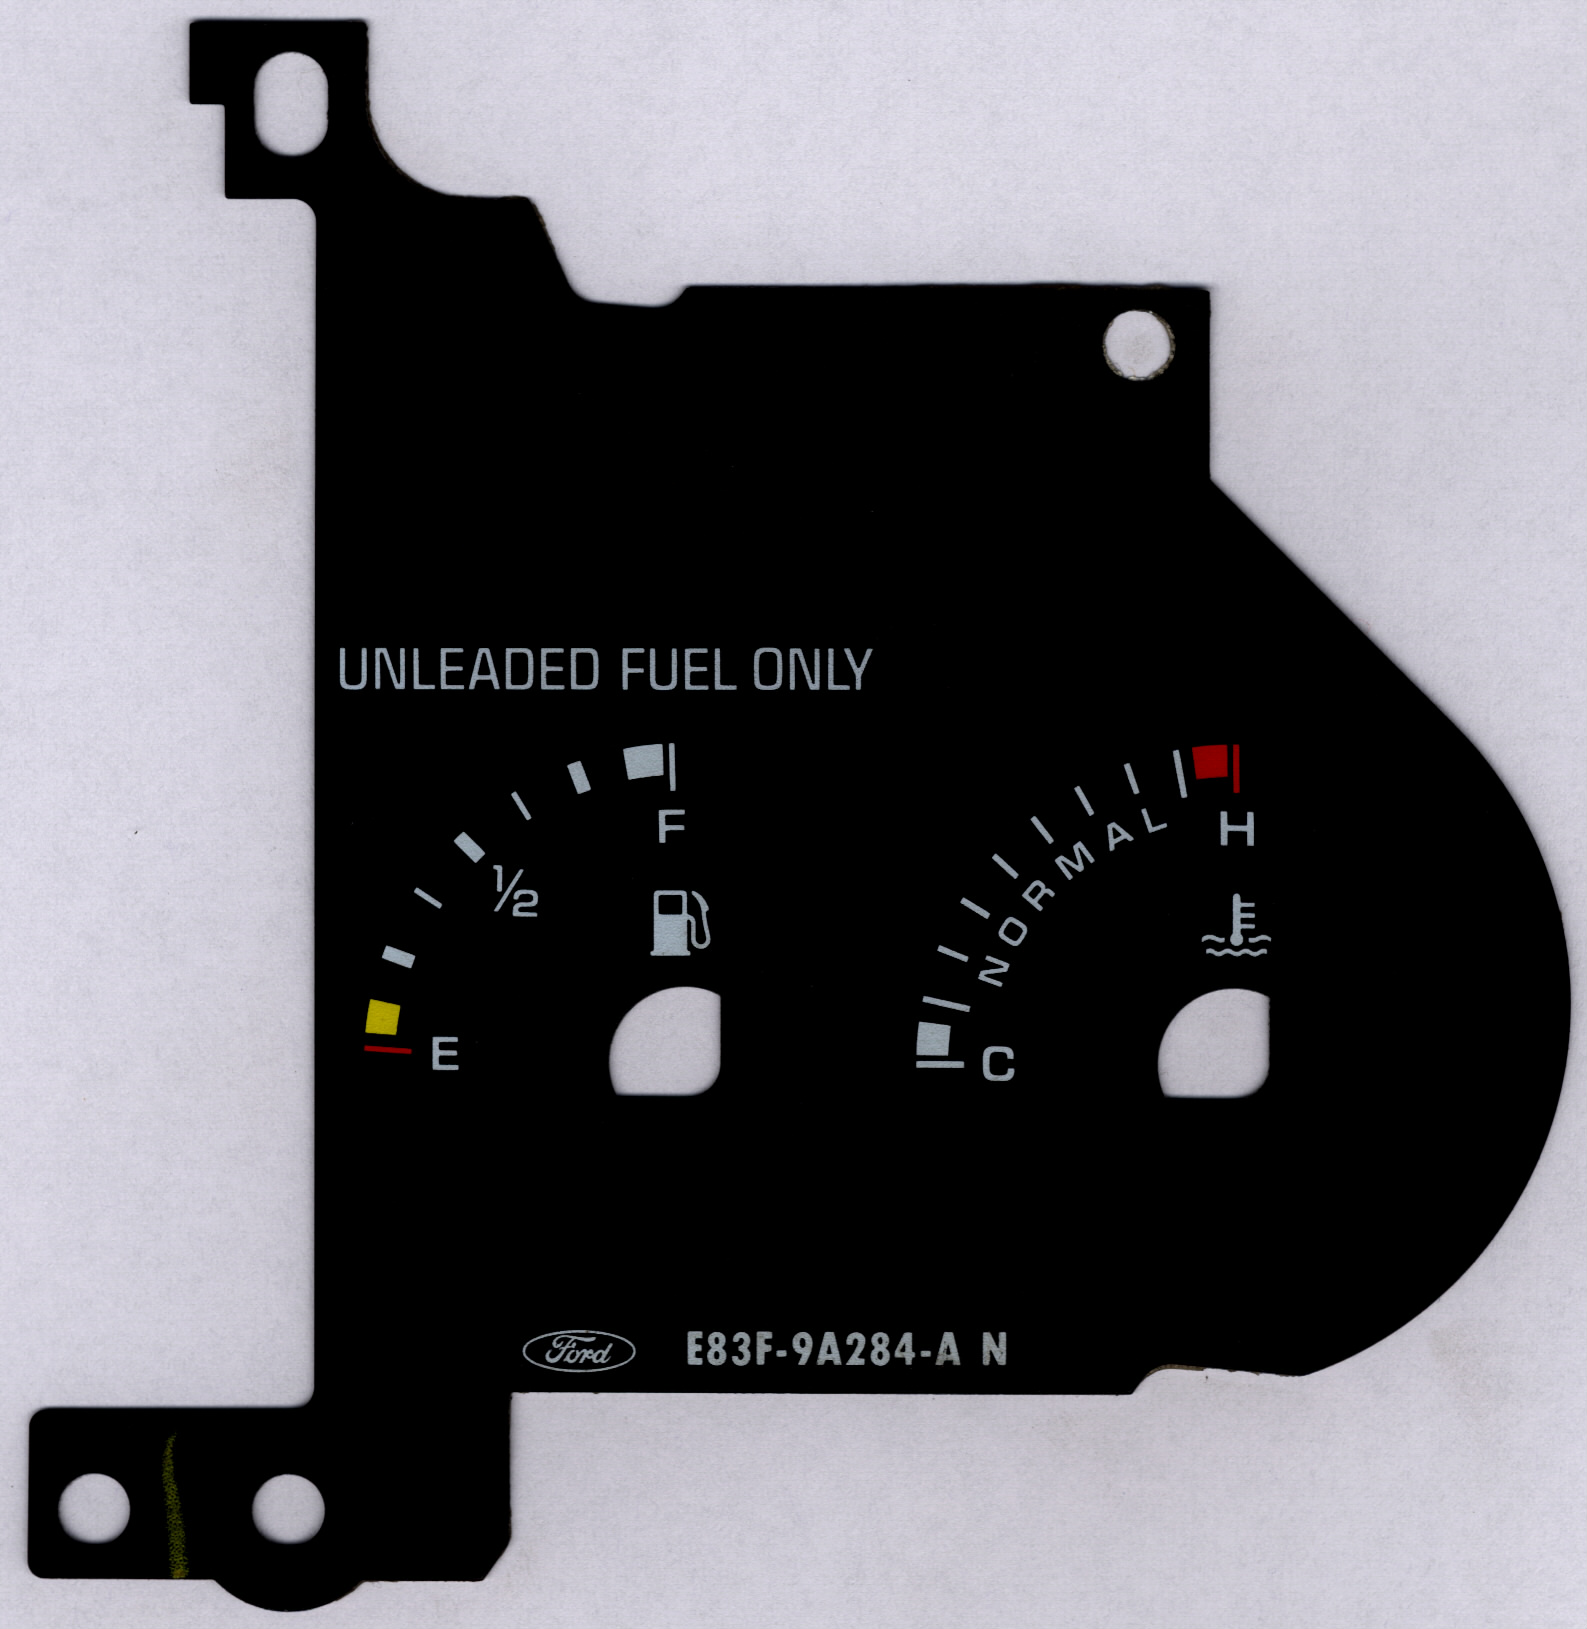
Here are the gauges that I scanned in, click on them to download higher
resolution images.
If you have a Canadian 88-91 sport cluster you can use my images if
you wish.
Using a graphics editing program, I used photoshop, replace the black
with white and the white with black
You can also touch up the yellow and red to brighter colours if you
want. Hell you could go red on blue if
you really wanted to.
At this step I also deleted the miles numbers from my speedo, leaving
only the km/h marks. You could
also delete the hash marks al a GSTopazBri.
Later on I might add some sort of logo between the trip and odometer
cause it's kind of blank now
The finished product is below. Again if you own a Canadian 88-91
sport cluster you can use my images if you wish
Now time to get some coated inkjet paper, only $0.20 a page, and print
out the gauges. Sometimes the graphics
editing programs like to change the size of the image ( cough cough
photoshop), but all you do is constrain the image
back to 300 dpi with the same # of pixels and the image go's back to
the correct size. Onces the pages are printed,
laminated them.
Ok here's the tricky part, using a light table (I know I know not many
of you may have one) place the laminated image
over the gauge face. The light table allows you to see the numbers
through the old face and the new laminated face so
that you can line them up properly. If you don't have a light
table put the face up to a window and that'll work too.
Now I used some spray on glue from the hardware store to attach the new face to the old, but you can use anything you want.
Cut the new face using the glued on old face as a guide and you're almost
home free.
Now just spray on some more glue to the back of the gauge face and
re-attach to the cluster.
I painted the needles orange with a felt marker, cheap and effective.
The coolest thing is the needles still light up at night and
glow orange.
Install everything in reverse order and you're done.
If you lined up the marks on the old and new gauge faces properly the
light will NO LONGER SHINE THROUGH so
you'll have to rewire some lighting in there for night driving.
I'll write about my set up a little later. The warning lights however
will still shine through at night (seatbelt, amp, oil etc.)
The variations on the graphics are of course infinite so you can choose whatever patter you want, not just the black on white.
The finished product is HERE of course.