Painted Rose

by DWhiteStar
Now add
a new layer and call it rose.
Set your
paintbrush back to:
Shape-round
size
1
Hardness
100
Opacity
100
Step
25
Density
100
Starting
with the farthest petal on the right you want to lay the colors down in
a manner following the original rose:
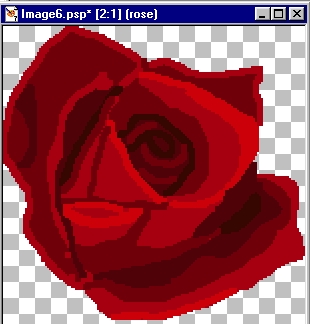
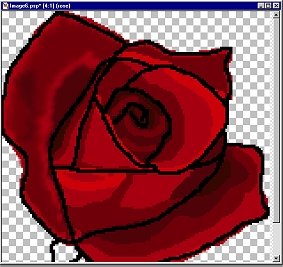
I have
enlarged the image so you could better see the detail as well as made all
other layers invisible so that you culd see just the rose. What you
end up with looks alot like a topagraphical map! LOL!
Next
thing we want to do is rearrange our layers to the following:
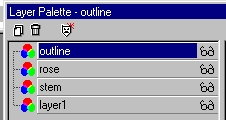
We
have moved the outline layer to the top so that if you need to quickly
refer to where each petal is, you can quickly make it visible for reference.
Make
all layers invisible with your rose layer as the only visible one, also
make sure that this is your active layer by clicking on it.
Now let's
start painting!!
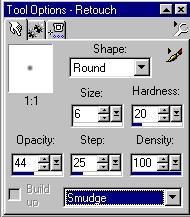
On
your tool bar click on your retouch Tool  and set it to the following
Work
one petal at a time and smudge the colors into eachother but make sure
to work in the natural direction of the petal itself. I usually work
from the outside in of each petal.
HINT:
This can get a little time consuming and "picky"
so I
like to set my workspace up as follows
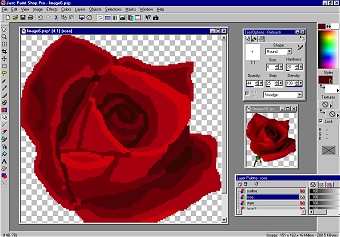
As you
can see, I have my image zoomed out quite a bit, this lets you see each
and every smudge stroke so that you can easily follow the shape of the
petals. Aso, make sure to save often!
Another
hint: Sometimes it is easy to work with your outline layer visible
but your rose layer active for the first little while, this really helps
you in locating the different petals
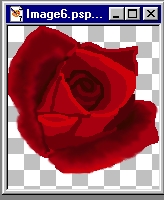
Here
is a nice closup of how the colors start to smudge together. Just
take your time and have fun with it...just like in nature there are no
2 flowers the same and in your image there is really never a wrong move,
just what looks good to you! :)
Yep,
Another Hint!! :Make sure to refer to your "real" flower alot, zoom it
up and look at the detail of how the different colors blend together and
how the different petals move.
Like
I said, for each petal start painting from the outside to the inside but
after the first intial smudges you can change direction, move in curves,
move in circles....what ever feels righ to you and seems to go with the
movement of your petals. The only thing is to try and stay away from
smudging your outside edges too much, we can clean them up later
As you
paint, you will start to see your rose magically come to life infront of
you!
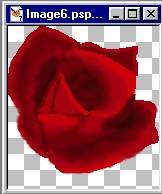
Once
you are happy with your blending

It is
on to the finishing steps!!
 Next Next
All
Graphics were designed and created by DWhiteStar
No
part of this page may be copied including graphics and text
without
permission. Thank you.
copyright
2001
|