 |
|
and Galvanic Isolator Upgrades |
"Early Light" lacked an inverter to supply AC power when away from the dock as well as a galvanic isolator on the AC Shore Power ground. My choice for a galvanic isolator was a Guest model 2433. I decided on a 1000 Watt continuous duty inverter so I could power a small (600 Watt) microwave oven as well as my laptop to charge it's internal battery.
The inverter installation required the following items:
1. 1000 Watt Continuous output inverter ($110.00 on eBay)
2. 6' Red #2 AWG battery cable ($17.34 at Boater's World)
3. 6' Black #2 AWG battery cable ($17.34 at Boater's World)
4. 6 heavy duty crimp-on lugs for #2 AWG cable ($6.87 at Boater's World)
5. Blue Sea ANL fuseholder ($19.99 at Boater's World)
6. Blue Sea 100 Amp ANL fuse ($14.99 at Boater's World)
7. 1 ea. Blue Sea #9005 Battery Switch ($22.99 at Boater's World)
8. Cable ties (On hand)
9. Phillips head screws to mount inverter, fuse holder, cable ties and battery switch (on hand)
Total cost of project: $209.52
The following tools were required to install the inverter:
1. Electric drill with asorted bits
2. Phillips head screwdrivers
3. Knife
4. Heavy duty crimp tool and hammer (to crimp lugs to input cables)
5. 7/16" box wrenches for nuts on positive and negative distribution posts
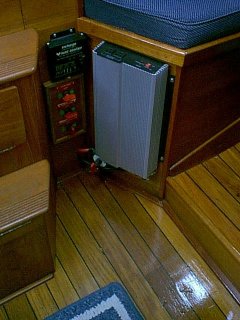
I wanted the installation to be as simple as possible with the unit mounted in an open area where it would remain cool while in use. The mounting location I chose does not make for the cleanest installation, but it does meet the aforementioned criteria. The inverter is mounted on the diagonal teak panel immediately to port of the original "1, 2, BOTH, OFF" battery switch.
This not only allowed for a location where it would remain cool, but also kept the DC input wiring from the "house bank" as short as possible. I used AWG #2 wiring for the input power. The positive lead is routed through a 100 Amp fuse and then on to a Blue Sea "On/Off" battery switch that would handle the current.
I decided that I would simply use the two AC outlets on the unit itself for the time being. In the future if I find that a need for other outlets, I will wire them in at that time.
|
 |
The galvanic isolator installation required the following items:
1. 1 ea. Guest model 2433 galvanic isolator ($159.99 at West Marine)
2. 24" #10 AWG green wire (on hand)
3. 2 ea. 1/4" crimp lugs for #10 AWG wire (On hand)
4. 1 ea. #8 crimp lug for #10 AWG wire (On hand)
5. 4 ea. #10 ss pan head sheet metal screws (On hand)
Total cost for this project: $159.99
The following tools were required to install the isolator:
1. Electric drill with asorted bits
2. Phillips head screwdriver
3. Wire stripper
4. Crimp tool
5. 7/16" box wrenches for bolts isolator terminals
First I disconnected the shore power and then removed the wood panels forming the forward bulkhead of the starboard cockpit locker to gain access to the back of the AC panel. I then removed the fiberglass protective cover over the back of the AC panel.
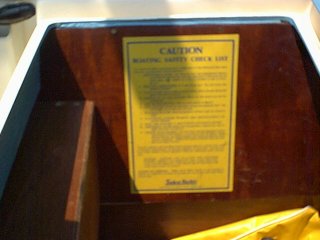 |
I located a spot to mount the isolator outboard of the AC panel's fiberglass cover and immediately above the box holding the AC duplex outlet in the galley. I drilled pilot holes for the 4 #10 self tap screws but did not mount the isolator until the wiring was completed.
Next I removed the ground connection (green wire) coming from the boat's shore power input connector where it is tied to the ground buss behind the AC panel and cut the old terminal lug off replacing it with a 1/4" lug. This wire was now connected to the input (shore power side) of the isolator.
The 24 inch piece of #10 AWG green wire was then made up with a 1/4" lug on one end and a #8 lug on the other. The 1/4" lug was then connected to the output (boat side) of the isolator and the #8 lug was connected to the ground buss on the back of the AC panel.
With the rather simple wiring complete, the isolator was then mounted to the bulkhead using the 4 self tap screws. The fiberglass cover and plywood panels were put back in place and the job was complete.
 |
Copyright 2001-2009 No duplication of any portion of this website without express permission.
Permission may be obtained by e-mailing the webmaster at
earlylight160@yahoo.com.