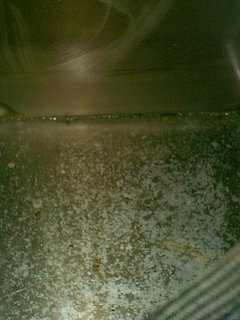
Inside of tank after wiping out but prior to cleaning
|
cleaning |
Although I have had no problems with the fuel system on Early Light, I do think that my Racor primary filter is gathering more junk than it should. Not having any idea what the previous owners had done in the way of fuel system maintenance, I decided I would take a pro-active approach and try to fend off any problems before they occur.
Having talked with a number of Sabre owners on the SailNet Sabre List, I received a wealth of information. With the boat on the hard, I decided to tackle the project. After cleaning out the starboard cockpit locker, I stuffed my 6 ft 200 lb frame into the locker to look things over. After several measurements I decided that it would be much easier to remove the tank if I first removed all of the mahogany plywood panels as well as the shelf in the locker. I then pumped the fuel from the tank into a 5 gallon jerry can.
The following is the procedure I used.
1. Remove the 1.5 inch fuel fill hose from the tank. (Replaced with new hose)
2. Remove the 5/8 inch vent hose from the tank. (Replaced with new hose)
3. Remove the fuel return line from the tank.
4. Remove the fuel feed line from the tank.
5. Disconnect the two wires going to the grounding tab on the tank.
6. Disconnect the wires going to the fuel sender unit.
7. Remove the hold down strap on the starboard side of the tank.
8. Remove the hold down strap on the port side of the tank. (This was the toughest part of the job as access is so poor)
9. I then tapped tapered wooden plugs into all 4 openings (fill, vent, feed and return) in the tank so that I would not spill any residual fuel while moving the tank through all different positions during removal.
The tank came out through the cockpit locker with about 1/4 inch of clearance. With the tank removed I pulled the fuel feed fitting and tube from the tank to check for the presence of a screen in the tube. There was none, so I assume it had been removed by one of the previous owners. I removed the fuel sender unit to have a look at the bottom of the tank using a flashlight and an inspection mirror. The tank had SOME sludge, but not as bad as I had suspected. I think there was somewhere on the order of one to two tablespoons of water in the tank as well.
Inside of tank after wiping out but prior to cleaning
With the tank out of the way I decided that this was an ideal opportunity to clean and paint the area as well as to varnish all the plywood panels. I used the Bikini Blue Petit EasyPoxy so it would match the original color. The mahogany panels were given 2 fresh coats of Z-Spar Captain's Varnish.
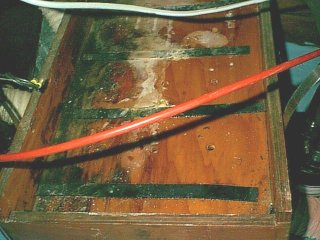
The plywood tray that the fuel tank sits in was in need of refinishing
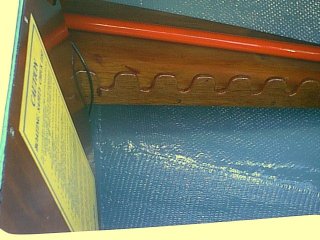
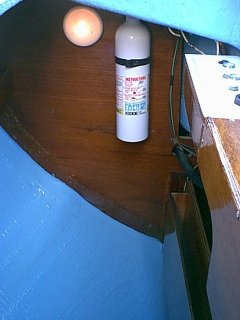
The two photos below show the starboard sail locker after repainting and a couple of maintenance coats of varnish.
I purchased a stainless steel inspection port to install in the tank so I could gain access to do a thorough cleaning. These inspection ports are custom made from 1/8 inch 316 stainless steel for one of the local marinas. Although it was pricey, it is a well made assembly.
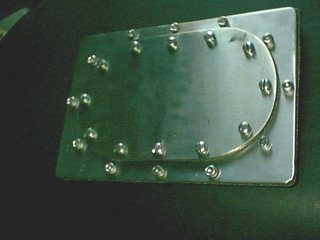
Top view of inspection port assembly
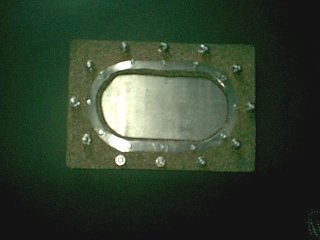
Bottom view of inspection port assembly
Materials and outside services required for this project:
1. Stainless steel inspection port (approx $95.00)
2. Gauge kit for Racor 500 ($89.00)
3. 16 ounce spray can of carb and choke cleaner ($1.99)
4. Gasket material ($3.00)
5. Permatex No. 2 non-hardening gasket sealant ($0.00 On hand)
6. Steam clean tank at radiator shop ($15.00)
7. New fuel fill hose ($25.16)
8. New vent hose ($21.00)
9. Pettit EasyPoxy Bikini Blue paint ($0.00 Left over from painting lockers)
10. Z-Spar Captain's varnish ($0.00 Left over from previous projects)
Installing the inspection port required the following:
1. Cut a hole in the top of the tank. (sabre saw)
2. Dress up the edges of the cutout with a file.
3. Drill twelve 1/4" holes to through bolt the outer ring to the tank.

Top of tank after cutting hole for inspection port and drilling the 12 holes to mount it
At this point I cleaned the tank by first wiping it out with paper towels to get the worst of the gunk out. Then I used fresh diesel fuel on a lint free rag to give it a second scrubbing. Any stubborn spots were sprayed with carb and choke cleaner, let stand for 10 minutes and then wiped clean. I then took the tank to a radiator shop and had them do a final steam cleaning. The tank was then rinsed with fresh water and left to air dry for several days after which I used a hair dryer to insure that all moisture was out of the tank.
4. Thru bolt the outer ring to the tank using 1/4 - 20 x 1/2 inch stainless steel allen head cap screws, stainless 1/4 inch lock washers, 1/4 - 20 stainless steel nuts, cork filled neoprene gasket and Permatex No. 2 non-hardening gasket sealant.
Top of tank after installing inspection port ring
5. Install the cover plate and cork filled neoprene gasket using Permatex No. 2 non-hardening gasket sealant.
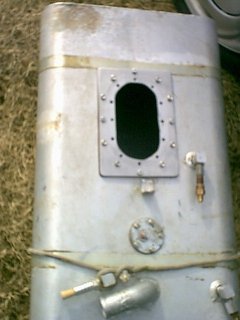
Top of tank after installing inspection port cover plate but prior to reinstalling the tank
Next I removed the copper fuel feed and fuel return lines and cleaned them with carb and choke cleaner from a spray can.
The fuel fill hose was not a good tight fit on the fitting on the tank. I measured the new hose and found it to be sized correctly, but found the tank fitting only measured a shade over 1 3/8 inches instead of 1 1/2 inches. To make a proper fit I laminated a layer of fiberglass cloth using West Epoxy. Once this had cured, I removed the amine blush and applied a second coat of epoxy. The finished job yielded a perfect 1 1/2 inch fuel fill fitting.
The 4 strips of 1" x 1/8" hard neoprene that the tank sat on were replaced as were the 2 strips that were adhered to the tank under the stainless hold down straps. The neoprene was obtained from Sabre.
The tank was then re-installed by reversing the removal procedure with one exception. While trying to tighten the nut on the port hold down strap, I became extremely frustrated as I was unable to hold the slotted machine screw with a screwdriver in one hand while operating the wrench with the other hand while stretching over the top of the tank to the opposite side of the fuel tank compartment. There was no way I could see to reinstall it unless I made some changes.

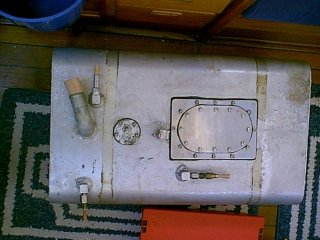
Photo of tank installed after cleaning.
After much thought, I decided that I could remove the two screws that hold the forward end of that strap to the lower forward portion of the tank shelf box. (See Figure #1) This would allow me to remove the forward half of the port strap so I could work on it in a much more comfortable position.
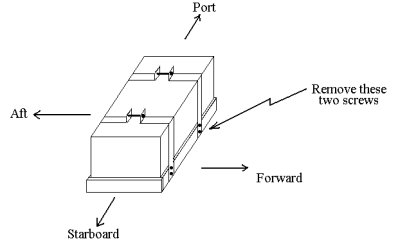
Figure #1
With the strap removed, I put a longer (3 inch 1/4" - 20) machine screw thru it and then secured the machine screw in place using a lock washer and hex nut. (See Figure #2) Then I reattached the strap to the forward plywood panel. The longer screw allowed me to leave the port straps connected but still lose enough that the tank could be slid in without disconnecting the straps. This would allow me to reach in with a 7/16" deep socket on a 1/4" drive ratchet and at the same time it prevented the machine screw from turning while I tightened the band. Below is a sketch of the hold down strap detail as I'm sure I have totally confused you with my poor explanation.

Figure #2
The Racor primary filter was completely disassembled and cleaned and a new filter element installed. I also installed a vacuum gauge on the top of the Racor filter (it replaces the "T" handle) so that I can better judge when a filter change is required without having to open the unit up.
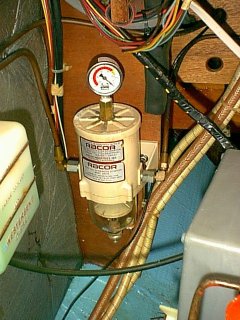
Racor filter with new vacuum gauge installed
The lift pump was completely removed, cleaned, and a new filter element and gasket was installed.
The engine mounted secondary filter was removed, cleaned, the filter element and the 2 o-rings were replaced.
Since I had the starboard cockpit locker empty, and freshly painted, I took this opportunity to build some teak cradle shaped blocks for the shelf in the locker to hold the emergency tiller and secured it using a couple of stainless steel hooks and a short piece of 5/16 inch shock cord. The teak, shock cord and stainless hooks were in my junk box, so there was no cost for this upgrade.
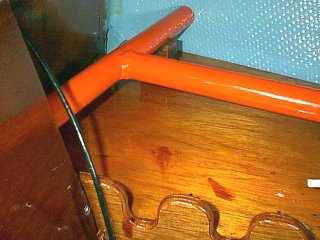
Emergency tiller stowed in new wood cradles on starboard cockpit locker shelf
I also decided to install nine 1 inch nylon straps and twist buttons (the type used on various canvas projects) to hold my spare dock lines and spring lines. This added some needed order to the locker that was always just a bottomless pit full of all kinds of things that could never be readily retrieved. All materials for this were on hand and left over from other projects on other boats I had owned.
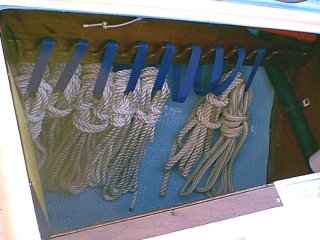
Photo showing new straps for stowing dock lines
All that remains is to add fresh fuel in the spring and bleed the fuel system.
It will be a good feeling knowing that the fuel system is clean as a whistle and that given the normal maintenance it should not give me any problems for years to come.
Total cost of project: $250.15
Copyright 2001-2009 No duplication of any portion of this website without express permission.
Permission may be obtained by e-mailing the webmaster at
earlylight160@yahoo.com.