
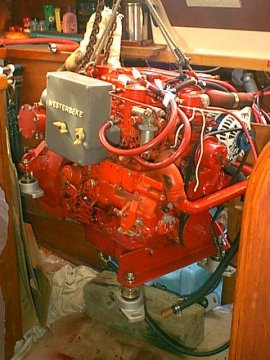
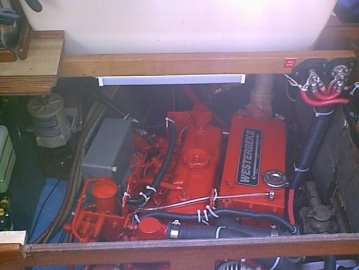
Engine after installing repainted heat exchanger
|
rear main seal on the Westerbeke 27 Page 2 |
With the good access afforded by pulling the engine I am taking this opportunity to replace all hoses and to give the heat exchanger a thorough cleaning. The heat exchanger end plates were removed and the unit was placed in a 50/50 solution of muratic acid and water for approximately 5 - 7 minutes. After this soaking, a piece of all thread (threaded rod) was run through each of the tubes in the unit and then the unit was thoroughly flushed with large quantities of fresh water. The heat exchanger was sanded, primed and given a couple of coats of fresh engine enamel. I fabricated new gaskets for the end caps from 1/16 inch neoprene gasket material and reassembled the unit.
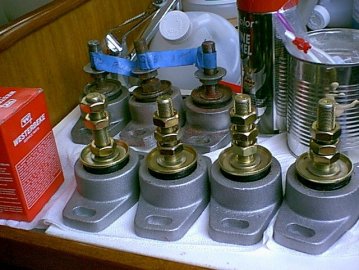
The rear engine mounts were original and looked like they were on their last legs and the front mounts were showing signs of fatigue as well. I decided to replace all four and placed an online order with Go2Marine.com. Their price was $42 each while all the Westerbeke distributors wanted $115 each for the exact same mounts. Hmmmmmm $168 vs $460......Not much thought needs to go into this decision.
After several days Katie returned and installed the new rear main seal, and began reassembly of the engine. The bellhousing, flywheel, damper plate, starter motor and transmission were reinstalled.
The freshly painted heat exchanger was installed and the new engine mounts have arrived. The engine will be reinstalled the later part of next week if all goes as planned.
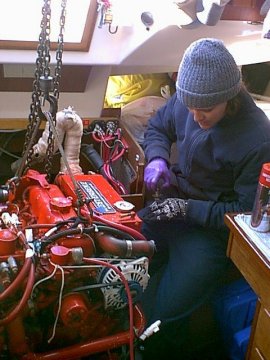
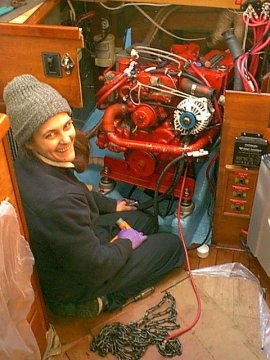
On Thursday Feb 9 Katie met me at the boat at 9:30AM to reinstall the engine. The first order of business was for her to repack the shaft stuffing box with Gore-Tex packing material.

Once the stuffing box was repacked the engine was hoisted and the new mounts were installed. Areas at the bottom, rear and sides of the engine (where it would be tough to get to once the engine was in place) were cleaned with degreaser and the paint touched up. The top and front will be done once the engine is in place since those areas are easy to get to.
Once the engine was moved into it's approximate position, the engine mounts were loosely bolted down to the bedlogs. Don't you know that one of the holes that was tapped for the 3/8" mounting bolts had a burr in it and as you probably guessed it was the toughest one of the eight to get too (on the aft mount on the port side). After 45 min of careful use of a 3/8 tap and thread chaser we finally had success and were able to get that last bolt in.

At 12:30PM we broke for lunch and then returned at 1:30PM
Next came the shaft alignment which went very smoothly and we ended up with the alignment to less than .001 inches. :-)

With the shaft alignment complete, all bolts and nuts were given final tightening and the alignment was checked one more time. It was still within less than .001 inches so the shaft coupling was bolted to the transmission coupling.

Next the exhaust system was connected and then the shift cable was connected to the transmission. It was now 5PM and we knocked off for the day. I will start to reconnect all the wiring, fuel lines and hoses over the next few days.
I took the weekend off as the weather was too cold to be connecting things to a hunk of cast iron that was 20 degrees or so. I returned on Tuesday when the weather took a turn for the better and the temps rose to the mid 50's. I began routing wires and hoses and then prepared the front and top of the engine for some touch up painting. I cleaned it using a degreaser and a cheap bristle brush that I trimmed the bristles to about 5/8 inch length. After degreasing, some of the areas required sanding with emory cloth or wire brushing prior to applying primer. I masked off some of the areas that I didn't wish to paint, then sprayed two coats of primer on all bare spots. After the second coat of primer dried I sprayed the finish coats of red.

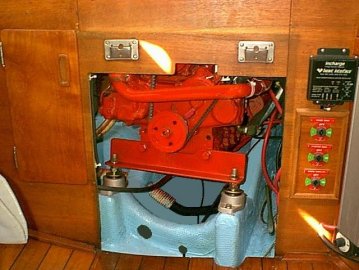
The last of the hoses finally arrived. I installed all the hoses, connected all the wiring, fuel lines, domestic water heater connections. Below are a couple of photos of the engine after completion of all connections
After several days Katie brought her pressure tester to test the cooling circuit for leaks. All was well. All that remains is to wait until launch day when Katie will commission the engine and hopefully will give it a clean bill of health.
Launch was scheduled for first thing in the morning on April 19. Once the boat was afloat, Katie arrived and the engine was started. All systems were monitored closely and there were no real surprises. The engine was run up under load and brought to full operating temperature. An infrared temperature gun was used to monitor various points in the cooling system to make sure there were no air bubbles in the system that would require purging. All was OK and the engine was run at full operating temperature for over an hour. Katie gave it her blessing and departed. I motored to my slip and Early Light is now properly berthed for the season.
Materials cost:
Rear main seal $71.81 from Westerbeke
Rear seal gasket $7.50
Bellhousing gasket $16.60 from Westerbeke
1 ft. 1/4" Goretex packing $4.80
Gasket sealer No Cost On Hand
Four each DF-2005-2 motor mounts $168.00 from Go2Marine
1/16 in thick neoprene gasket material $2.00 from McMaster Carr
Full set of hoses for engine $76.00 from various vendors
Pettit EasyPoxy Bikini Blue paint No Cost On hand
Red engine enamel for touchup $5.00 from True Value Hardware
Shop supplies $32.60 from Drum Pt. Marine
Freight on parts $10.29
Total Materials: $326.60
Labor:
23.25 Hours for mechanic ($75/hr) $1743.75 Drum Point Marine
24 Hours of my time No Cost Owner supplied
Total Labor $1743.75
Total cost (labor and materials) $2070.10
Copyright 2005-2009 No duplication of any portion of this website without express permission.
Permission may be obtained by e-mailing the webmaster at
earlylight160@yahoo.com.