Inexpensive Bike Stand
These plans differ from the plans found on the Harley site to accommodate our larger bike. My stand is incredibly sturdy and the bike does not move at all.
The plans are as follows:
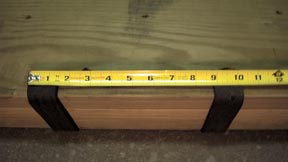
Purchase 3 30" pieces of PT 2X8 lumber from the local lumber yard. I purchased "Culled" lumber, which is just a term for imperfect lumber.
Purchase a 4' pipe, threaded on the ends. 3/4 gas pipe works great.
Purchase a matching galvanized floor flange.
Purchase 4 3" wood bolts to secure the flange.
Purchase a hole saw that matches the outside diameter of the 4' pipe.
Purchase a 3' wood dowel that will fit tightly inside the 4' pipe.
Purchase a supply of 3" drywall type screws. Look for the brass type, as they are stronger and less likely to break.
Purchase a 2"x30" piece of heavy duty padding strip.
Now the assembly. It's very straight-forward, but there are some helpful hints to make the assembly easy and help keep the stand together for the long haul. Numbers in bold (n) refer to pic's below.
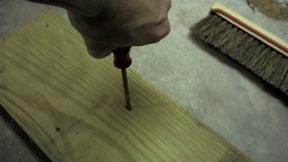
Before you attach the 2x8 pieces together, drill the holes for the handle. Measure in from the edge 3". This is where the outside edge of the hole should be. Drill the hole until the pilot bit breaks through the other side of the 2x8.(1) Then turn the piece over and finish the cut. This way the wood plug doesn't wind up clogging the hole saw.(2) To keep the hole properly aligned for all pieces, use the 1st 2x8 as a guide and start the hole in the 2nd 2x8. Then finish the cut as you did with the 1st piece. Repeat the above for the final piece.
Put all the pieces together. Apply glue to 2 of the pieces and, using the 4' pipe as a guide, stack the 2 pieces on top of one another. Use the drywall screws to attach the pieces.(3) Finish by gluing and screwing the last piece of 2x8 to the 1st 2. You now have your block, complete with the handle hole.
Attach the floor flange in an inverted (upside-down) manner. The pipe will not screw into the back-side of the flange as the threads are tapered to insure a tight fit. This is why the flange must be inverted. Use the wood bolts to attach the flange.(4)
Insert the wood dowel into the pipe. It should fit so tightly that you will have to use a hammer to insert it.(5) This adds necessary strength to the pipe. Keep in mind that we are lifting a heavy bike. When you are done the dowel end should be flush with the pipe end. This end will be the end that screws into the flange.
Turn the block over so that the flange is on the floor and insert the dowel end of the pipe into the open hole of the block, working it down into the threads.
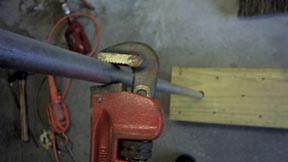
Using a pipe-wrench, finish tightening the pipe into the flange.(6)
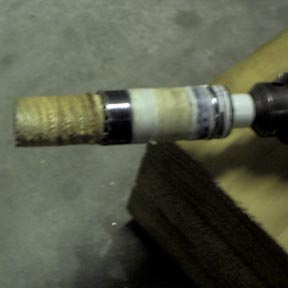
Tape the "handle" end and tape a 12" section of the middle of the pipe so that if it makes contact with the bike, it wont scratch it.
Slide the stand under the bike. It will just clear. Stand the bike up and while steadying the bike with one hand, push the handle toward the rear of the bike. Don�t completely jack up the bike. You just want the frame to make small impressions in the wood at this point.
Remove the stand from under the bike and look for the impressions that the frame of the bike made. Use these as line-up marks for the heavy-duty pads. It's generally best to overlap the edges by 2 or 3 inches and staple far enough away from where the frame makes any contact to avoid scratches. (7)
You are done! Remember to apply firm even pressure to the handle when jacking the bike.
The big difference between this stand and the one on the Harley page is that by using 3 pieces of wood, you effectively increase the platform by 33 percent, making the bike sit much more securely.(8)
The total cost when I was done was $15.75!
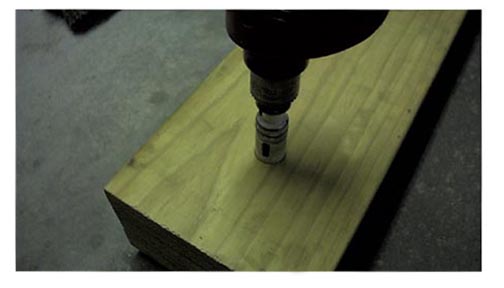
Measure and drill each piece...
Dont drill all the way through... Stop 1/2 way and turn the piece over...
Glue and screw all three pieces together...
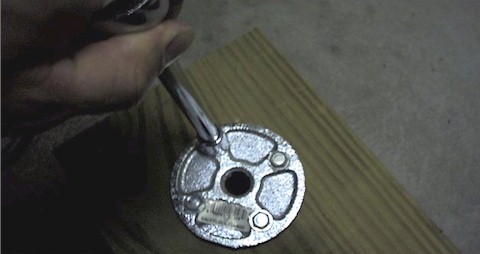
NOTE: Invert the thread plate before attaching it to the block that you just assembled as shown...
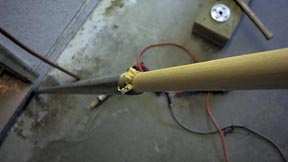
The wood dowel adds strength to the handle...
Measure out the frame pads...
Tighten the handle into the thread plate...


...And you have the strongest, easiest and quickest to use
maintenance
stand that less than $20.00 can buy!
Home