Low Budget Fuel Pump Relocation…
Relocating the fuel pump is a simple project that really cleans the left side up. It can be accomplished using what already exists for hardware and fuel lines.
All you have to add is the braided line that goes from the fuel filter to the fuel tank. (It doesn’t have to be braided, but it looks pretty trick that way…)
The illustrations pretty much tell the tale, but here’s the walkthrough…
Remove the fuel tank.
Remove the chrome cover that covers the fuel pump and bracket. (Right above the ‘Choke’ knob…)
Remove the rubber mounting bracket, Fuel pump/filter and all. (Be careful when removing the fuel lines.
There’s plenty of fuel left inside the components…)
Remove the metal bracket that holds the ‘choke’ knob/fuel pump assembly. You will be modifying this bracket later.
You should now have the following parts:
Fuel pump.
Fuel filter.
Metal bracket.
Rubber bracket (holds the fuel pump, fuel filter…)
Heat Shield (rubber/metal foil piece…)
Fuel lines/line looms (spring-like coils that cover the fuel lines…).
Misc. hardware.
Remove the fuel pump and the fuel filter from the rubber-mounting bracket. You won’t be using the rubber mount anymore.
Wrap the metal parts of the fuel pump in one layer of electrical tape.
The fuel filter will be located on top of the bracket that holds the ‘choke’ knob bracket
and the fuel pump will be located directly opposite, on top of the carburetor.
Refer to the illustration, and lay the components out in their general location.
You will use some of the existing fuel lines to connect the fuel filter to the pump inlet, then the carburetor to the pump outlet.
Take this opportunity to modify the existing fuel lines and cut some new ones. You will find that by cutting and trimming,
you will be able to use most of the existing lines to connect everything.
Care should be taken not to bend the fuel lines in an unnatural manner.
Take your time, and you will find that most of the existing lines make their new connections perfectly.
Following the illustration below, modify the bracket that holds the ‘choke’ knob and the fuel pump/filter.
The new bracket is now mounted to the frame, as before.
Once you have your new fuel lines cut, connect everything, making sure that each end of every fuel line is clamped.
Plug the fuel pump back into its harness and use wire ties to secure everything.
The gas tank does a pretty good job at holding everything in place so the wire ties don’t have to hold everything really tight, just in place.
Make certain that none of the fuel lines touch the engine anywhere.
I braided and used loom on the lines that appeared to be close.
Once everything is in place, reinstall the gas tank, connect the final fuel line and your done.
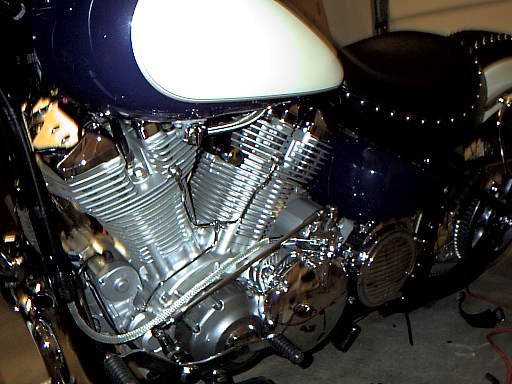
The photos will give you a good idea how it will all look…
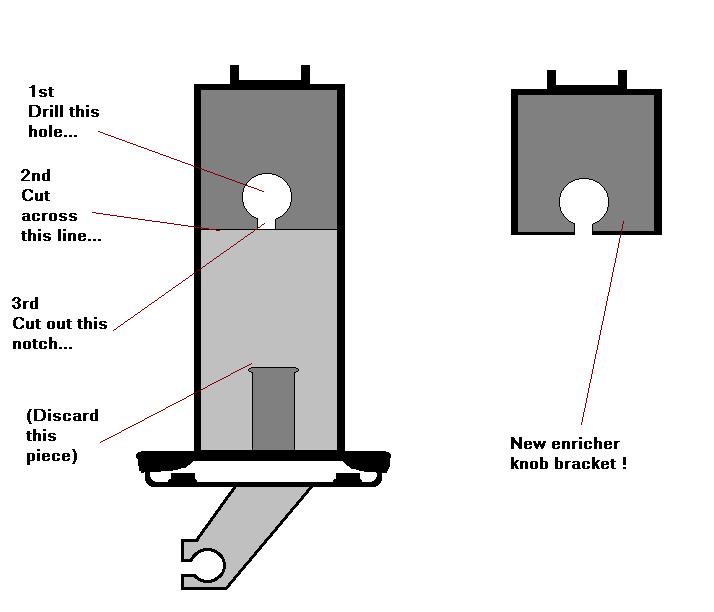
Modify the enricher bracket like this....
(Click image to enlarge)
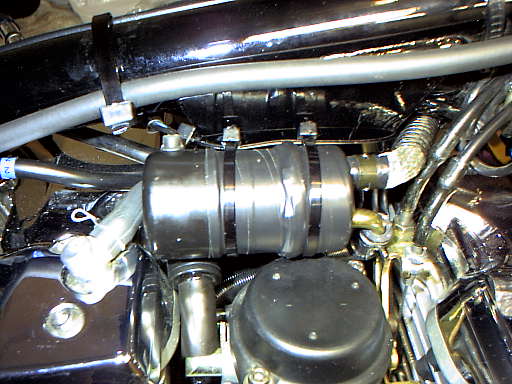
This is how you locate the components...
(Click image to enlarge)


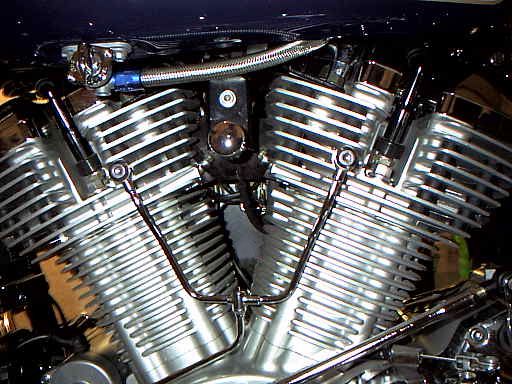
Locate the pump between the frame and the carburetor...
The filter goes on the opposite side...
The result is a clean appearance and a choke knob within easy reach!

Home