These are photos of a bike before it was lowered...

Click on a photo to enlarge. (Bike courtesy of Father
Dave.)
OK, so it's not really MY way, but it is definitely the way that I prefer. The method below is virtually free, requires nothing more than some time, tools and a bench grinder and drops the bike up to 3 inches lower in the rear. Removing, grinding and reinstalling the relay arm is all that it takes.
So here it is, complete with photo's;
1st you should remove the rear wheel. Some have removed the relay arm without doing this but you will probably want to remove the wheel for a couple of reasons. You will need to size up the relay arm in it's new position a couple of times while you are grinding the arm and this is much easier if you have easy access to the area. Also you will now know how to remove the wheel when it comes to other service that you may do (New tires, bearing lubrication, belt maintenance etc...).

 Click on a photo to enlarge.
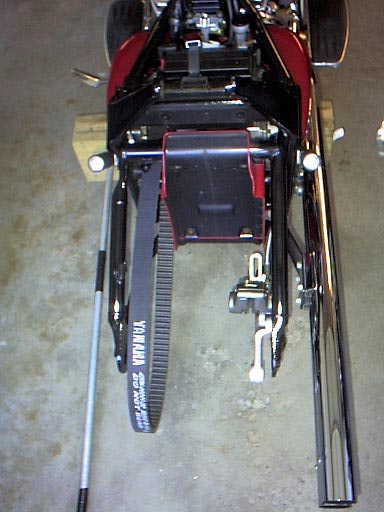
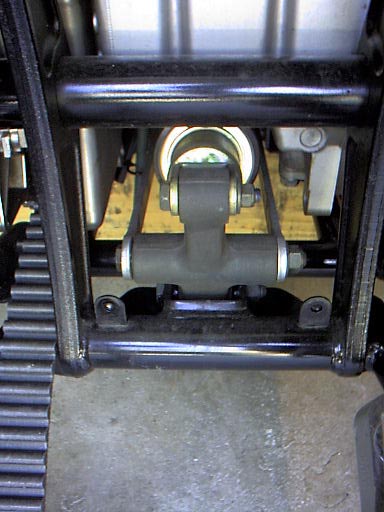
Once you have the ABS Plastic Suspension guard removed you will see the relay arm connected to the shock, stationary arms and swing-arm.
 Click on photo to enlarge.
Remove the top nut/bolt first, then the bottom, removing the middle nut/bolt last. The middle bolt is longer than the others and requires a little manipulation to get it out.
Once you have the relay arm out 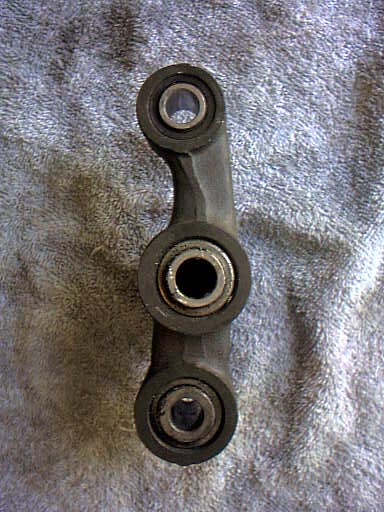
 Click on a photo to enlarge.
you will see that what is necessary is to turn the relay arm around so that the
rear of the relay arm is in the front, thereby making the offset negative,
rather than positive. The only problem is that the relay arm is designed
to clear the shock only when installed the way that it came out. This is
why grinding the arm is necessary. You will be grinding the area that was
once opposite the shock until, upon installing the relay arm in it's new
position, all of the bolt holes line up.
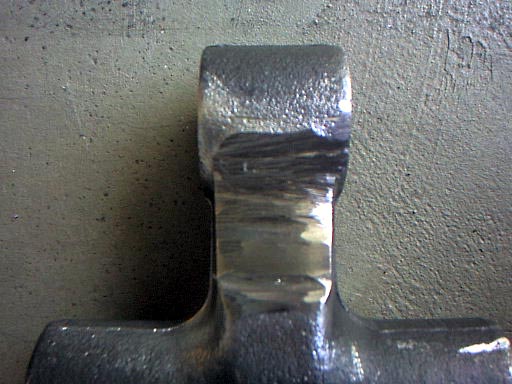
 The area that has been reshaped will look like this...
 Click on a photo to enlarge.
You will be checking the relay arm alignment from time-to-time to see how
the piece lines up. Once all of the bolts can be successfully reinstalled,
you can reassemble the components.
The end result is a lower bike that now looks much more proportioned as well as more aggressive, wider and with a rear fender that is stuffed full of tire!


 Home
Home