How to Make a Set of Firechains
See also:
Adam Rice's Info
|
Firechains are basically two chains, each chain with a fire-wick on one end, and some means of holding the chains on the other. With your arms at your sides, they should hang down to around your ankles. Bear in mind that shorter chains are less likely to become entangled than longer chains.
A set of firechains can be broken down into the following:

A photo of firechains, showing from top to bottom:
- fluorescent tails;
- the chains themselves;
- kevlar wicks;
- towel wicks;
- practice wicks.
|
The Chains
|
To make a set of chains which will hold both practice wicks and fire wicks, you need:
Lightweight metal chain, about 40-60cm long.
The length of chain is a personal choice - shorter chains can spin faster and not become entangled as easily whilst perfoming some of the more complicated moves. Conversely, longer chains can be harder to handle but give a slower, more mesmerizing set of patterns.
Four strips of leather, each about 1cm wide and 8-10cm long to make finger loops. Leather finger loops make it easy to move from two-handed moves into one-handed moves and help to avoid blisters on your fingers.
Folk also use cord, like a shoelace, which is looped over the first and second fingers, and then passed back between them to lock the cord in place.
Four keyrings for attaching the finger loops to the chains - make sure you get thick, heavy duty ones. Some folk also connect a fishing swivel between the keyring and the chain to help prevent tangling.
Two small climbing karabiners, to allow you to clip your wicks onto the end of your chains.
Other suggestions are screw-down links from hardware stores, or the clips on the end of dogleads. (My first chains were made from dog leads, with cut-up cat collars for finger loops).
Construction of a Chain (you'll need to make two of these):
Make a loop with one of the leather strips, so the ends are together.
Make a small hole through the ends, so you can thread the leather loop onto a keyring.
Repeat this with a second strip.
Using the keyrings, attach both loops to one end of a chain. This gives you two finger holds on the chain, one for the forefinger, and one for the middle finger. (You can use only one loop if you choose - two loops per chain is simply my personal choice for comfort and safety reasons).
Clip the karabiner (or screw-down link) onto the other end of the chain - this clip allows you to easily switch between your practice and fire wicks by simply unclipping the wicks.
N.B. The use of keyrings to attach clips to the ends of chains is a pretty common practice, but it should be noted that this can be a little unsafe. Although I've never had a problems with keyrings being pulled open, it has happened to other folk so try and avoid them on the business end of your chains.
UPDATE: I´ve heard about metal cable (like bike brake cable) being used instead of chains, which sounds like an interesting evolution. I haven´t tried it yet, but it sounds pretty handy. Check out the page by Adam Rice.
|
The Wicks
|
There are two basic types of wick that you will want to attach on the end of your chains:
- Practice Wicks
- Fire Wicks (made from either Kevlar or Towel)
|
| Practice Wicks
|
Practice wicks are simply two tennis balls, which each have a keyring attached to them by a short length of cord. You connect each tennis ball using the keyring to the end of each chain. They hurt so much less when practising than the real wicks you use, as the tennis balls bounce off and, unlike the fire wicks, don't have any hard metal parts on them.
Construction of a Practice Wick:
Punch a small hole in one side of a tennis ball, then cut the ball open part-way on the opposite side so you can thread about 10-15cm of cord through the small hole.
Tie the cord off with a big knot inside the ball. Tying a nut on the cord, inside the ball, also works well.
Using the cord that is hanging out of the hole in the ball, make a small slip knot and attach a keyring to this loop.
Voila - a practice wick.
|
| Fire Wicks
|
Fire wicks are made from some sort of fabric that is securely bound and then attached to the ends of your chains. I vary from time to time between two sets:
The first set are made from Kevlar strips (the type of material that you see on the end of juggler's fire batons - you can buy it from juggling and kite shops).
The second set are made from towel material which is bound by thin wire.
|
| Kevlar Wicks
|
Advantages - it doesn't burn up and is pretty tough.
Disadvantages - can be tricky to get hold off and often isn't cheap; some types of kevlar won't hold a good flame for much more than five minutes or so.
To make two fire wicks, you'll need:
Two strips of Kevlar, each about 6cm wide and at least 30cm long. In theory, you'll hold more fuel on your wicks with more Kevlar. I've heard of someone using four feet of rolled and bolted Kevlar on their wicks, which provided a big, long-lasting flame. I don't think the Kevlar was wrapped around a metal tube in this instance.
Two 10cm pieces of lightweight metal (e.g. aluminium) tubing, about 2cm in diameter.
4 sets of nuts and bolts (long enough to be screwed through two or three layers of Kevlar and through your tubing).
Construction of a Kevlar Wick.
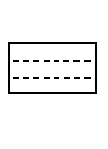
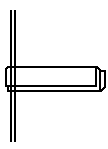
Drill or punch two holes through one of the pieces of tubing - make each hole wide enough in diameter so a bolt can be pushed through. Make sure that the holes are correctly spaced so that they will be covered by the Kevlar, and so that the bolts will hold the Kevlar securely.
Wrap the Kevlar around the tubing. It's a good idea to fold the loose end of the Kevlar back and under itself before screwing the bolts through, as this helps to stop the end fraying.
Screw the bolts through the Kevlar, through the tubing and out through the other side. Screw the nuts on tight, so they press into the material.
Cut any protruding bolt ends off, and file any sharp pieces smooth.
After using kevlar wicks, remember to resoak them in fuel and then spin off the excess fuel before packing them away. This helps to prevent the wicks smouldering away inside and so prolongs the life of the kevlar.
Alternative Method: Cubic Kevlar Wicks
See Adam Rice's notes on
cathedral wicks.
|
| Towel Wicks
|
My first set of wicks and one of my present sets were made with towels.
Advantages - it soaks up loads of your flammable liquid and so gives a big, strong flame which can last for around fifteen minutes or more.
Disadvantages - it eventually burns up as you use it (obviously!), though you should be able to use them at least two or three times.
To make towel wicks, you need:
A piece of a towel, about 50cm by 40cm. (This is about a quarter of an average sized bathroom towel).
Four strips of thin wire, each about 60cm long. The wire needs to be at least 1.3mm in diameter. (I've used coathangers for this purpose a couple of times).
- A set of pliers to work with the wire.
Construction of a Towel Wick
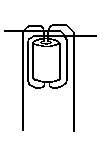
- Fold the piece of towel lengthways two or three times, so you end up with a long narrow rectangle.
- Place two 60cm lengths of wire at one end of the narrow strip of towel with equal lengths sticking out of the top and bottom.
- Roll the strip up tightly so that the wire is in the middle.
- Fold the bottom two ends up to the top.
- Fold the bottom two ends horizontal.
- Intertwine the top ends with the bottom ends, then fold the top two ends down.
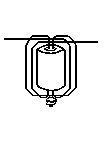
- Thread these folded-down ends through the wire at the bottom of the wick, then twist the wire off tightly at the bottom.
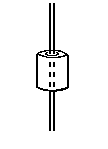
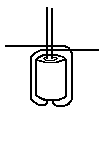
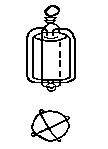
- Twist the wire off tightly at the top. The towel should now look as if it's in a four-barred cage. Curl some of the excess wire into a ring, so you can attach the wick to the end of a chain.
- Cut off any excess wire so you have a neat little wick, without too many bits sticking out.
That's it - too easy!
Diagram 8 (below) shows the finished product in a slightly exaggerated form. Note that you must make the wire 'cage' very tight around the the towel - the wire in the diagrams is not shown as tightly as it needs to be for ease of understanding.
[ Back
Home ]
|

