Installing the RPTtoHTML program.
Create an appropriate directory structure for managing the conversion
of winspeed reports and html documents.
I created a folder on my C drive named RPTtoHTML.
Inside of that directory I created 2 more folders (Winspeed_reports)
and (save_reports).
Download the RPTtoHTML.zip file from
this site.
Unzip the data into the lowest directory. Mine is PRTtoHTML
It looks like this on my computer.

The purpose of the 2 sub directories.
* Folder - Winspeed_reports - move provided winspeed
reports or save you winspeed reports with a suffix of rpt into this
folder. Convert the files and save their html into this
directory. After the *.html files have been created, reviewed,
and moved onto my web pages I delete the *.html from this
directory. I then move the *.rpt files into the save_reports
folder. The folder Winspeed_reports folder should now be
empty. This will follow that next time a am converting all of the
files in the Winspeed_reports folder should be converted, reviewed, and
then moved to my web pages.
* Folder - save_reports - The Winspeed report files
is provided to me by the race secretary. If problems occur with
the web pages I can go back to the original contained here to recreate
new html files.
Install crystal fonts.
Install crystal fonts on your computer if they are not present.
The fonts will already be there if you downloaded and installed the COI
program from this website. If not use windows help to install the
fonts and reply with crysrg__.ttf when the font file is requested.
Create a desktop shortcut pointing to
RPTtoHTML.exe
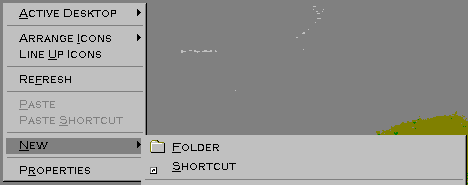
Right mouse click on your desktop.
Select new and then select shortcut.
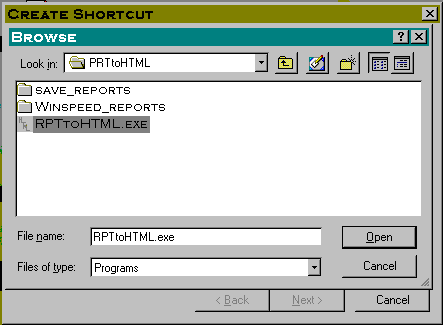
Browse to the downloaded program, highlight it, and press open.
Click next and enter your shortcut name.
Then click finish.
Now click on the shortcut with the right mouse button.
Change the Start in folder to the folder where you will position the
winspeed *.rpt files. In my case it was
C:\PRTtoHTML\winspeed_reports. (The program will now look inside
of this directory when it starts for *.prt files to open).

The program is now ready to run by clicking on the desktop shortcut.
NOTE:
When processing
multiple reports in one session the message may appear when attempting
to save the file. The only known work around is to close the
application and restart it.

If you are not removing any header lines just open the file then
[Save As] will add HTML code and change the file's extension to .html.
Example
Session:
Sample session with removing headers.
To follow this session copy the file sample.rpt from your lowest level
folder (where the unzipped files were placed ) into the folder you identified as the
startup folder in the step above.
Now click the desktop shortcut to start the program.

The startup screen will a have quick program explanation on the startup.
For the demo I am pointing out the different screen components.
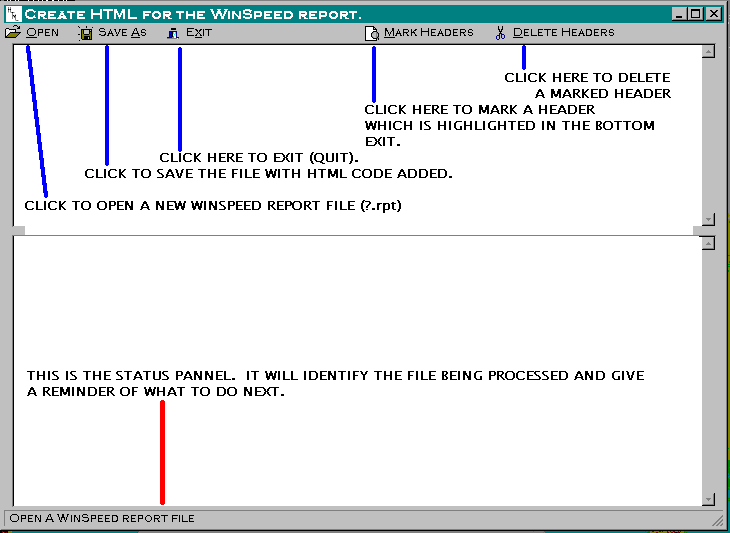
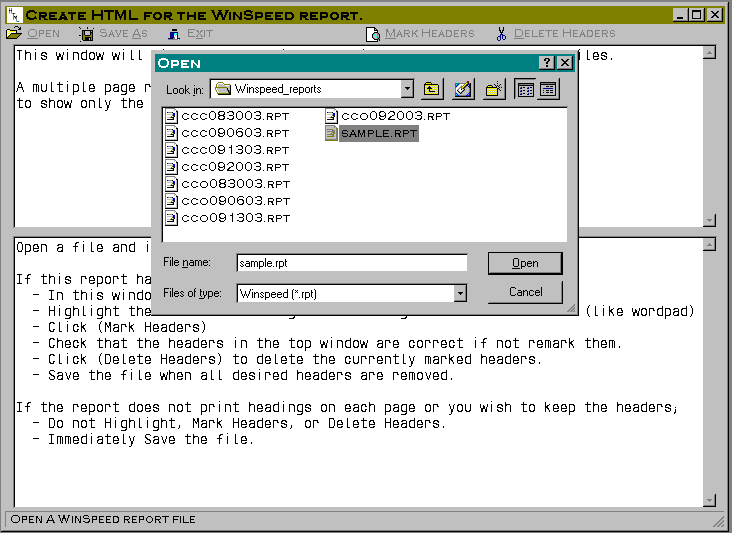
Click Open on the menu. A file selection dialog appears where you
choose the file to be converted. The folder identified is the one
you named in the shortcut properties [Start in;] above. Highlight
sample.rpt like below and then click the Open button is this dialog.
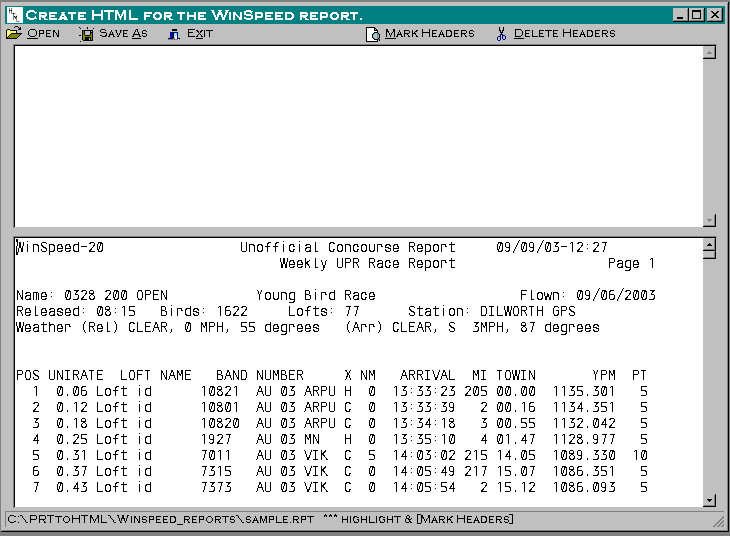
When the file is opened you will see its contents in the bottom
panel. It is positioned at the top of the file. You cannot
delete the top set of headings. In fact the program will not
alter the first fifteen lines of the file to ensure to do not
effect the 1st set of headings.
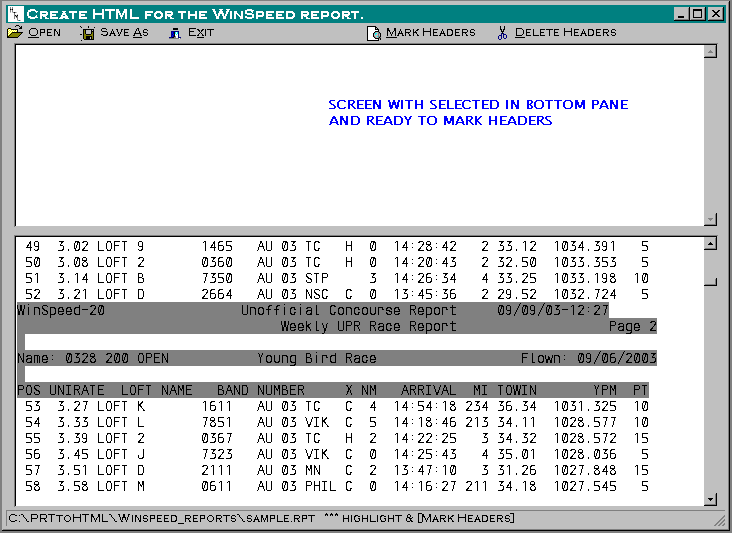
Here I scrolled down to see the page 2 headers. I marked them
with the mouse. I find the easiest method to mark data is to
start at the bottom right corner and moving up and to the left with the
mouse.
Just after clicking on [Mark Headers] you will see the marked headers
appear in the top panel. This gives you an opportunity to verify
the headers before attempting to delete them. If the are not
marked correctly change the selection in the bottom panel and click
[Mark Headers] again.

Click [Delete Headers] and the second panel advances to the point where
the last set of headers was deleted. Now scroll down line by line
looking for additional headers to be deleted.

This reflects the selected second set of headers in the bottom panel
highlighted and I have clicked on [Mark Headers].
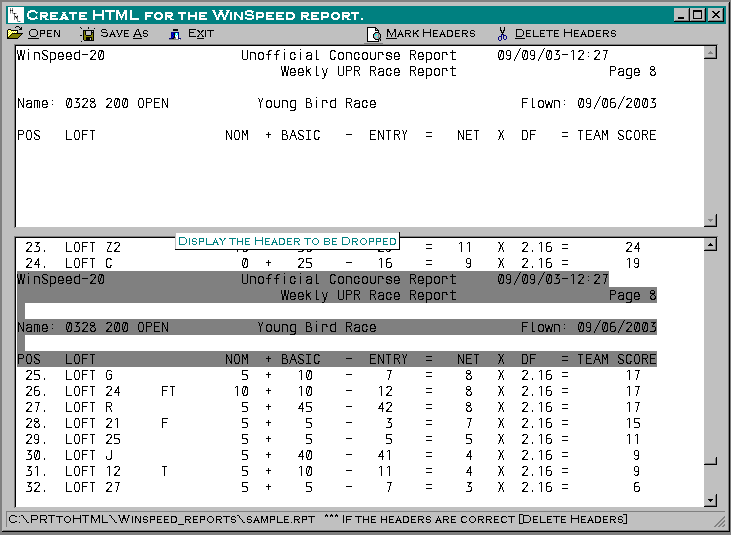
I deleted the headers and scrolled down and found another set of
headers to delete. Here they are highlighted and I clicked [Mark
Headers] to verify this last set..
Note. This set of headers
included a selected blank line. I took care to mark it
with as part of the header to delete with the entire set. If I
had not done this and selected just a blank line; all of the blank
lines after line 15 would be removed.

Now we see ourselves at the bottom of the file. You could choose
to scroll upward to review the entire file.

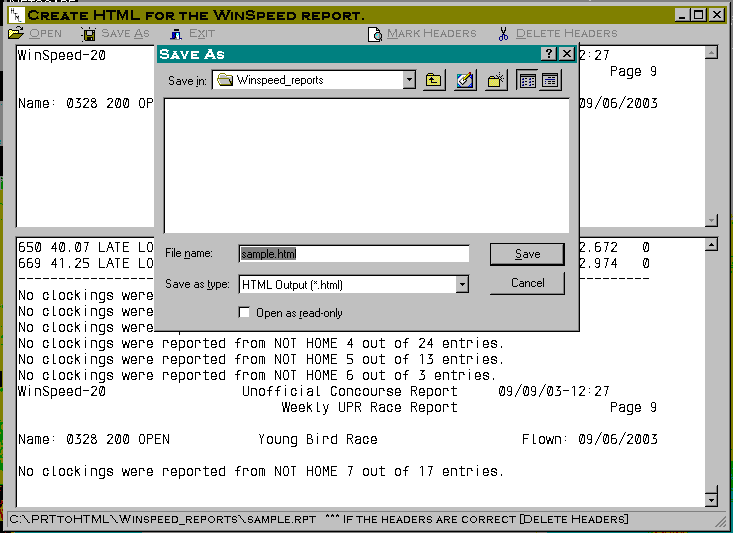
Last remember to save the file. Click [Save As]. When the file is
saved the HTML code
to create a web page is inserted with the text. The file can be
opened
in word pad if you wish to review the added codel. Confirm or
deby the save if the file already exists. The directory approach
I used
keeps both the .rpt files and the. html files in the same folder and
makes this process easier
.
Click [Exit] to leave the application.


