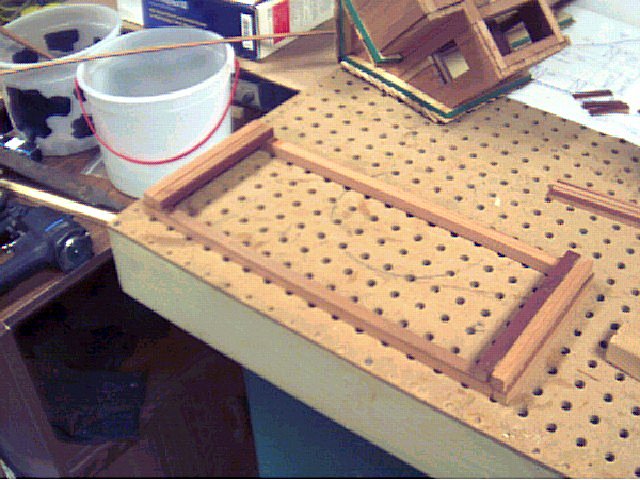
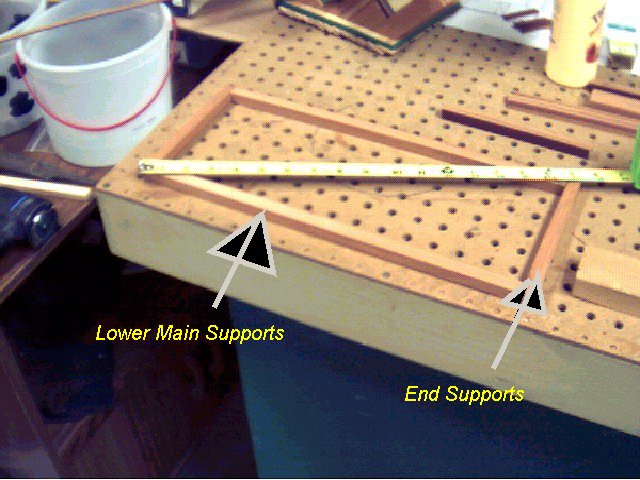
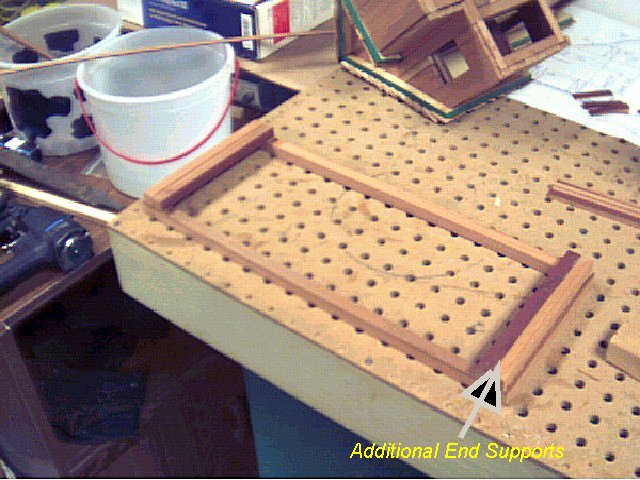
The main part of the frame is built from the two Lower Main Supports and 2
of the End Supports. I glued the frame together and then used brads to
nail the End Supports onto the ends of the Lower Main Supports. To make
sure the frame was square I used a tape measure, to measure the distance from
the outside of one corner to the outside of the other. Then compare that
measurement to the measurement from the opposite corners. These
measurements should be equal. If one is longer than the other, lightly
push in on the corners that gave the longest measurement, then re-check the
measurement. I then glued and nailed two additional End Supports to the
bottom of each end of the frame. The first one is set back 1/8"
from the end and then another one was added right behind it. Once this
was done I let the whole
thing dry for 30 minutes to make sure it stayed square.

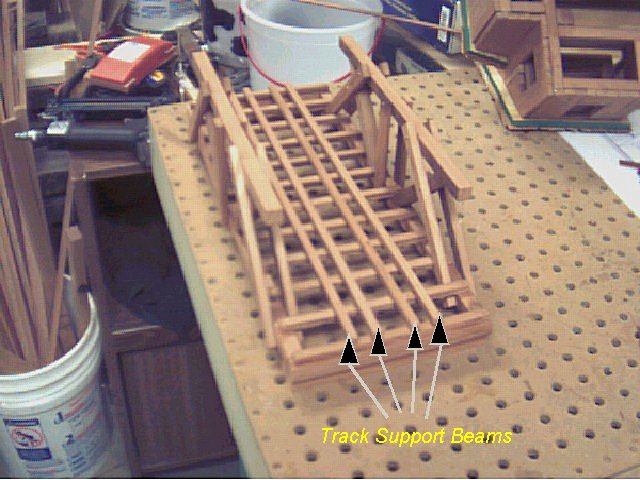
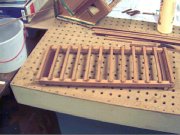 The
next step was to attach the Lower Track
Supports. I started from the
outsides and worked in towards the center. The first support was laid in
alignment with the end of the Lower Main
Support. This sets it back
about 3/16" from the end of the main frame. Each support is glued
and nailed into place with the 3/8" side of the support facing up. To find the
location for the next support I placed 4 supports next to the one I just
attached and then glued and nailed the last one into place. You then
remove the 3 supports in the middle and repeat the process. This makes a
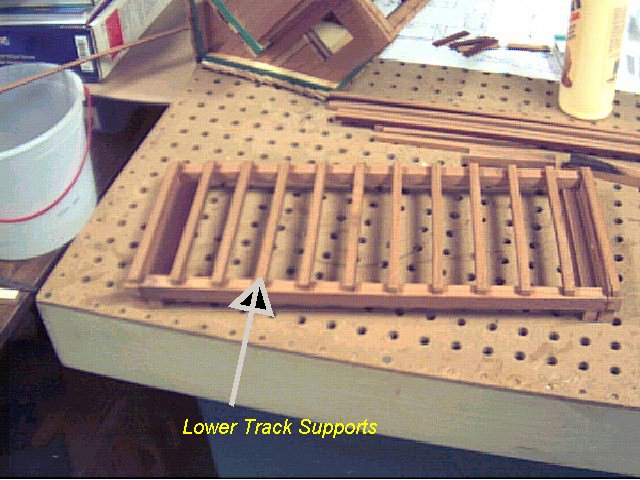
spacing of a little more than 1" between each Track Support. I
continued the process adding one support to each end until I had finished in
the middle. The supports are held in place with glue and one brad in
each end. Be sure to pre-drill all nail holes first to keep from splitting
the wood. I used a brad, chucked in my drill, to pre-drill all
holes. This works better than a drill bit because it does not actually
remove any wood. It just kind of presses a hole into the wood and makes
the brads hold better.
The
next step was to attach the Lower Track
Supports. I started from the
outsides and worked in towards the center. The first support was laid in
alignment with the end of the Lower Main
Support. This sets it back
about 3/16" from the end of the main frame. Each support is glued
and nailed into place with the 3/8" side of the support facing up. To find the
location for the next support I placed 4 supports next to the one I just
attached and then glued and nailed the last one into place. You then
remove the 3 supports in the middle and repeat the process. This makes a
spacing of a little more than 1" between each Track Support. I
continued the process adding one support to each end until I had finished in
the middle. The supports are held in place with glue and one brad in
each end. Be sure to pre-drill all nail holes first to keep from splitting
the wood. I used a brad, chucked in my drill, to pre-drill all
holes. This works better than a drill bit because it does not actually
remove any wood. It just kind of presses a hole into the wood and makes
the brads hold better.
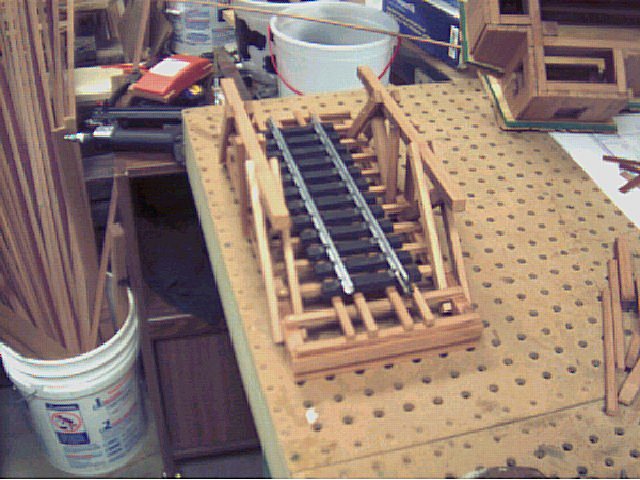
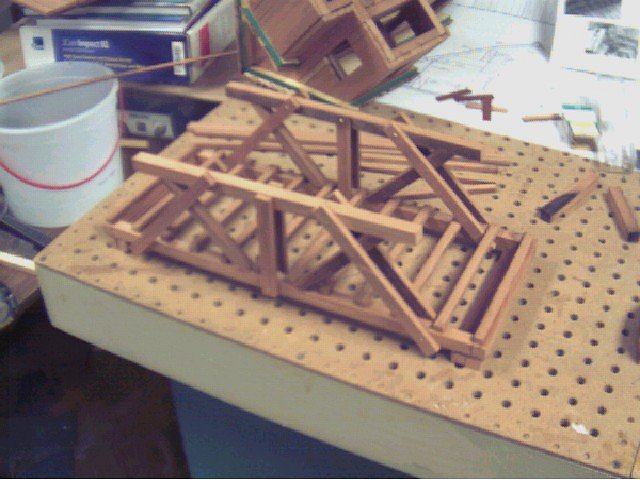
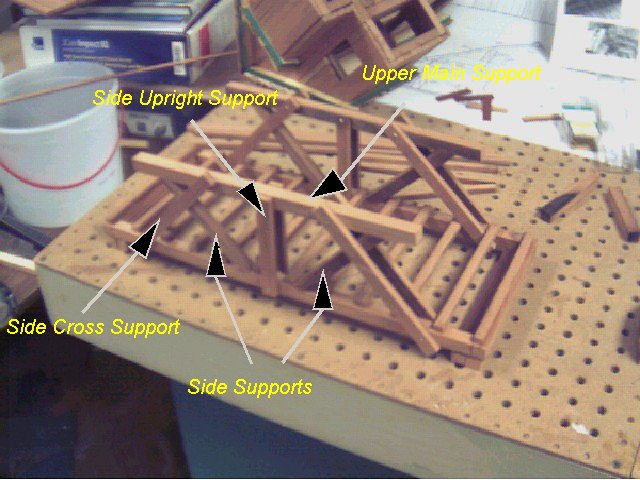
 Next
I started on the sides. Working on one side at a time, take two Side
Supports and glue and nail them into place with brads. These
supports are butted up against the two center Lower Track Supports and angle
towards the ends of the bridge. Make sure these Side Supports are cut as
close to 45 degrees as possible, otherwise the 2 Upper
Main Supports will not be parallel to the Lower Main Supports. (mine
weren't) Now glue the upper main support into place and repeat
the process for the other side. The Upper Main Supports are not nailed
because there is no good way to nail it to the Side Supports without breaking
the Side Supports loose. When both sides are completed to this point let
the sides dry for about an hour before continuing.
Next
I started on the sides. Working on one side at a time, take two Side
Supports and glue and nail them into place with brads. These
supports are butted up against the two center Lower Track Supports and angle
towards the ends of the bridge. Make sure these Side Supports are cut as
close to 45 degrees as possible, otherwise the 2 Upper
Main Supports will not be parallel to the Lower Main Supports. (mine
weren't) Now glue the upper main support into place and repeat
the process for the other side. The Upper Main Supports are not nailed
because there is no good way to nail it to the Side Supports without breaking
the Side Supports loose. When both sides are completed to this point let
the sides dry for about an hour before continuing.
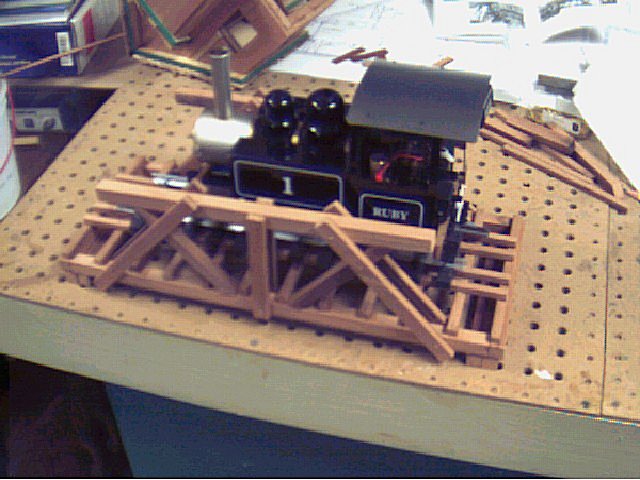
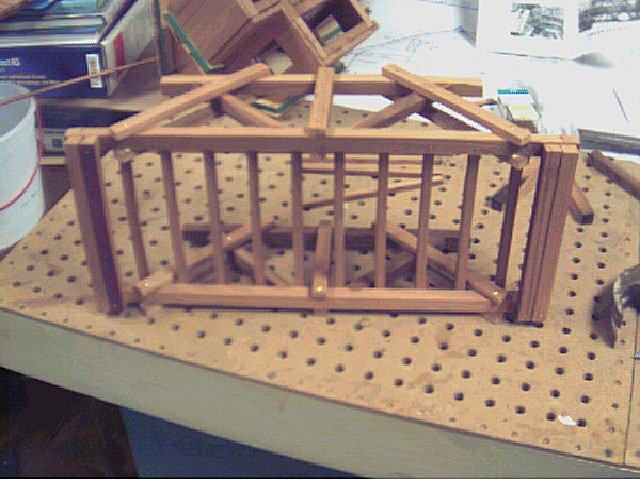
Now that everything is dried we can finish the bridge. There are 6
more pieces to the assemble of each side and glue and Escutcheon Pins will be
used. The Escutcheon Pins just add an additional point of detail.
If you don't have any than brads will work fine. The Side
Cross Supports are added next. These supports are located so that
the bottom of the support starts 1 1/2" in from the end of the bridge
frame and the top of the support ends 3 3/4" in from the end of the Upper
Main Support. Glue and nail this support into place with an Escutcheon
Pin in the lower support, the side support and the upper support. Now
place another Side Cross Support just opposite of the last one but on the
inside of the bridge rail. Then repeat the process at the other end of this
side. The last two pieces are the Side
Upright Supports which are located in the middle of the structure.
Now it's time to repeat the process for the other side.
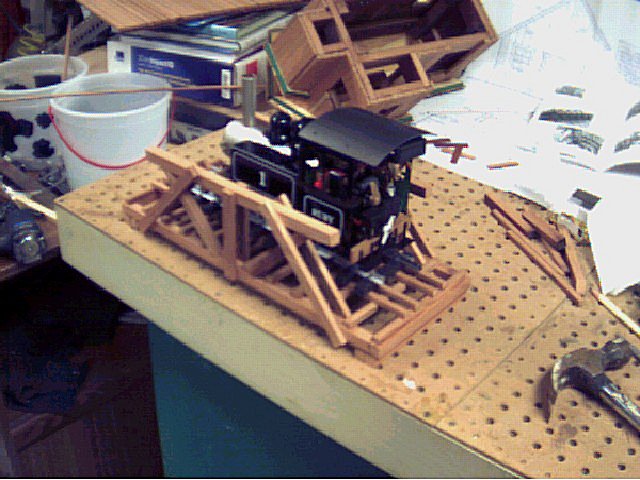
Once all 4 beams are in place, stand back and admire your work.
Whether it's perfect or has a slight lean because you cut 42 degree angles
instead of 45 (like mine), it's hand made, not from a box and something to
show off!
Although my directions seem clear to me I'm sure you have a bewildered look
on your face by now. If you decide to build one and have any questions,
please drop me an e-mail.
Take care,
Johnny F


